DIY Christmas Tree Ornament Is A Hit For An Ornament Exchange
Posted December 5, 2017 in DIY (Crafts) by Dianne Weller
Sometimes it’s difficult to come up with your gift for an Ornament Exchange, so we designed a Christmas Tree Ornament that is the perfect symbol of the holiday season in a diorama. An ornament exchange is just like a “White Elephant” party, except you swap ornaments as the presents! This DIY ornament captures everyone’s love for their Christmas Tree, and will be adored at your party.
Each ornament hanging on the tree holds a memory or a story, so if you are attending an ornament exchange, it is important to keep the nostalgic feelings of the season alive. This Christmas Tree Ornament is an expression of the joy of Christmas morning, the anticipation of the pretty wrapped presents under the tree and the warm feeling you get decorating your tree, reliving memory after memory as you hang the ornaments upon the branches.
How To Make A Christmas Tree Themed Ornament
The beauty of making this Christmas Tree Ornament for an ornament exchange is that even if you gave the same instructions to every participant to make the same thing, everyone will have their own artistic interpretation of a tree, making each unique and individual.
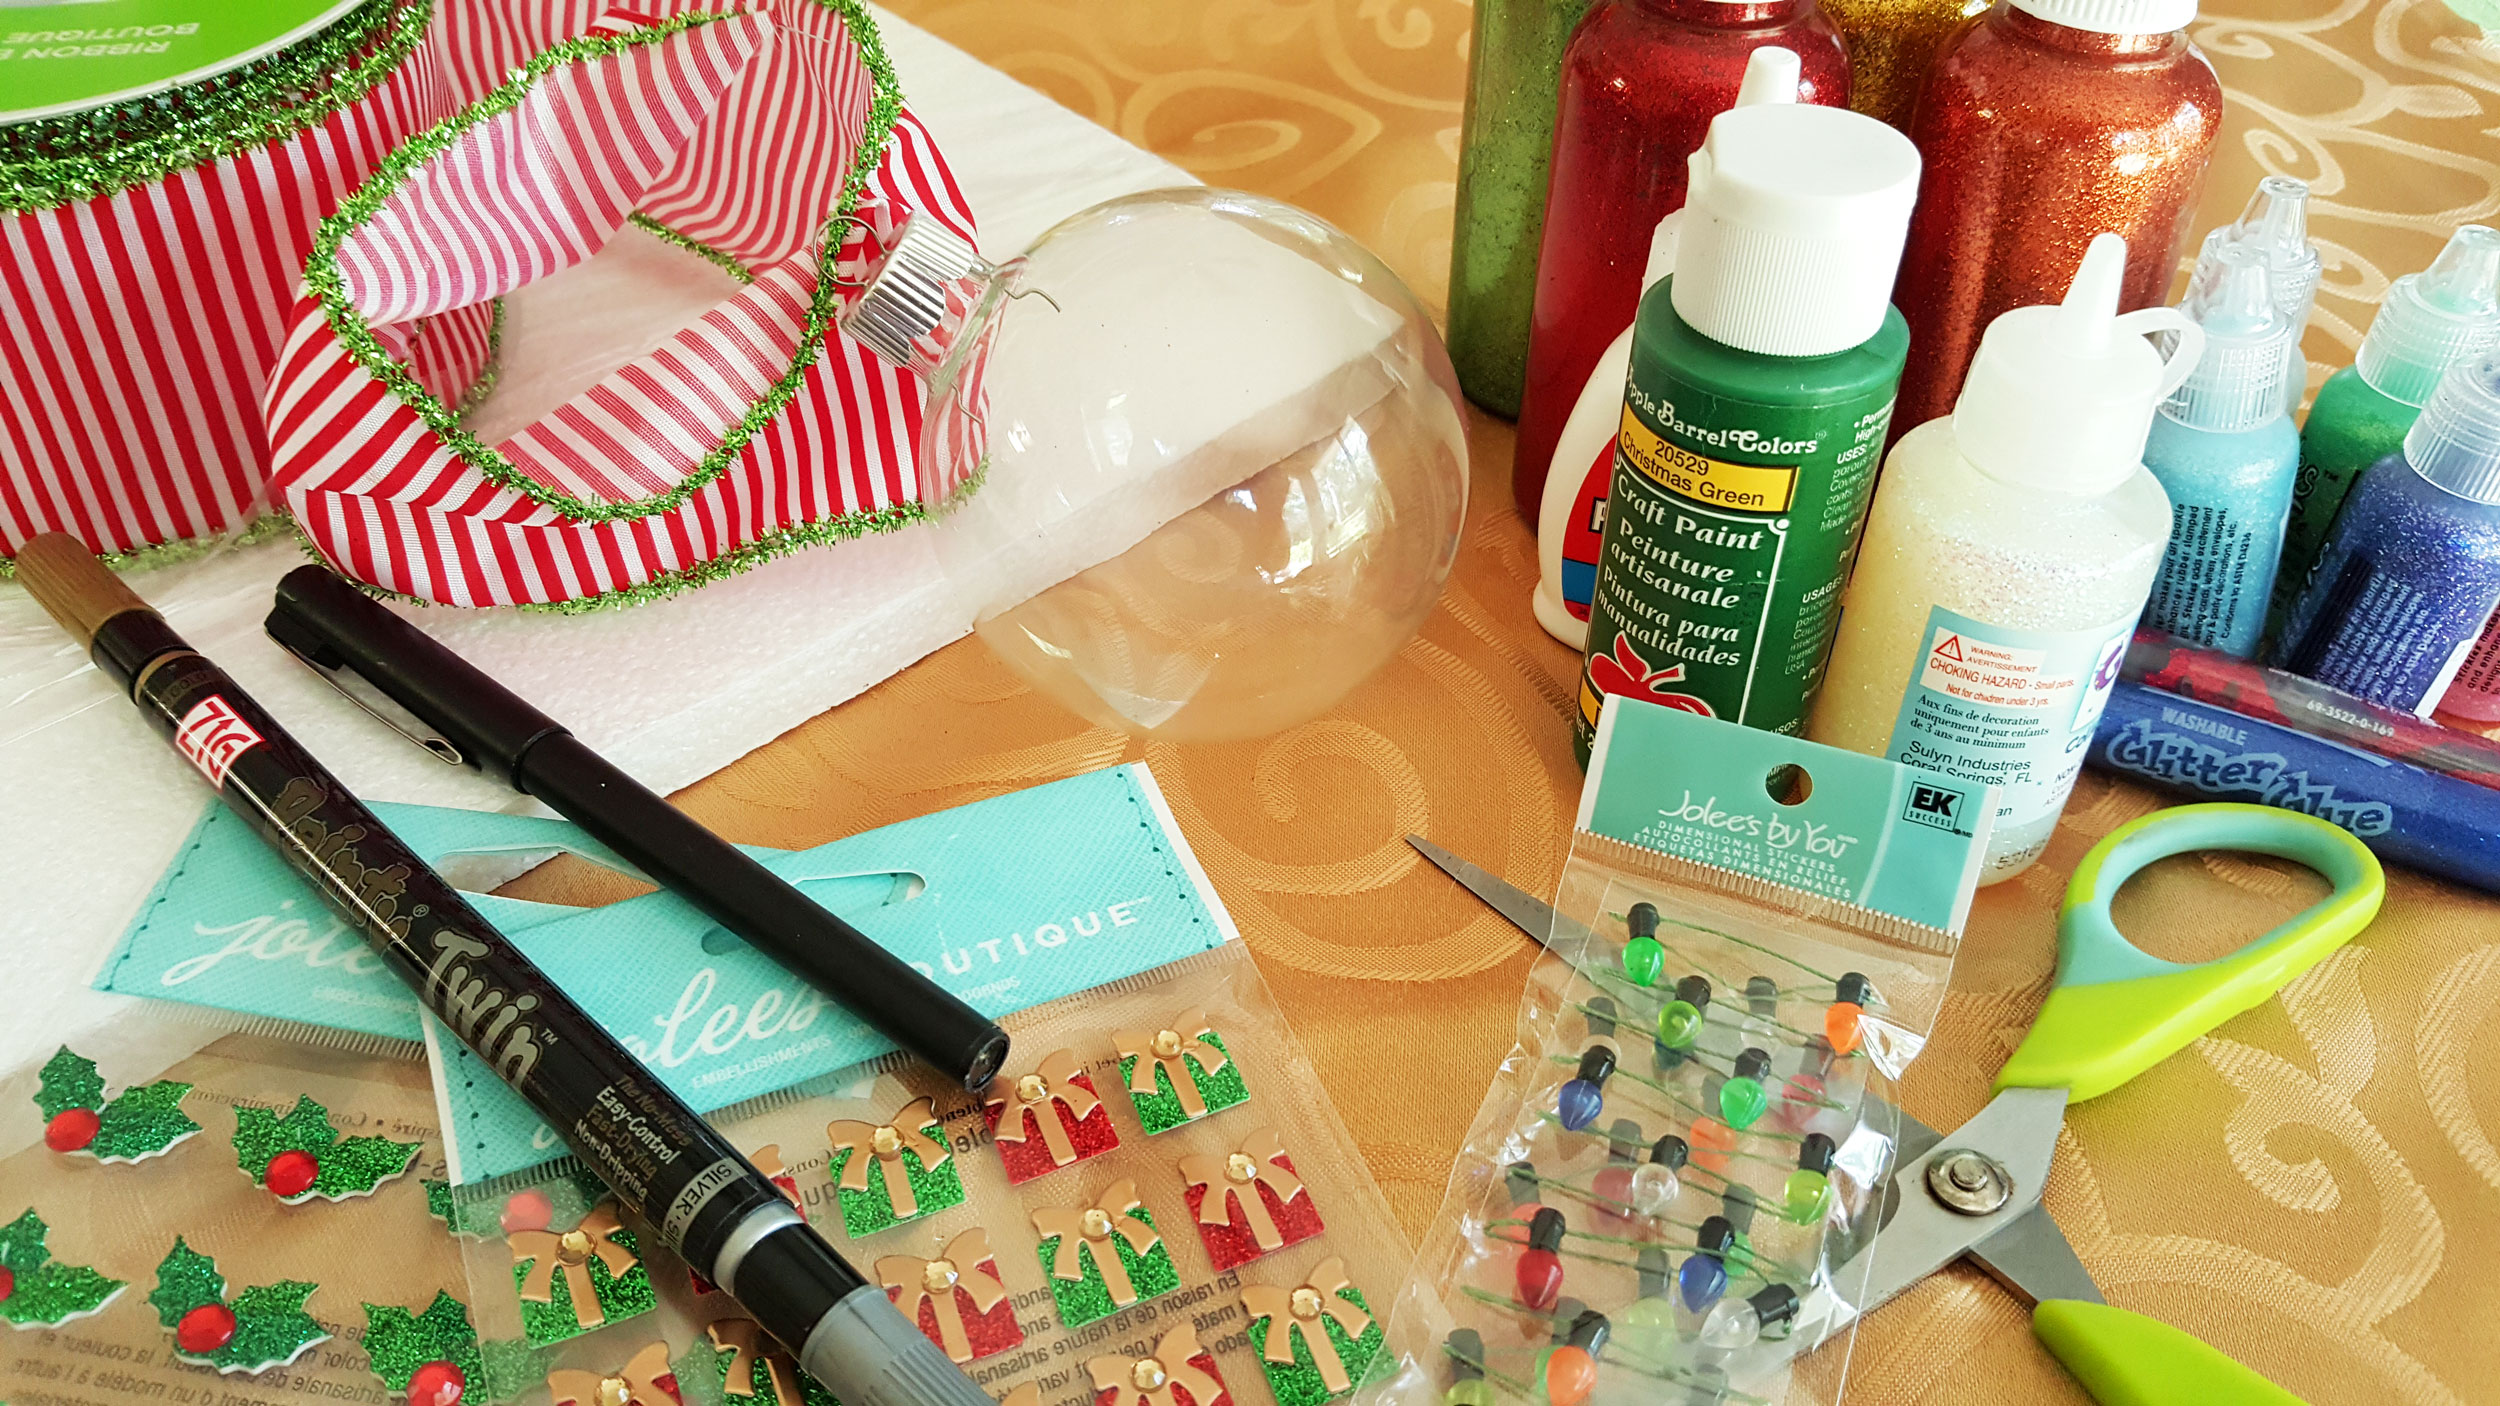
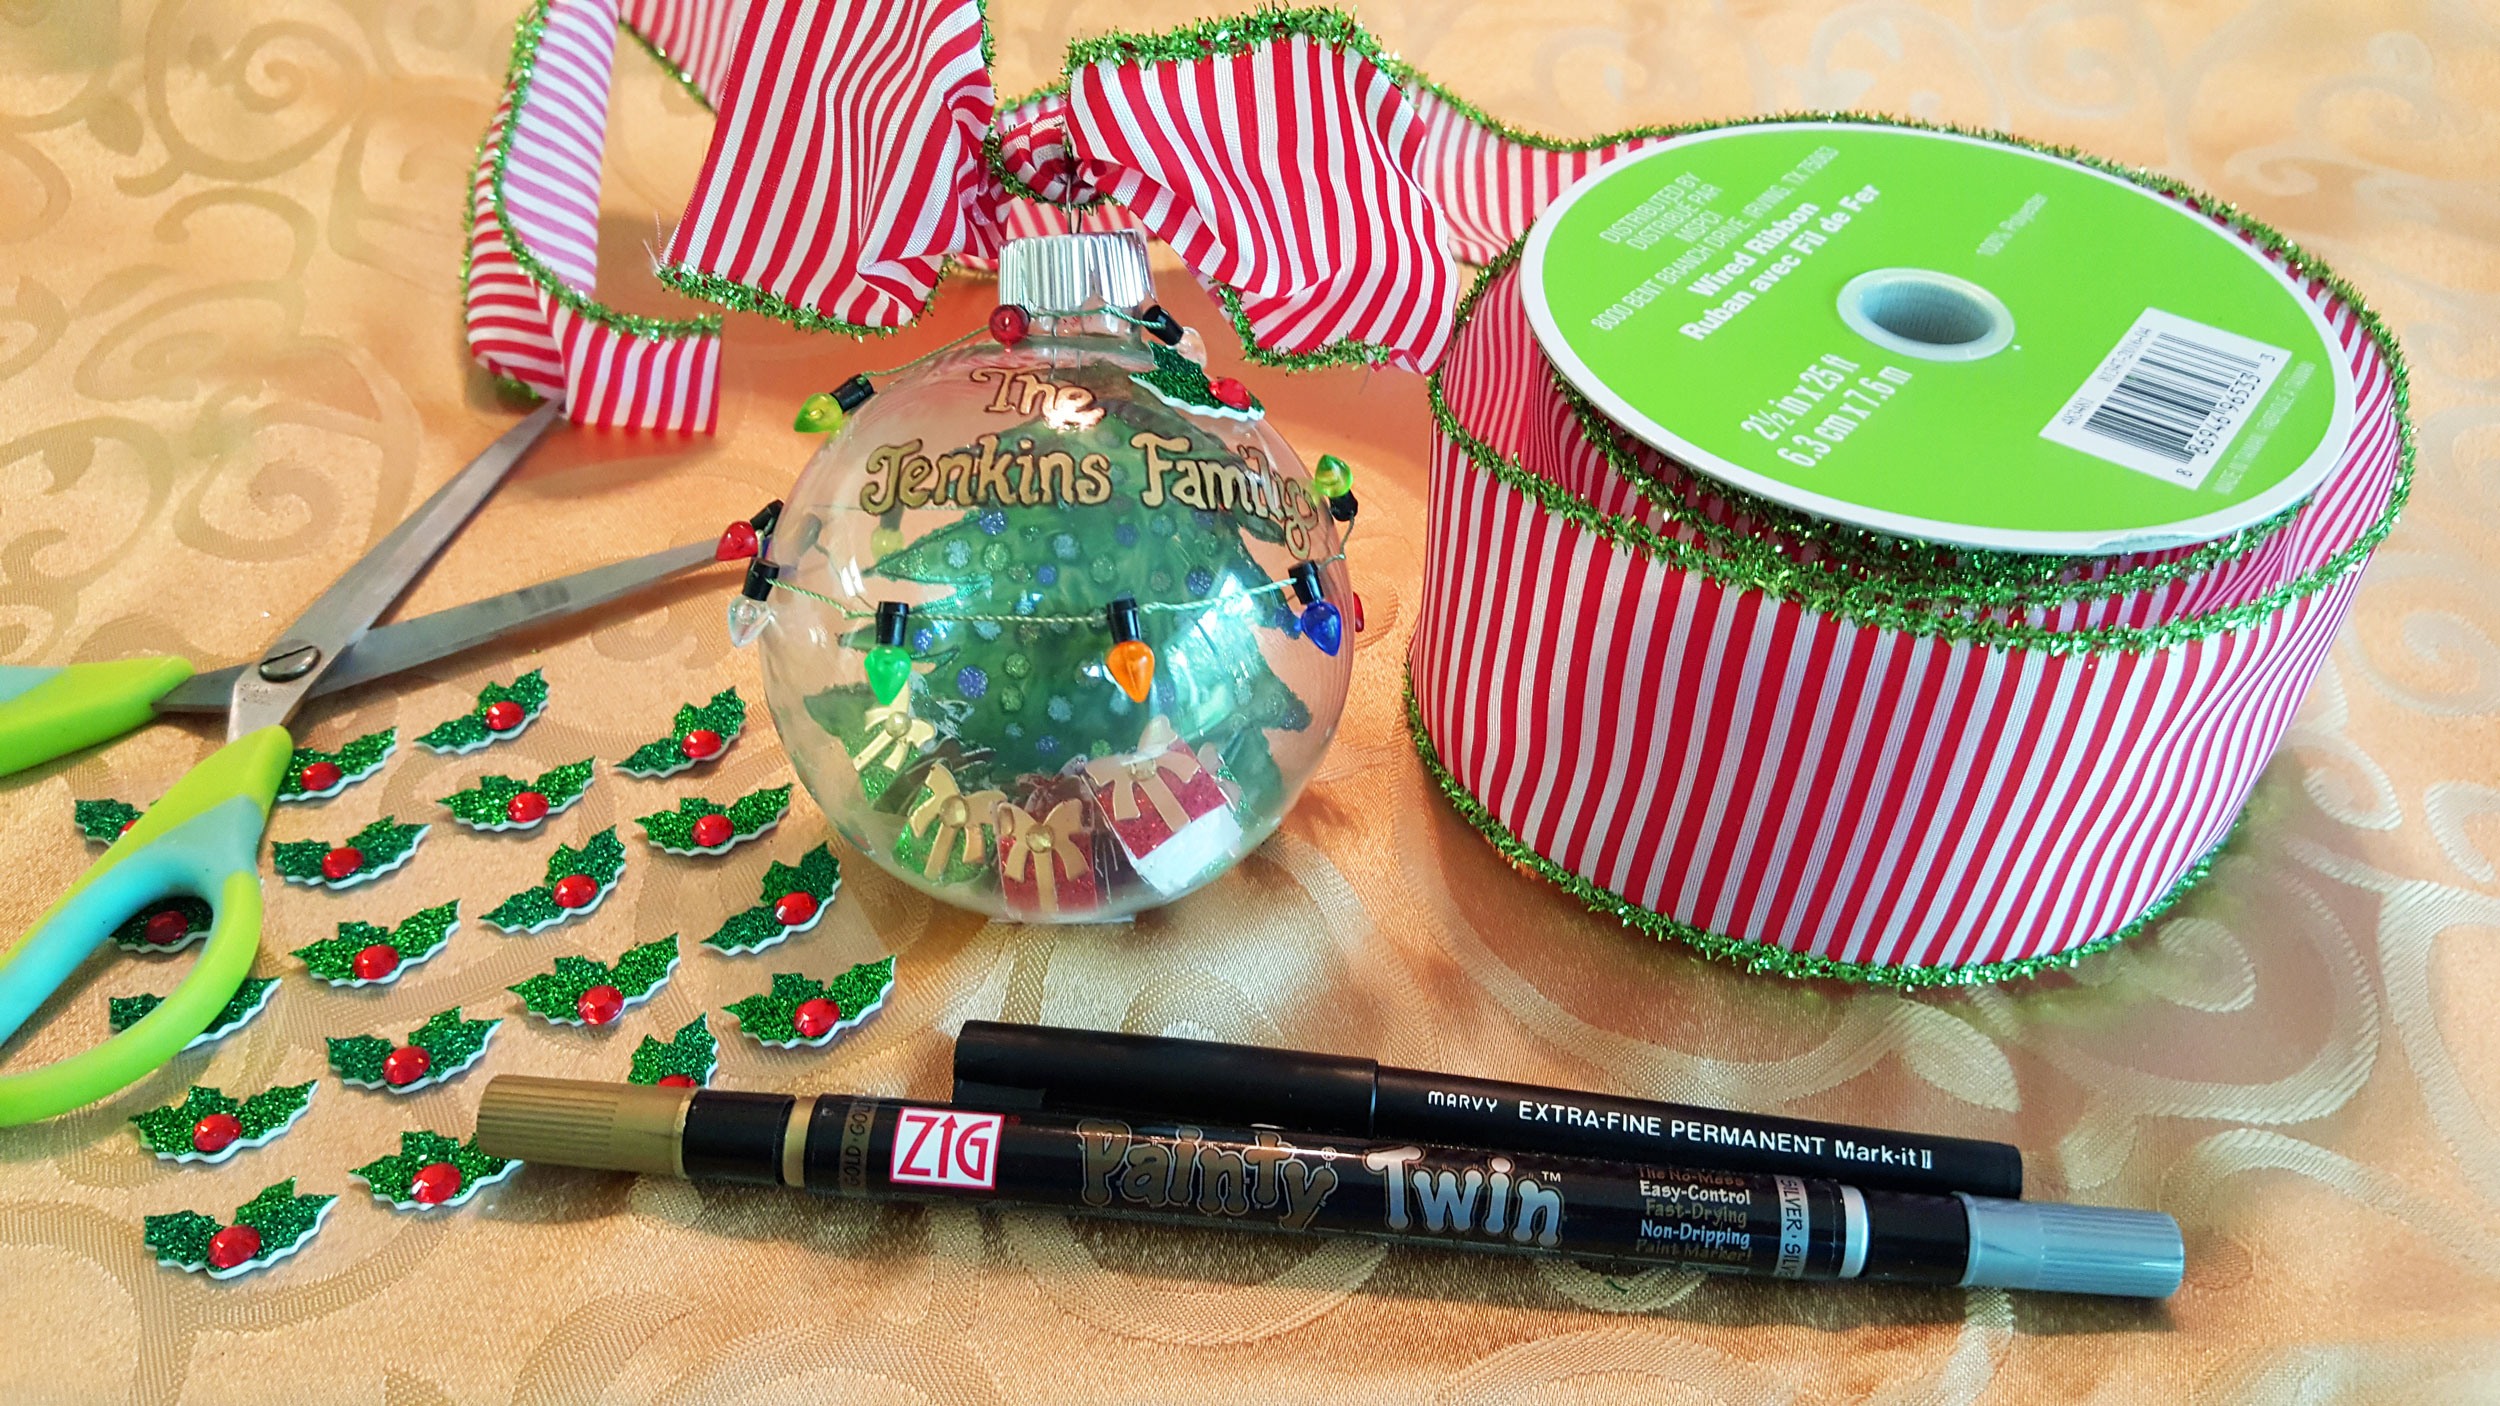
Supplies:
- Clear glass ball ornament
- Glitter glue
- Green and brown paint
- Styrofoam
- Paint marker
- Permanent marker
- Scissors
- Colored paints
- Miniature decorative Christmas lights
- Glue
- Present embellishment stickers
- Other embellishment stickers (optional)
- Ribbon
Christmas Tree Ornament Steps 1-4
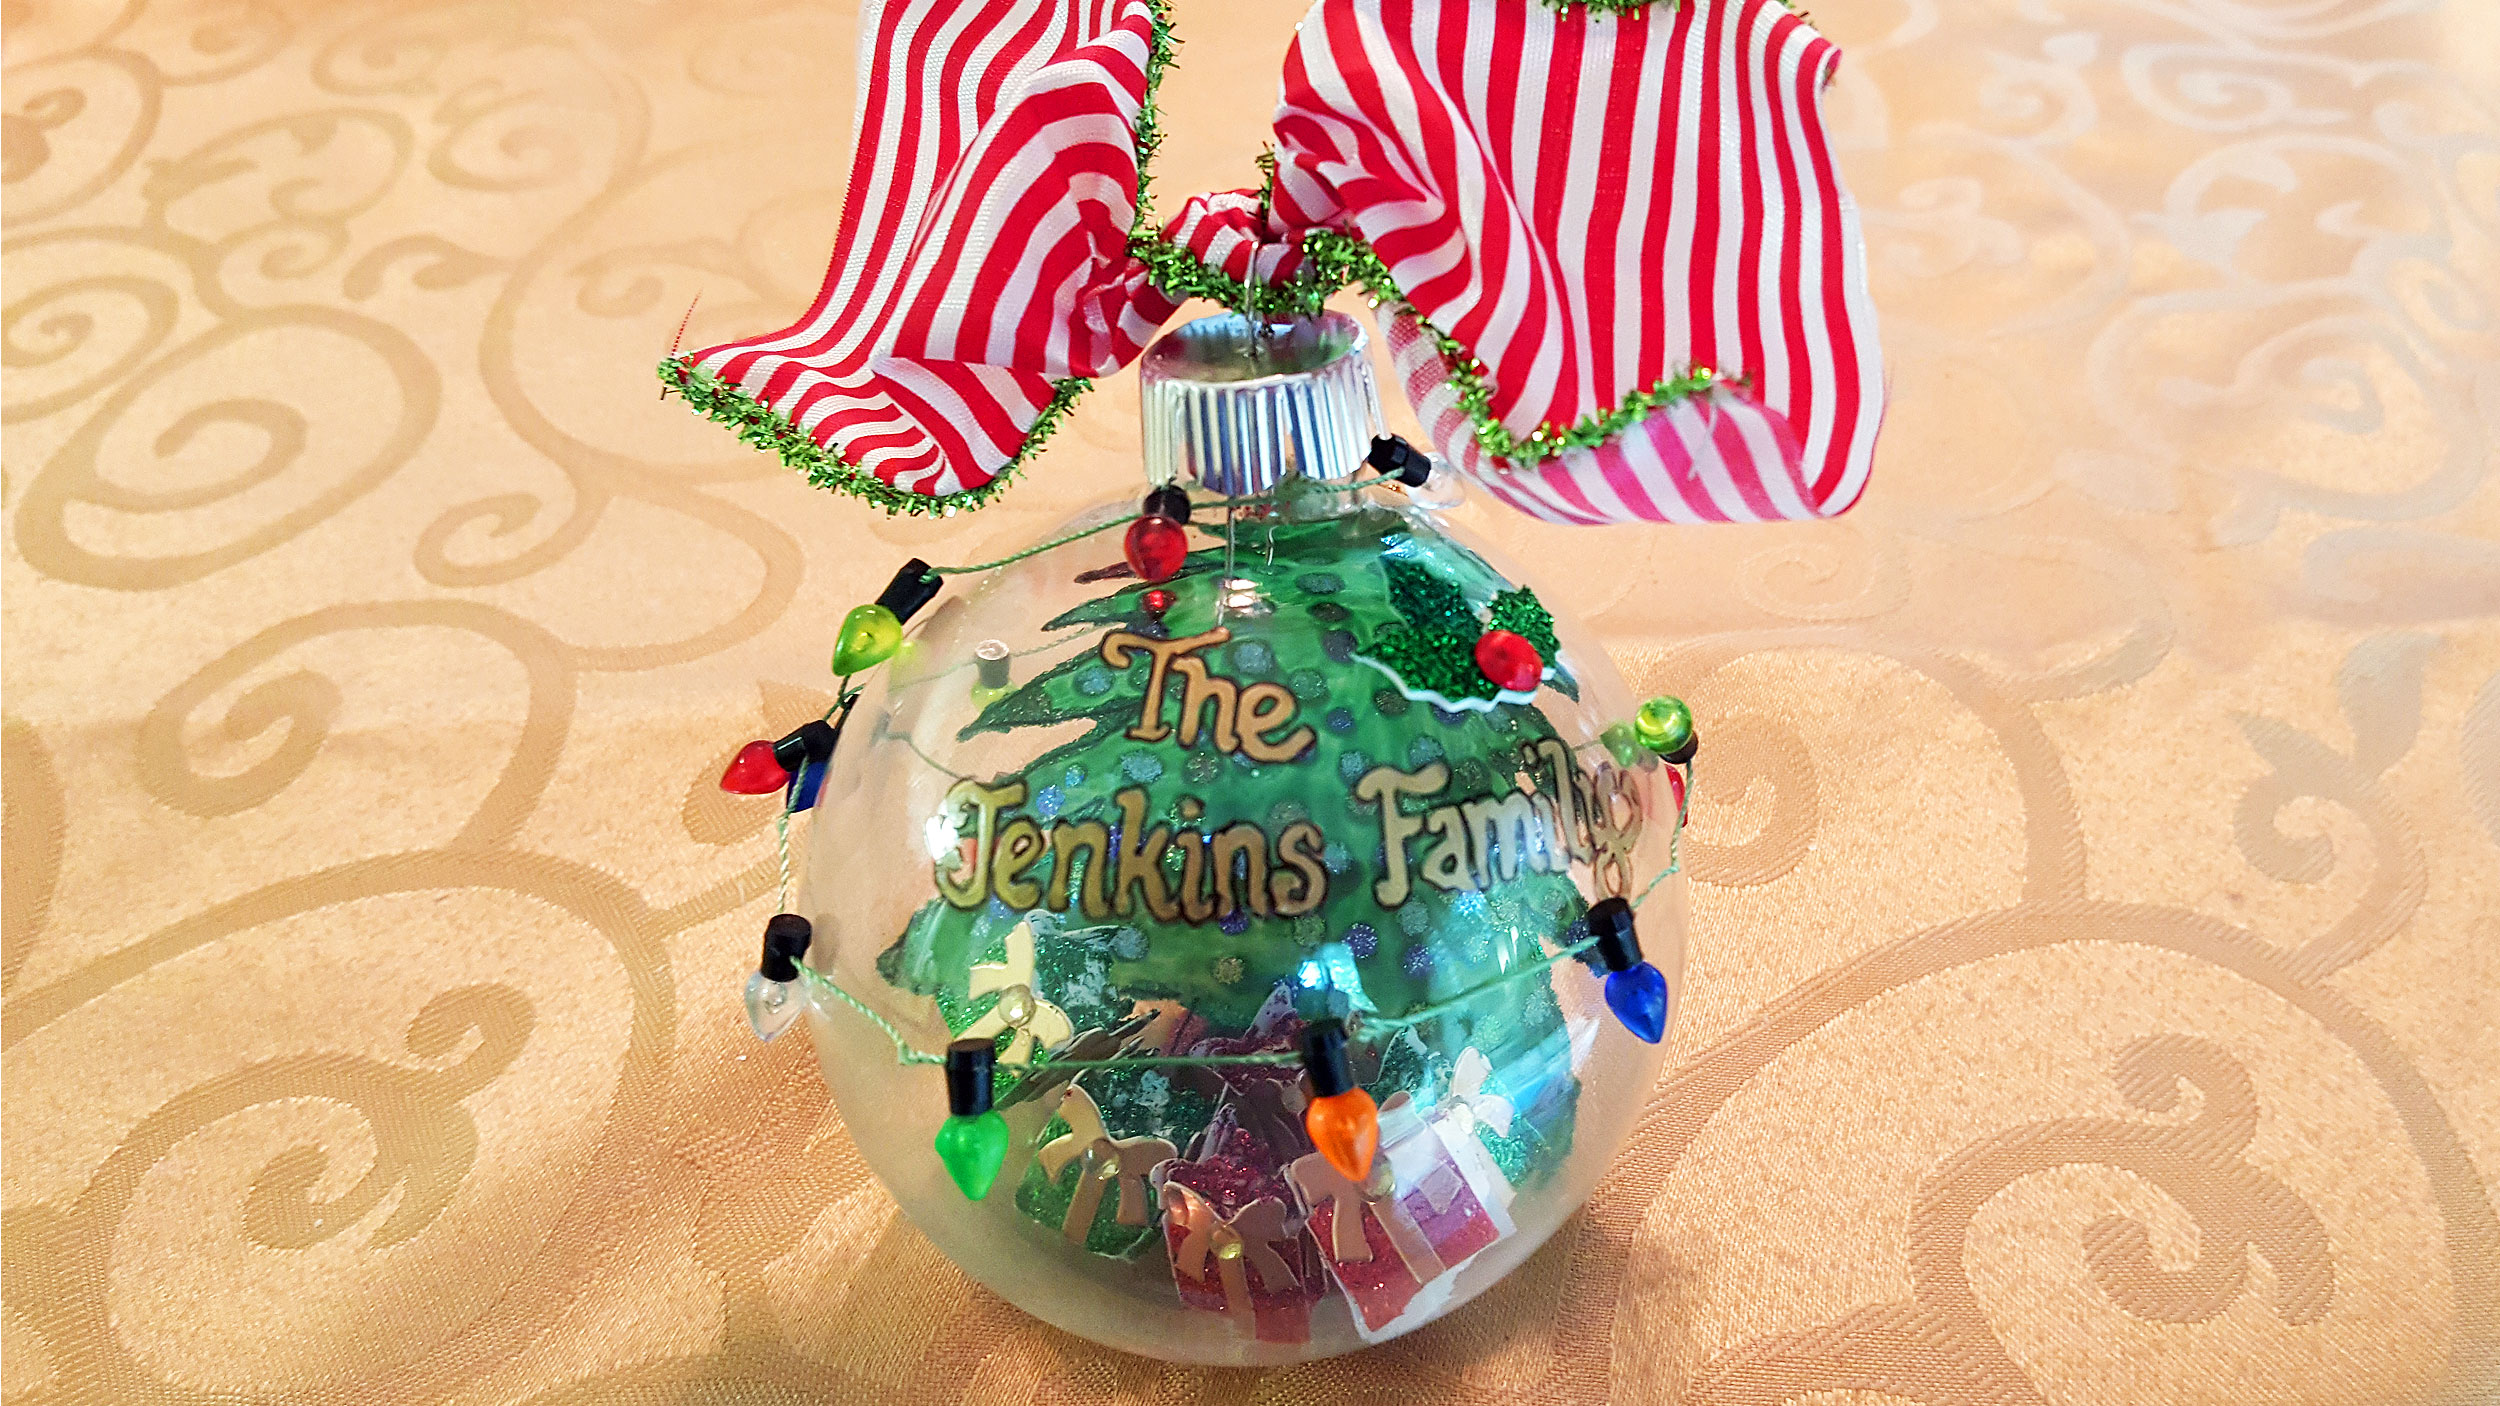
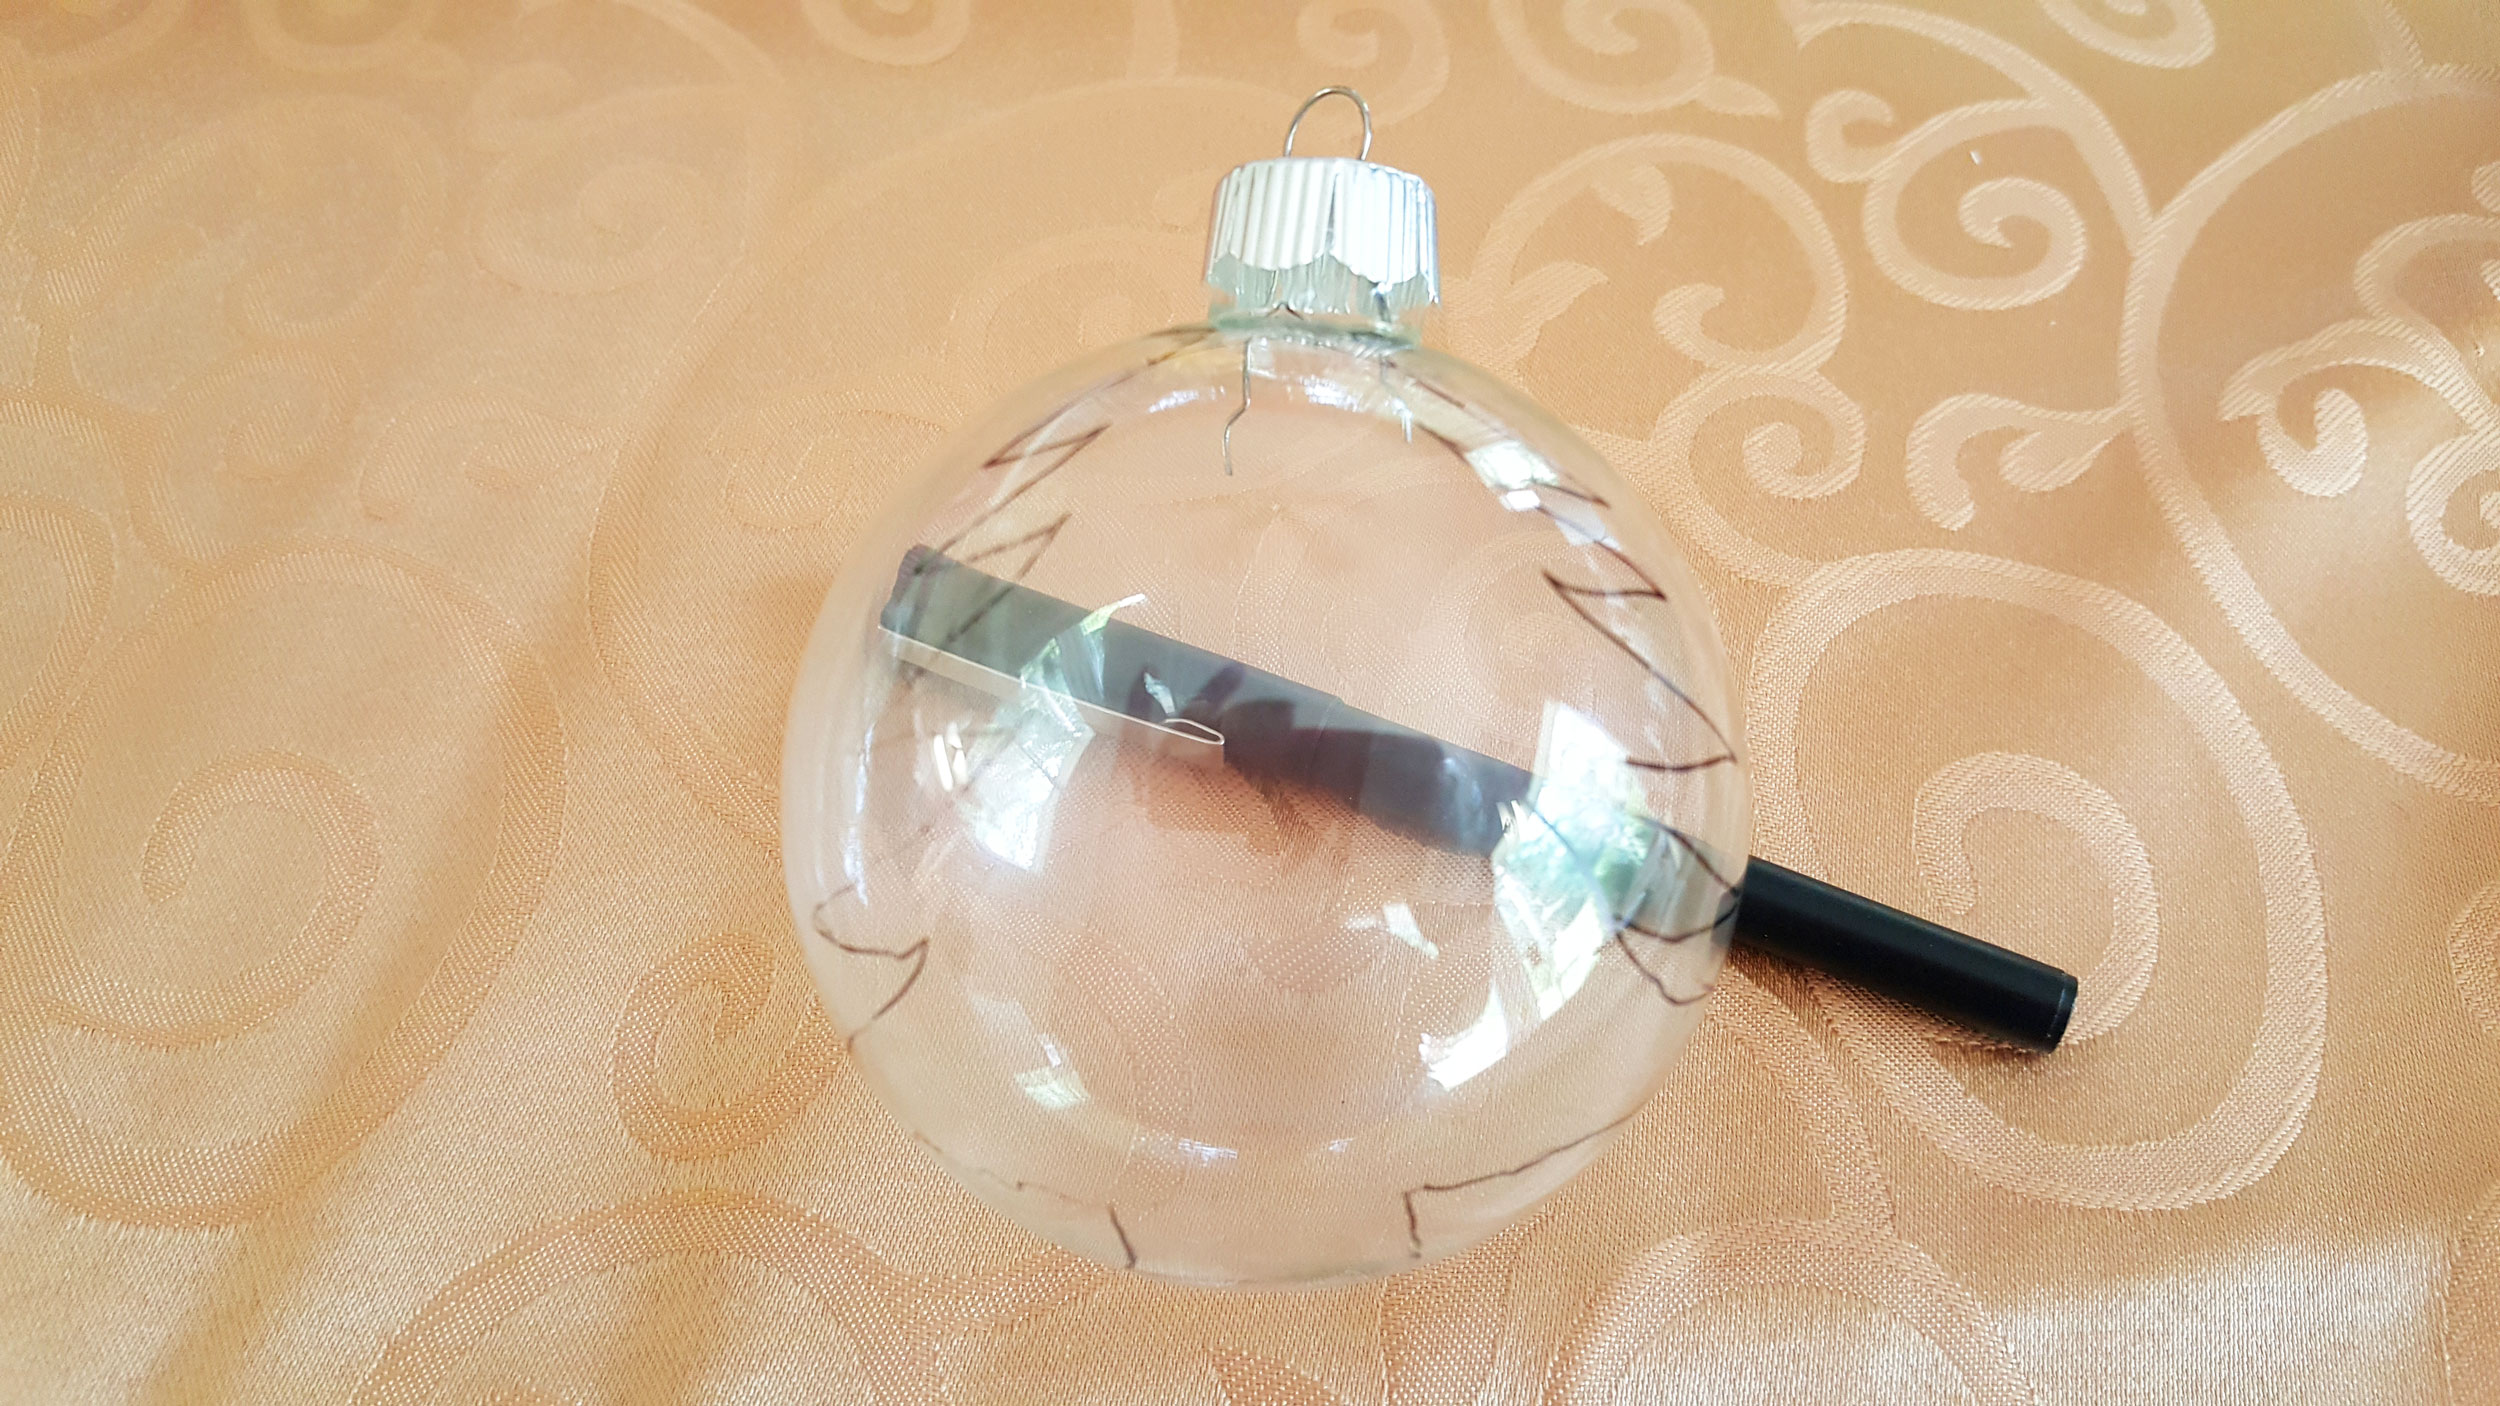
Step 1: Using the permanent marker, sketch out the outline of your Christmas tree on the back of the glass ball ornament.
Step 2: Paint ornaments and a star on your tree in glitter glue. Outline the tree and stump as well with the glitter glue. Let the glitter dry thoroughly.
Note: Do not paint the tree at this point! The paint needs to be in layers, with the green being behind the colored ornaments.
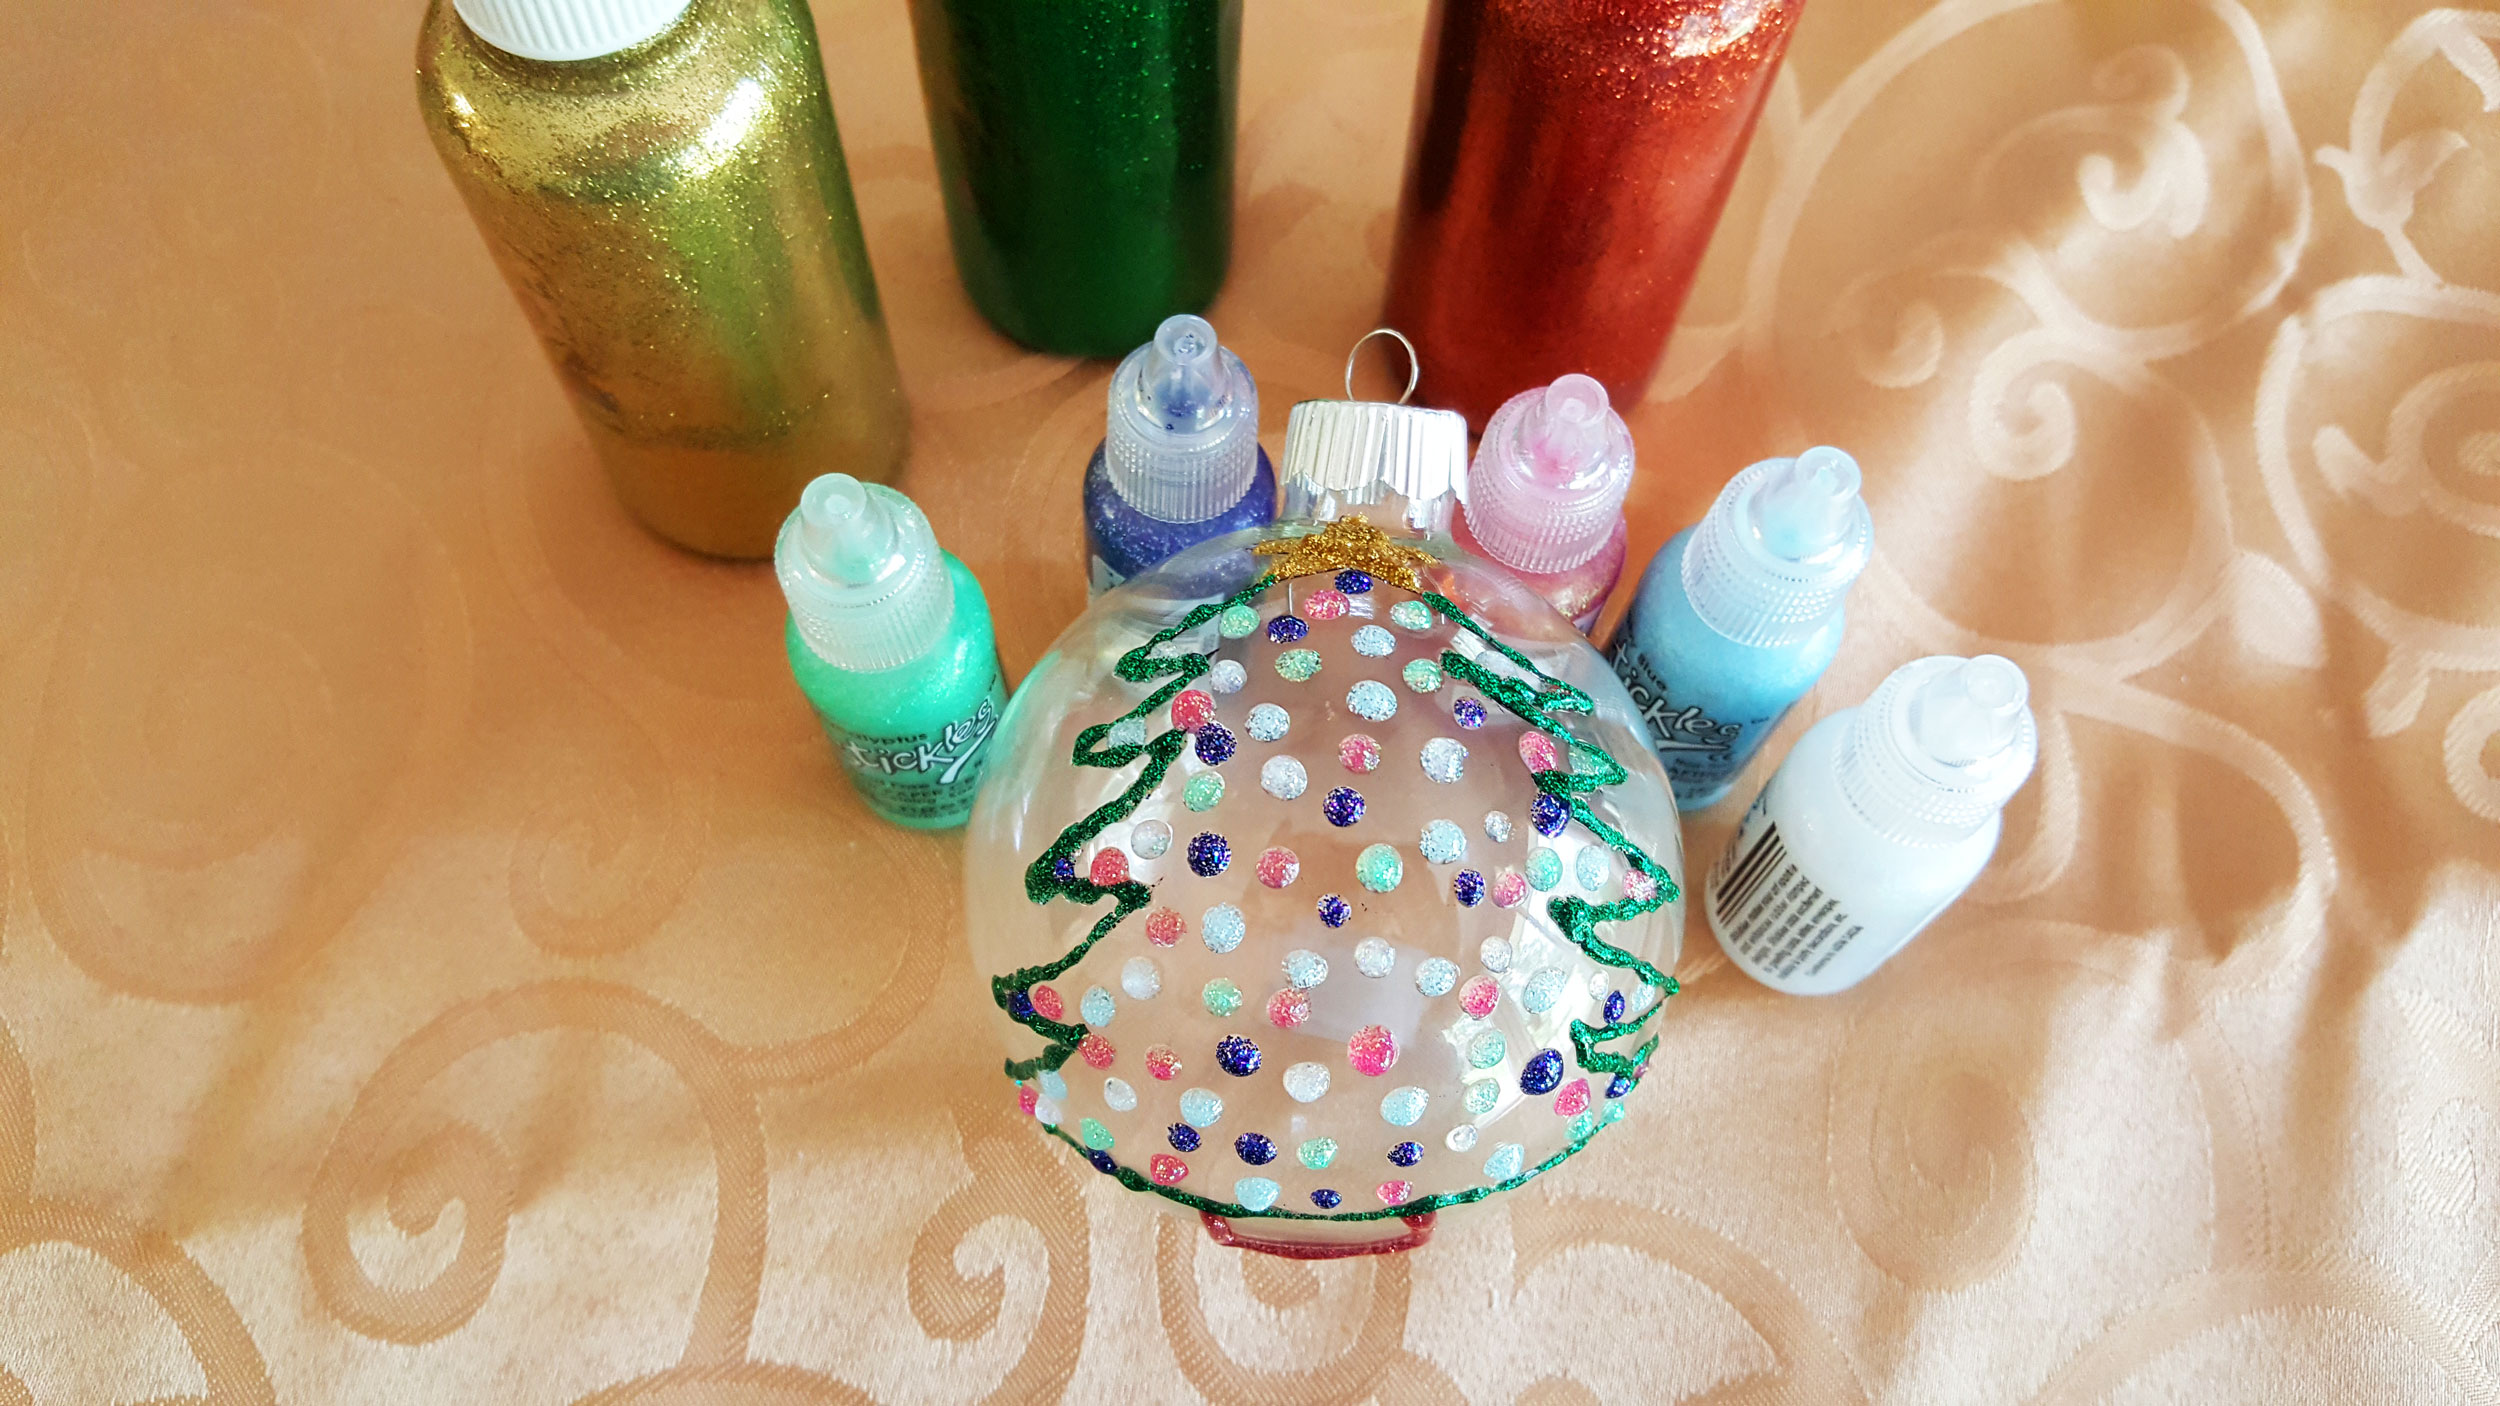
Step 3: Now solidly paint the tree over the glitter glue, keeping inside the glitter outline of the Christmas tree.

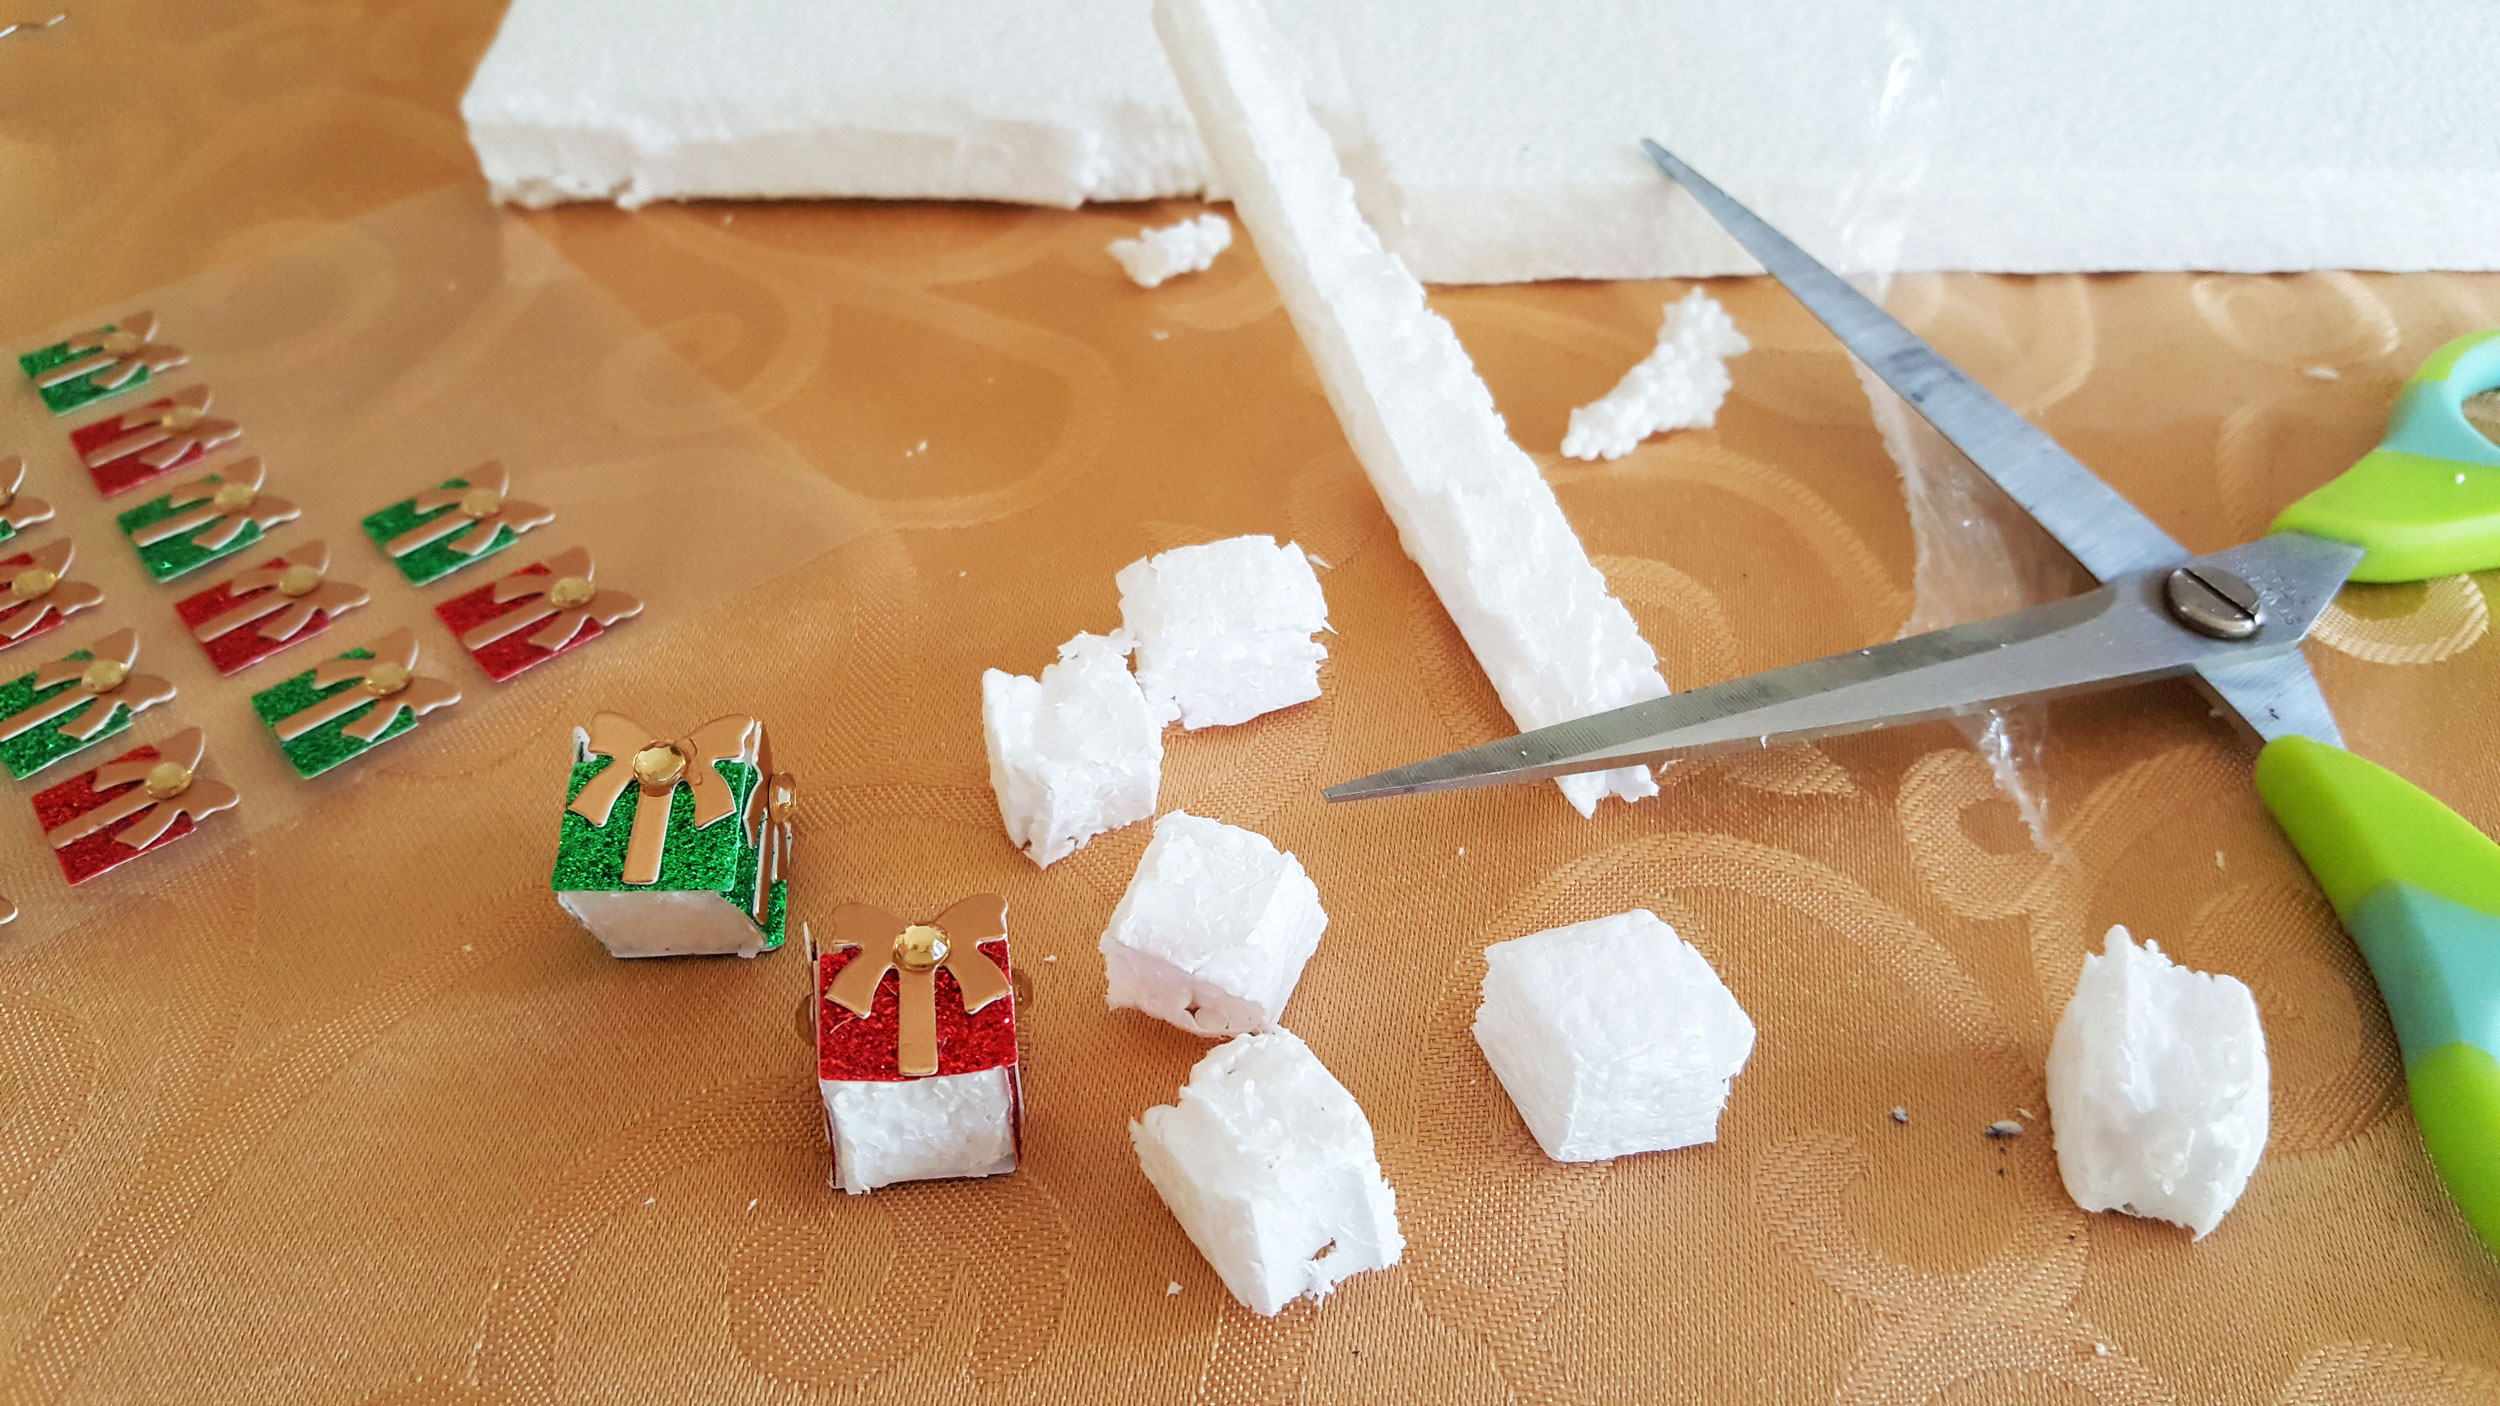
Step 4: Cut Styrofoam into miniature cubes, making sure that they fit through the opening of your Christmas tree ornament. Attach the present stickers to the outside of the cubes.
Christmas Tree Ornament Steps 5-7
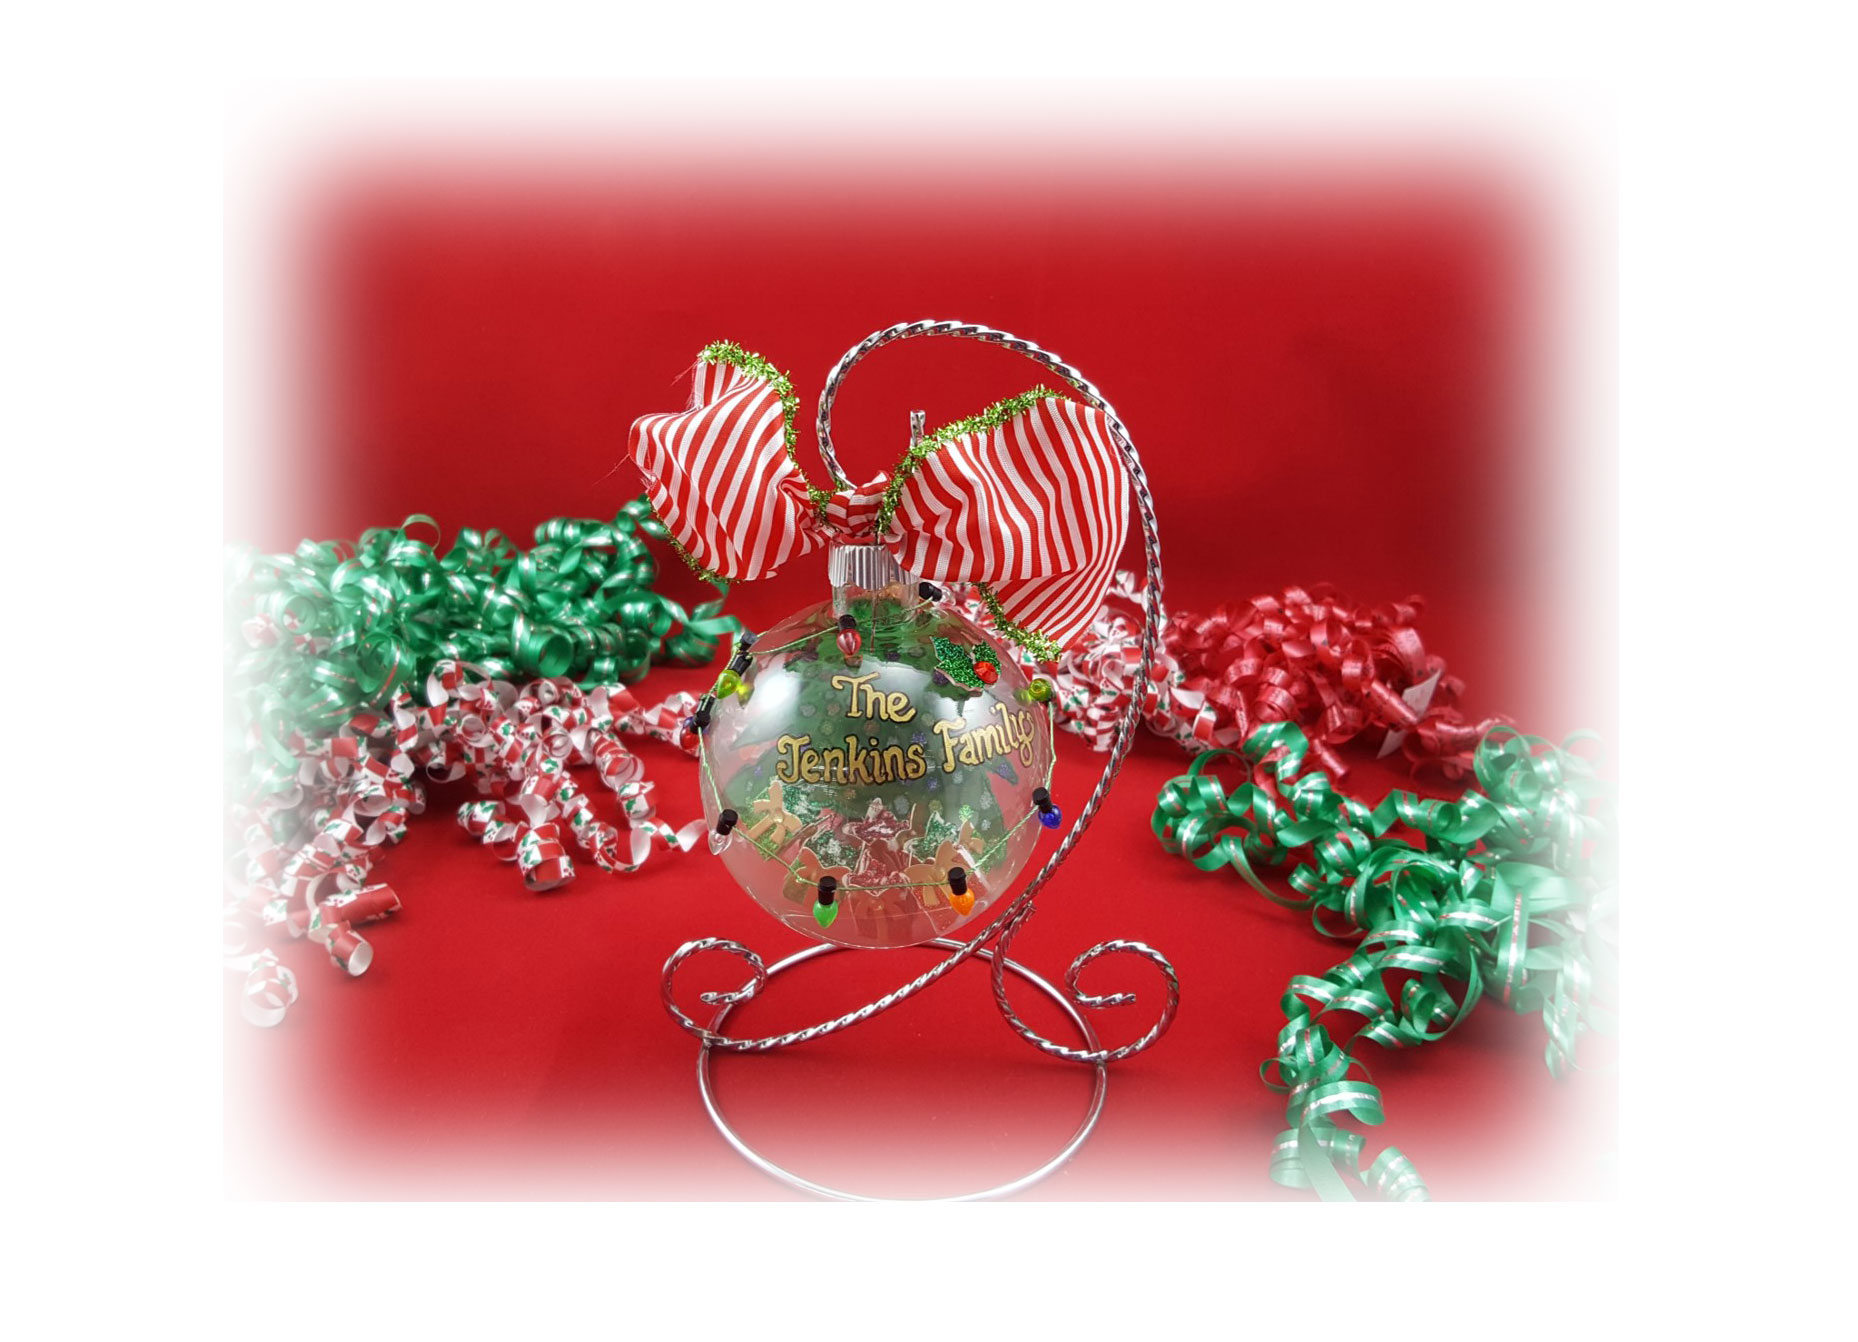
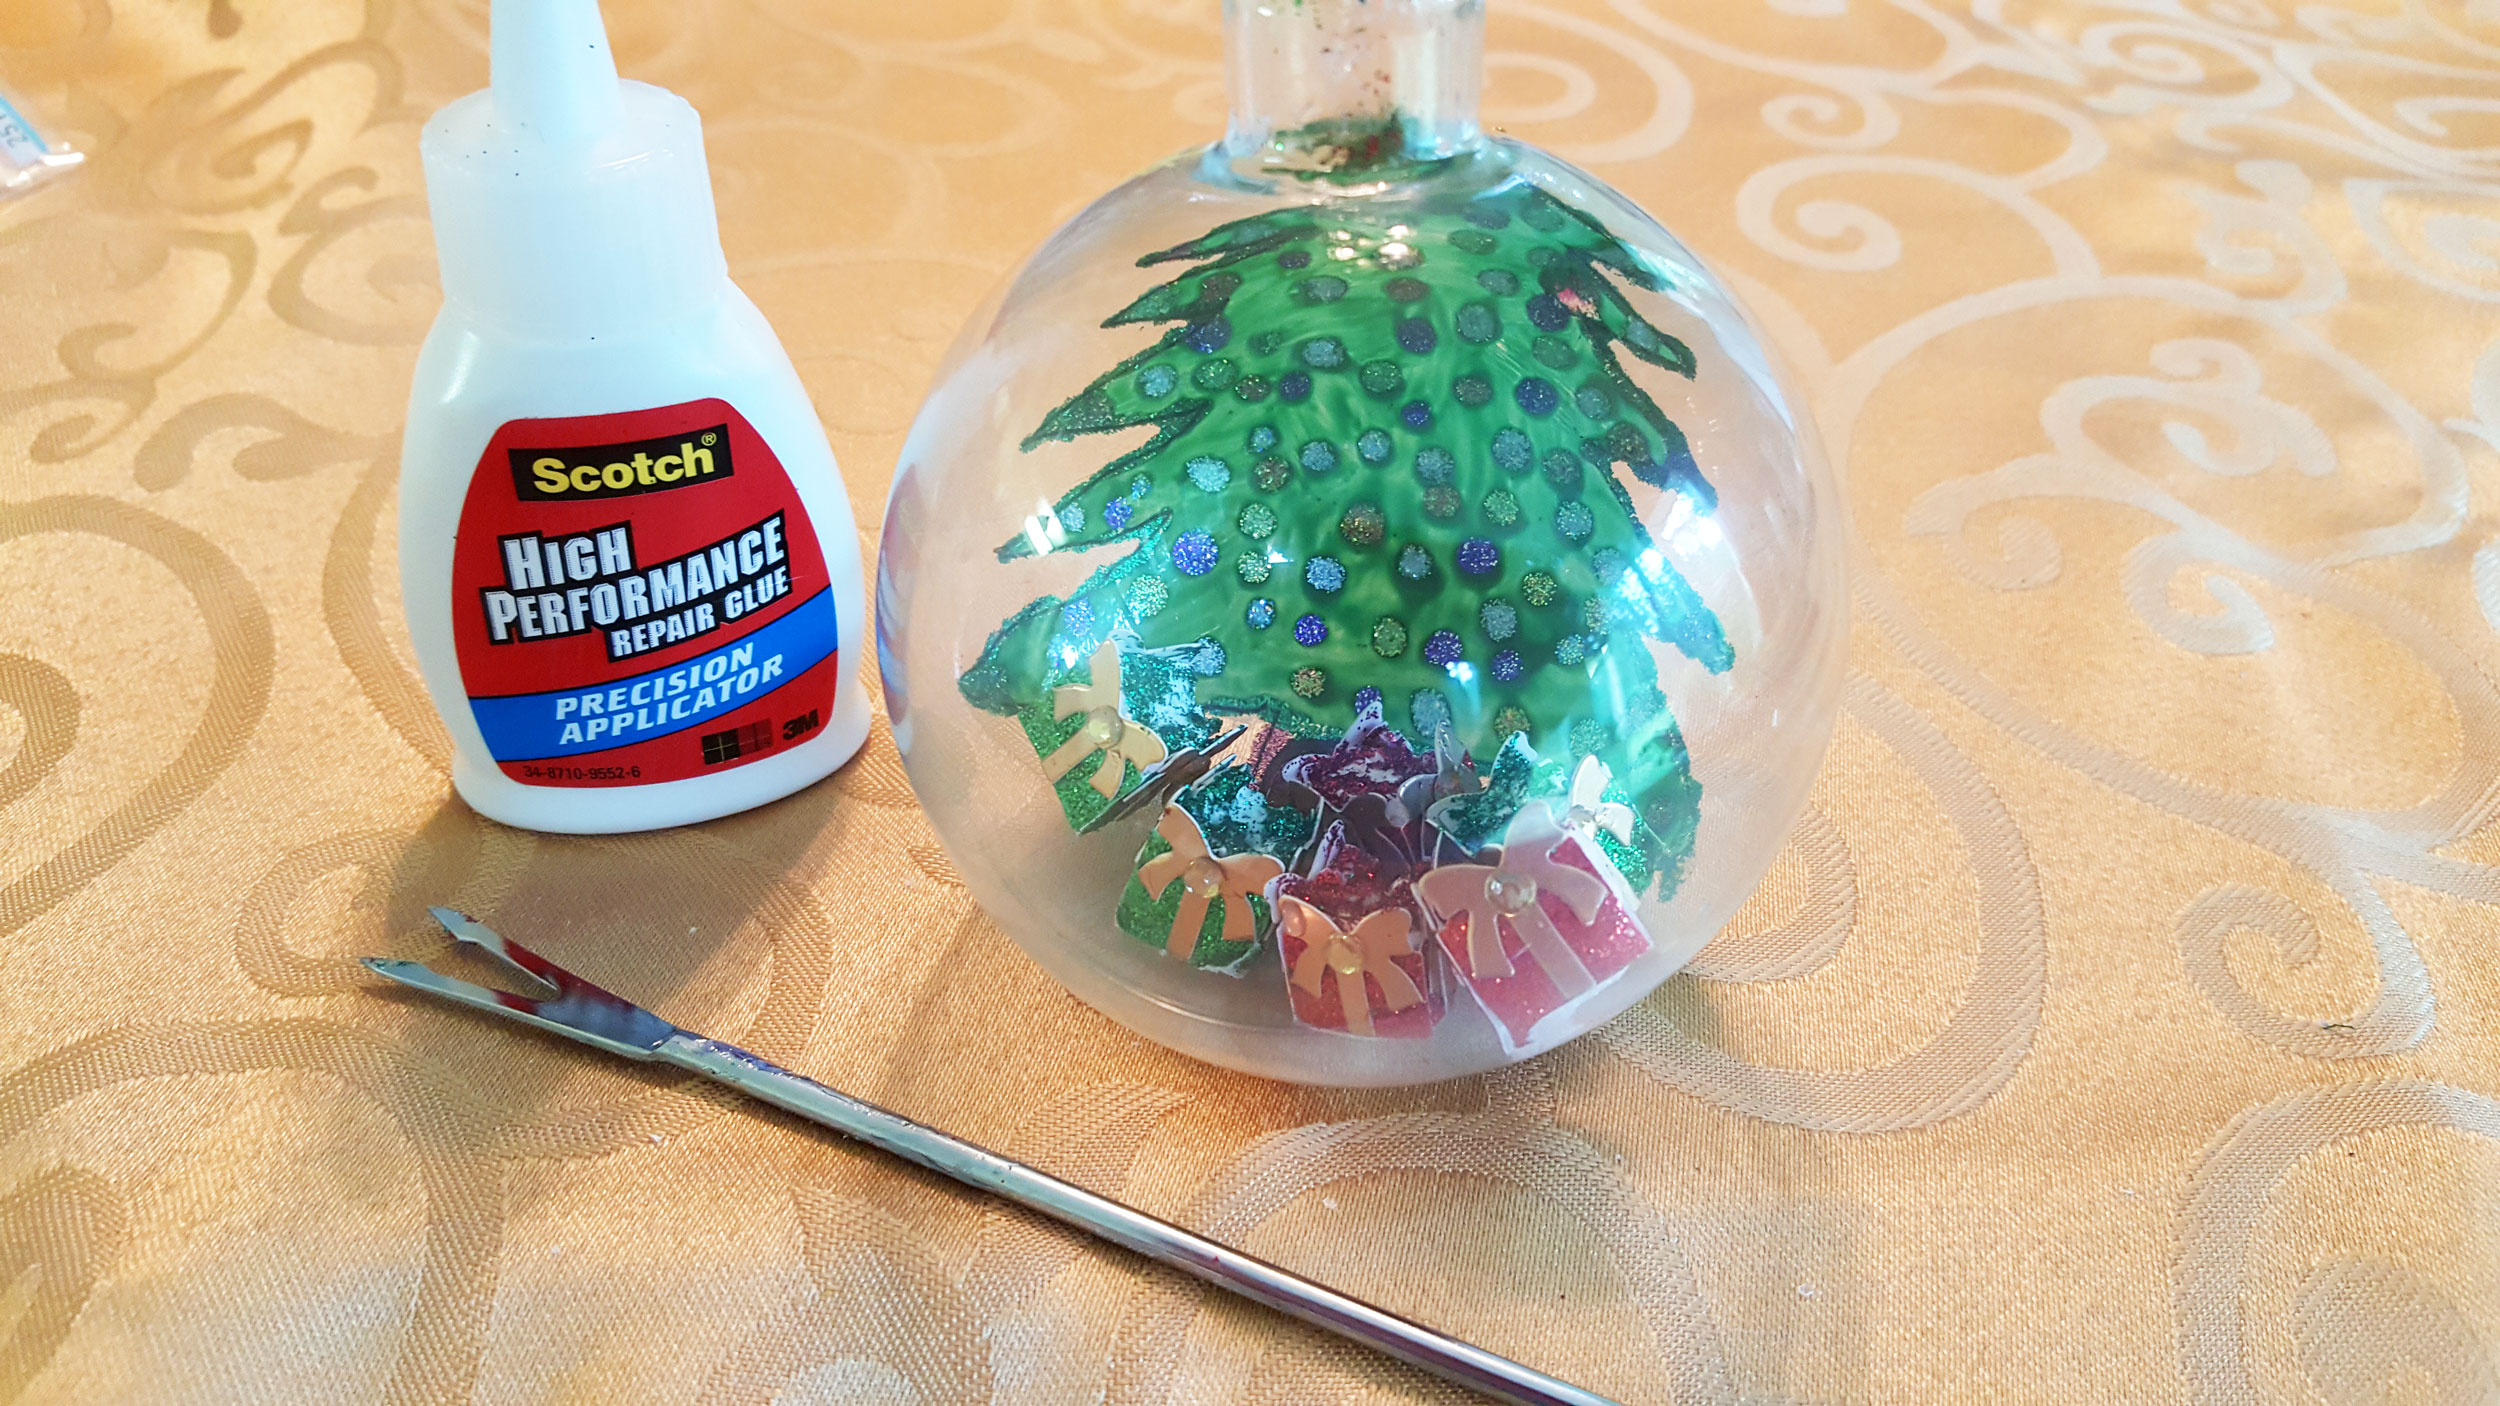
Step 5: Carefully remove the ornament cap and push the presents through the hole.
Note: If you don’t want the presents to move, drip a couple of glue drops through the hole and carefully set the presents on the glue with a pair of tweezers or I used a fondue fork.
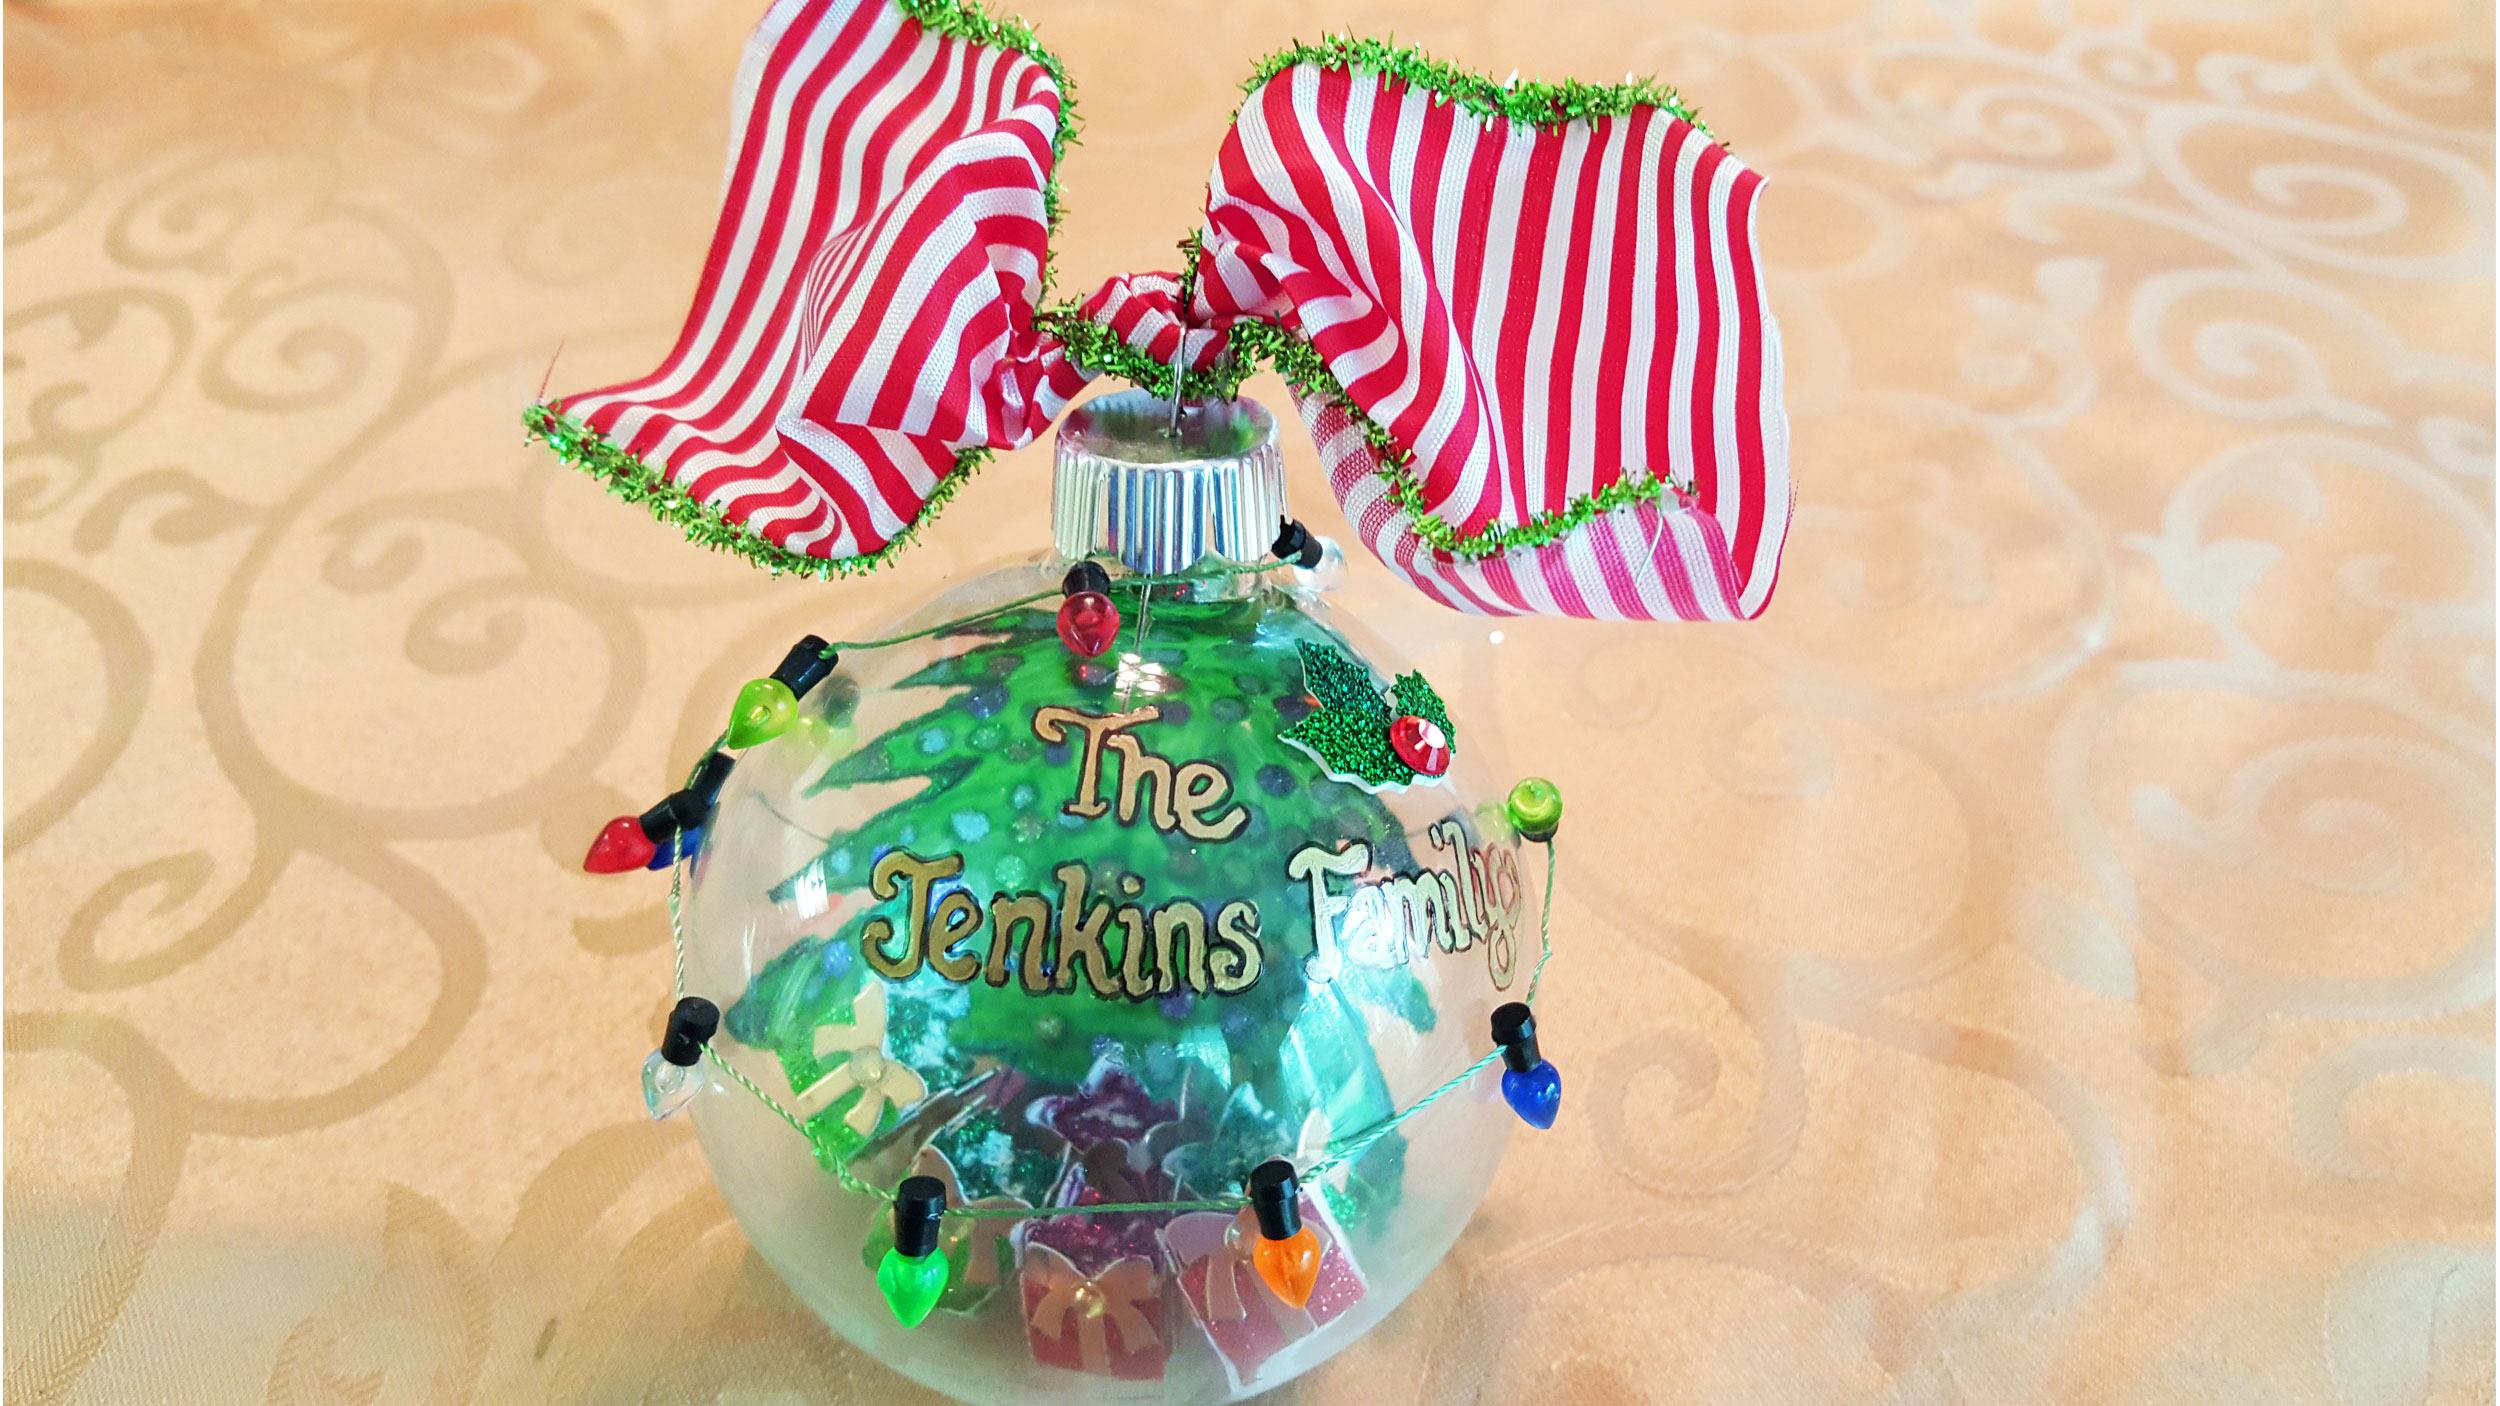
Step 6: Glue the decorative Christmas lights on the tree around the circumference of the clear glass ball ornament, leaving most of the lights loose, but gluing down a few here and there to anchor them securely to the outside.

Step 7: Make it personal! Personalize the front with a paint marker and add any additional sticker embellishments such as the holly leaves we used.
Tie a ribbon to the top and your Christmas Tree Ornament is complete! To make it personal for an ornament exchange, you can personalize your ornament with the name of the party and the year on the front.
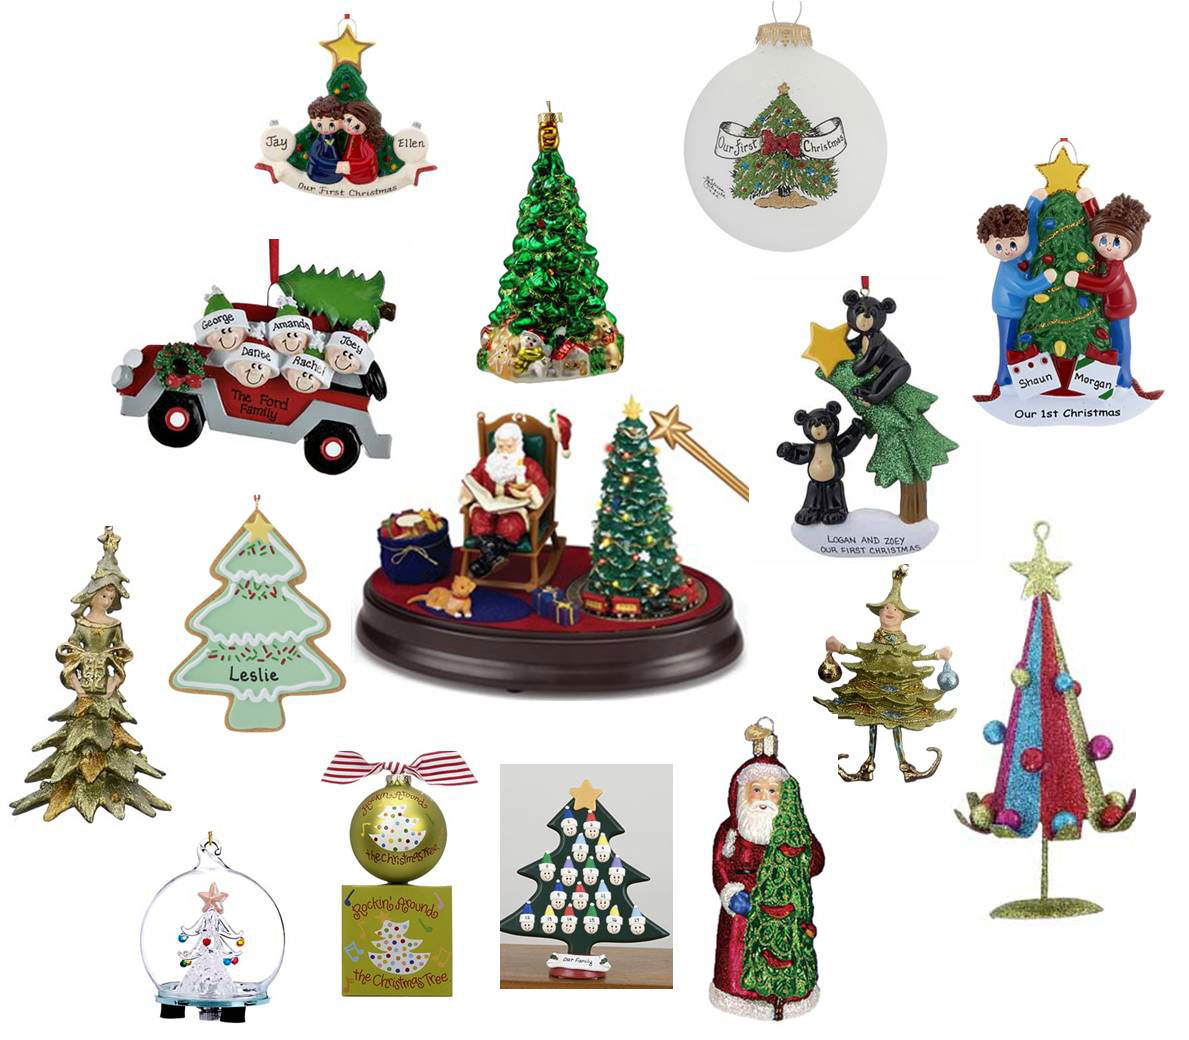
If you don’t have time for crafting, but you would love to bring a Tree Ornament to your holiday Ornament Exchange, we have a variety for you to choose from. All of our ornaments can be personalized specifically for your event!