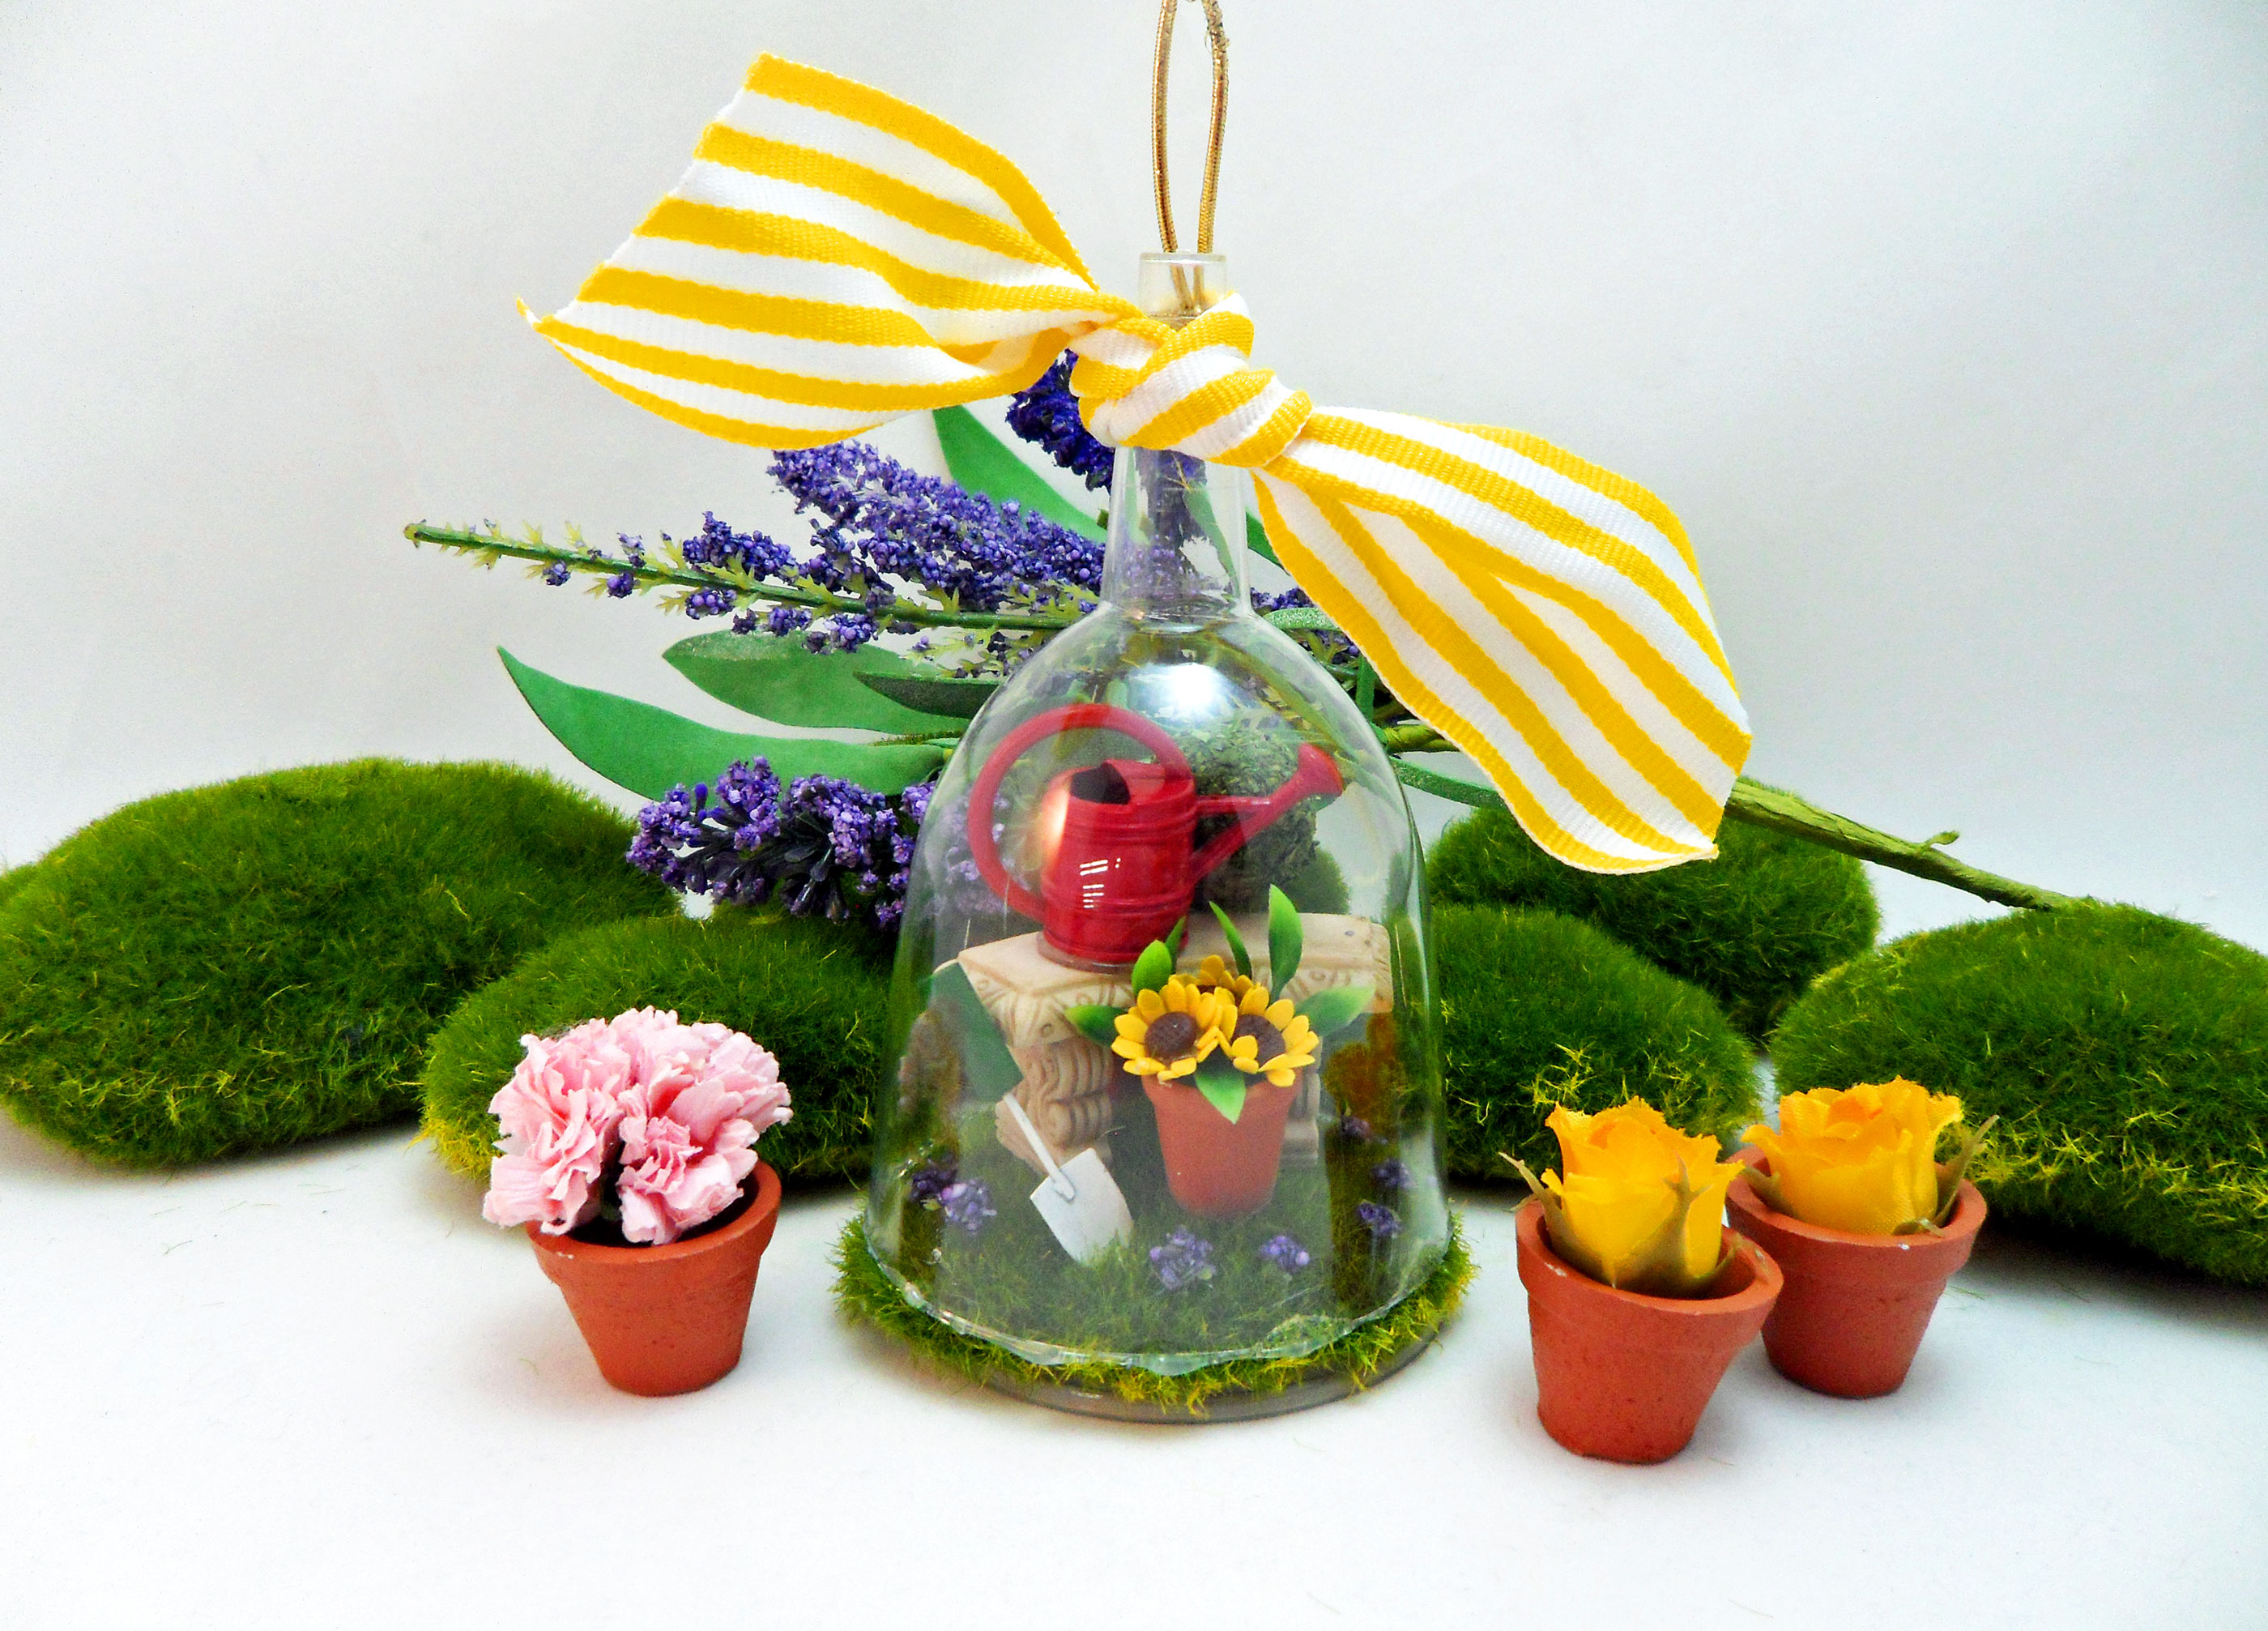
Bring A Miniature World To Life With DIY Cloche Spring Decorations
Posted May 24, 2017 in DIY (Crafts) by Dianne Weller
Do you love Cloche Displays and Spring Decorations as much as I do? There’s just something about a little miniature world behind glass that seems almost magical to me. I have a friend who has a cloche display in her home and she changes it for the different seasons and holidays. Every time I visit, I am excited to see what is inside and am looking forward to seeing her cloche spring decorations.
Spring is here and what better activity defines the season than gardening? If you also love caring for plants and flowers, you might already have a glass terrarium, which is a type of cloche used to enclose plants. For our project, there’s no need to maintain your tiny world and it will represent the beauty of spring. Spring decorations make everyone a little happier and the days a little brighter.
While we do carry some glass ornaments with scenes inside, I wanted to see if I could create a cloche ornament of my own. Because glass is so heavy, I thought a substitution with plastic would get the same sort of result and be lightweight enough to hang from a tree branch or other spring decorations hanger in your home.
How To Make Wine Glass Cloche Ornaments Into Spring Decorations
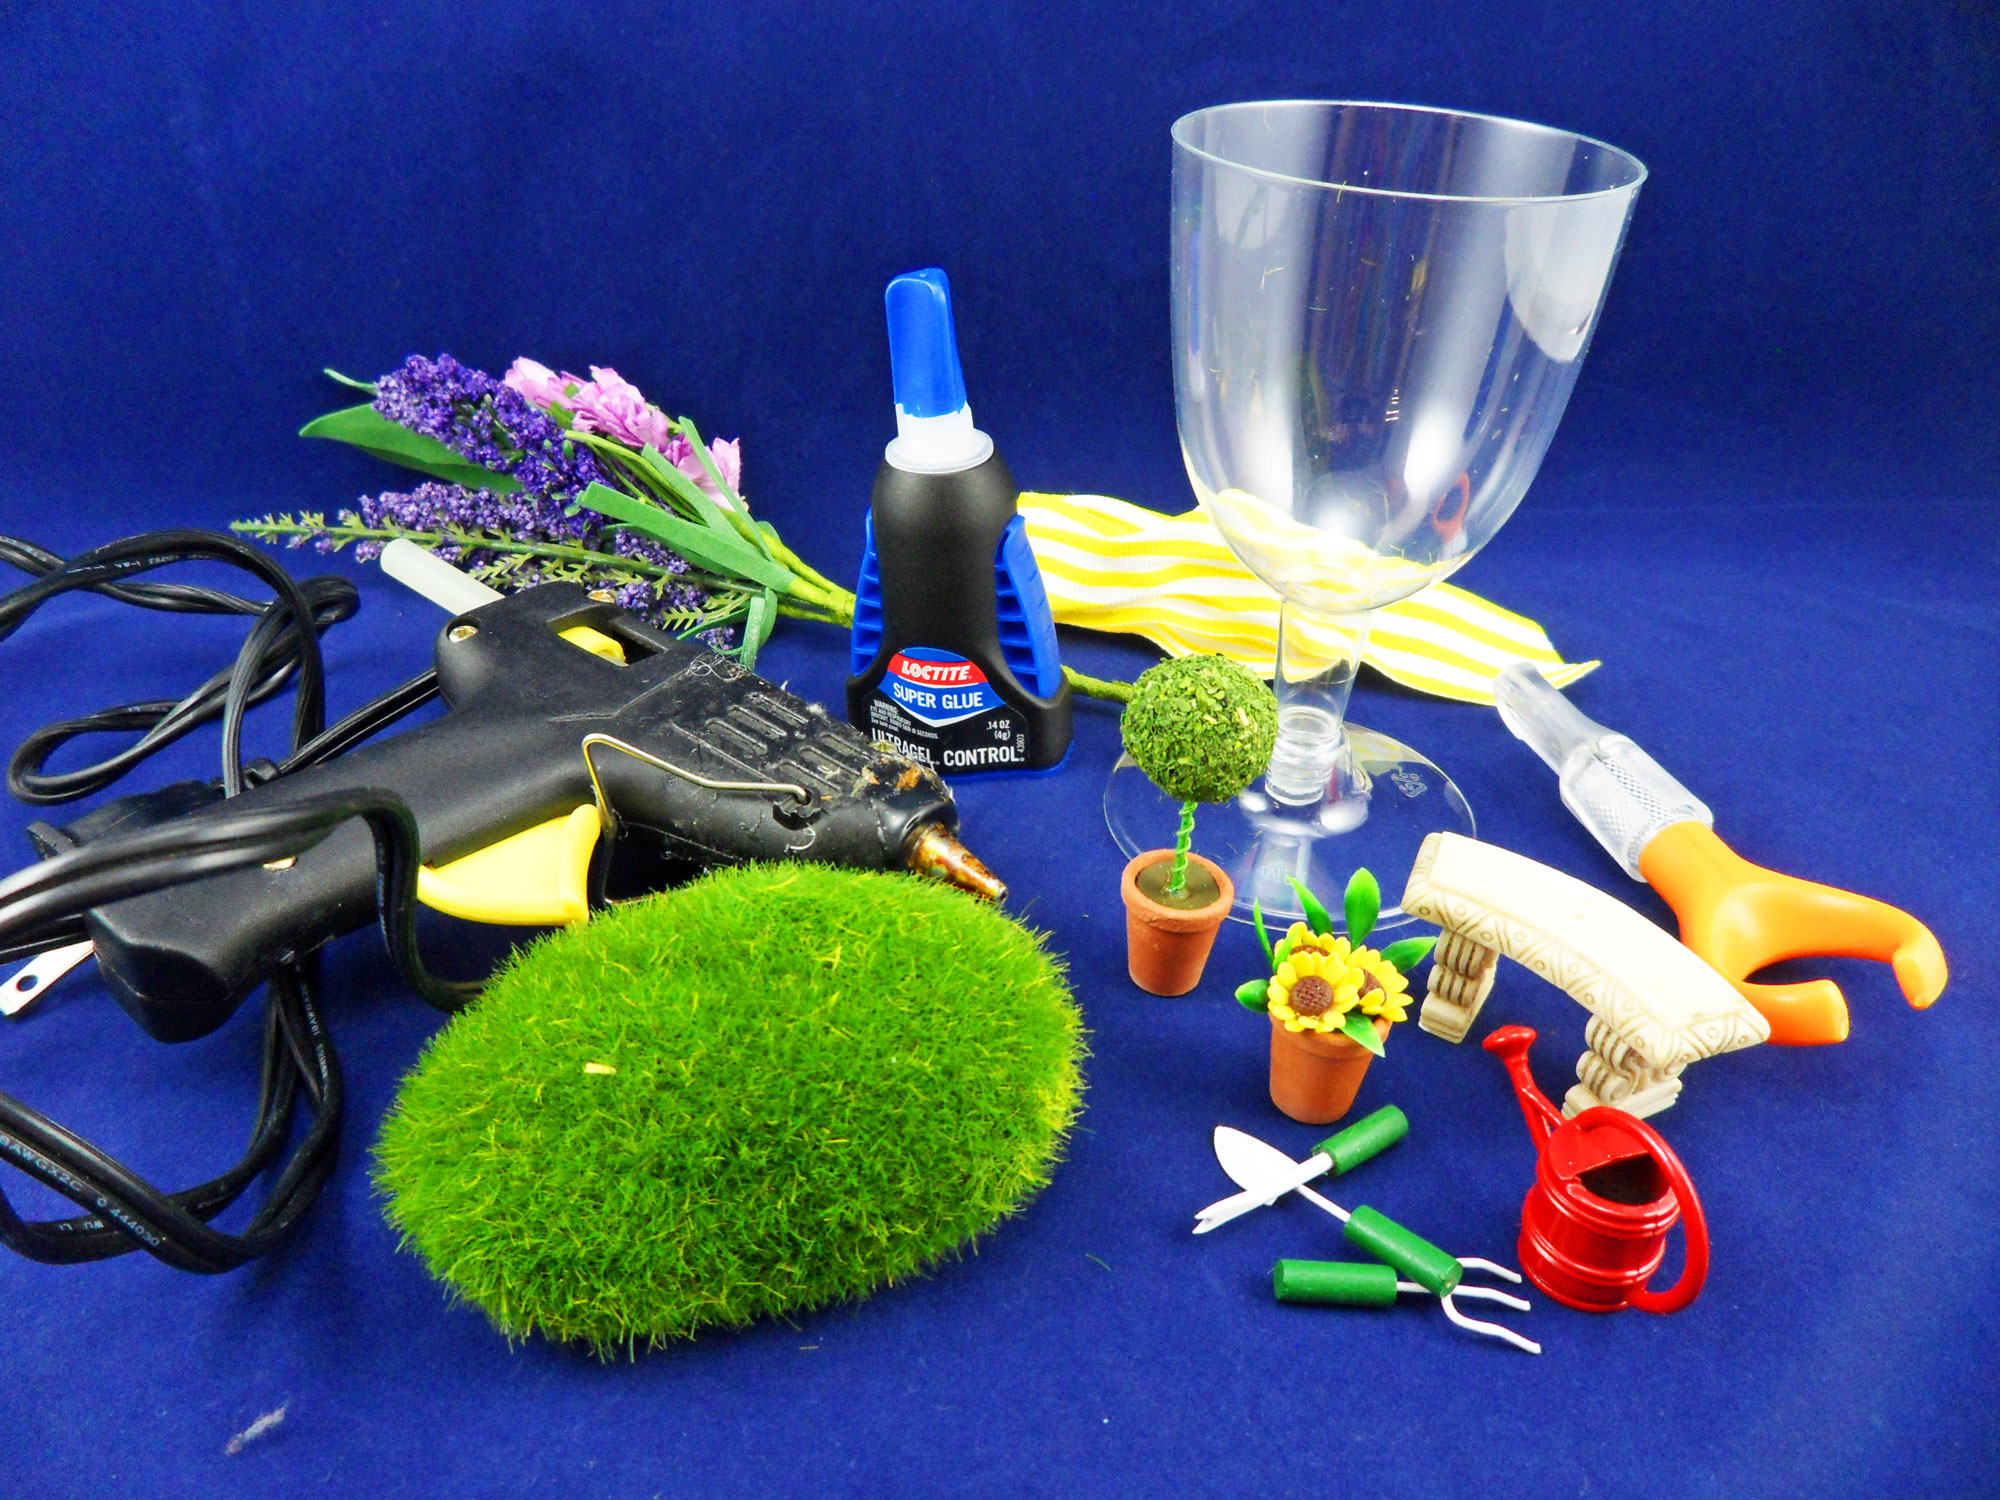
Using a plastic wine glass (yes, the ones with the snap on bottom) you can make a unique cloche spring decoration. Because you will have to buy a package of wine glasses to use one, you might as well make adorable scene ornaments for all of the seasons and holidays. Have fun and get creative!
DIY Cloche Supplies:
• Plastic wine glass with snap on or removable bottom
• Miniatures to fill and create a scene in the cloche
• Astroturf type of fake grass or craft moss
• Glue
• Spring Decorations Ribbon
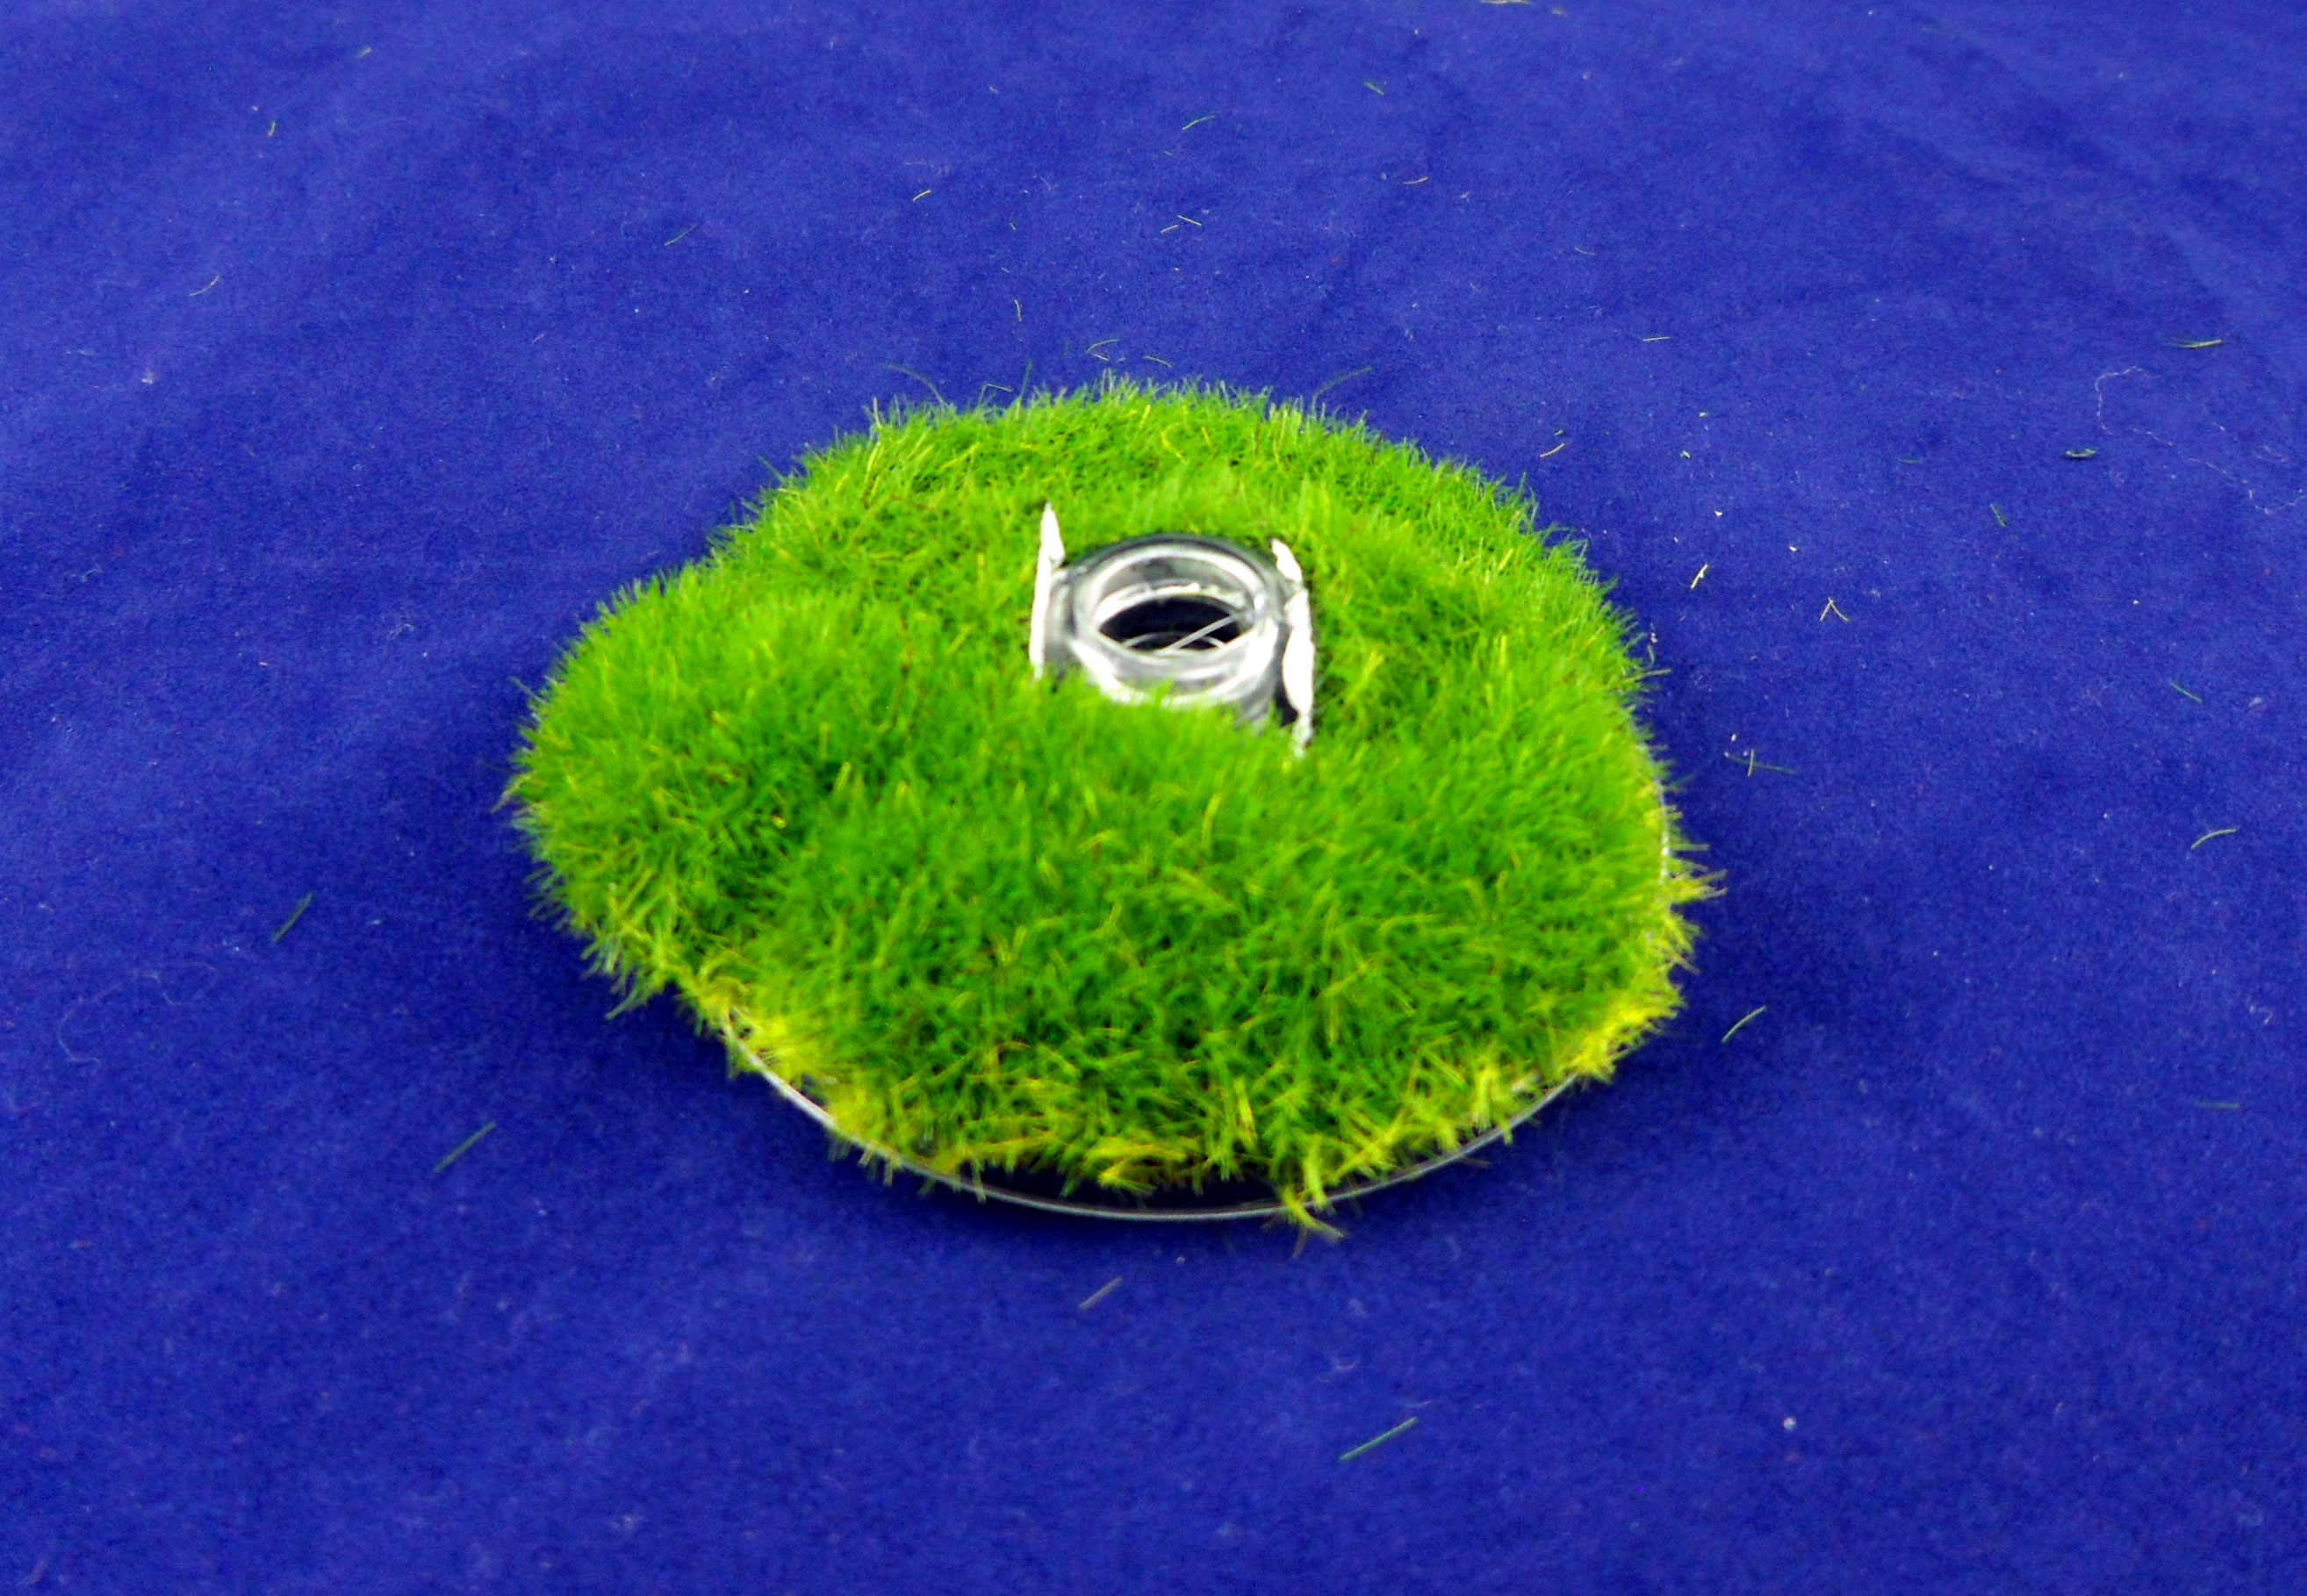
Step 1: You will work with the base of the wine glass, raised side up. Cut the pieces of moss in a circle in order to completely cover the base, even the hole (which should be on the top).
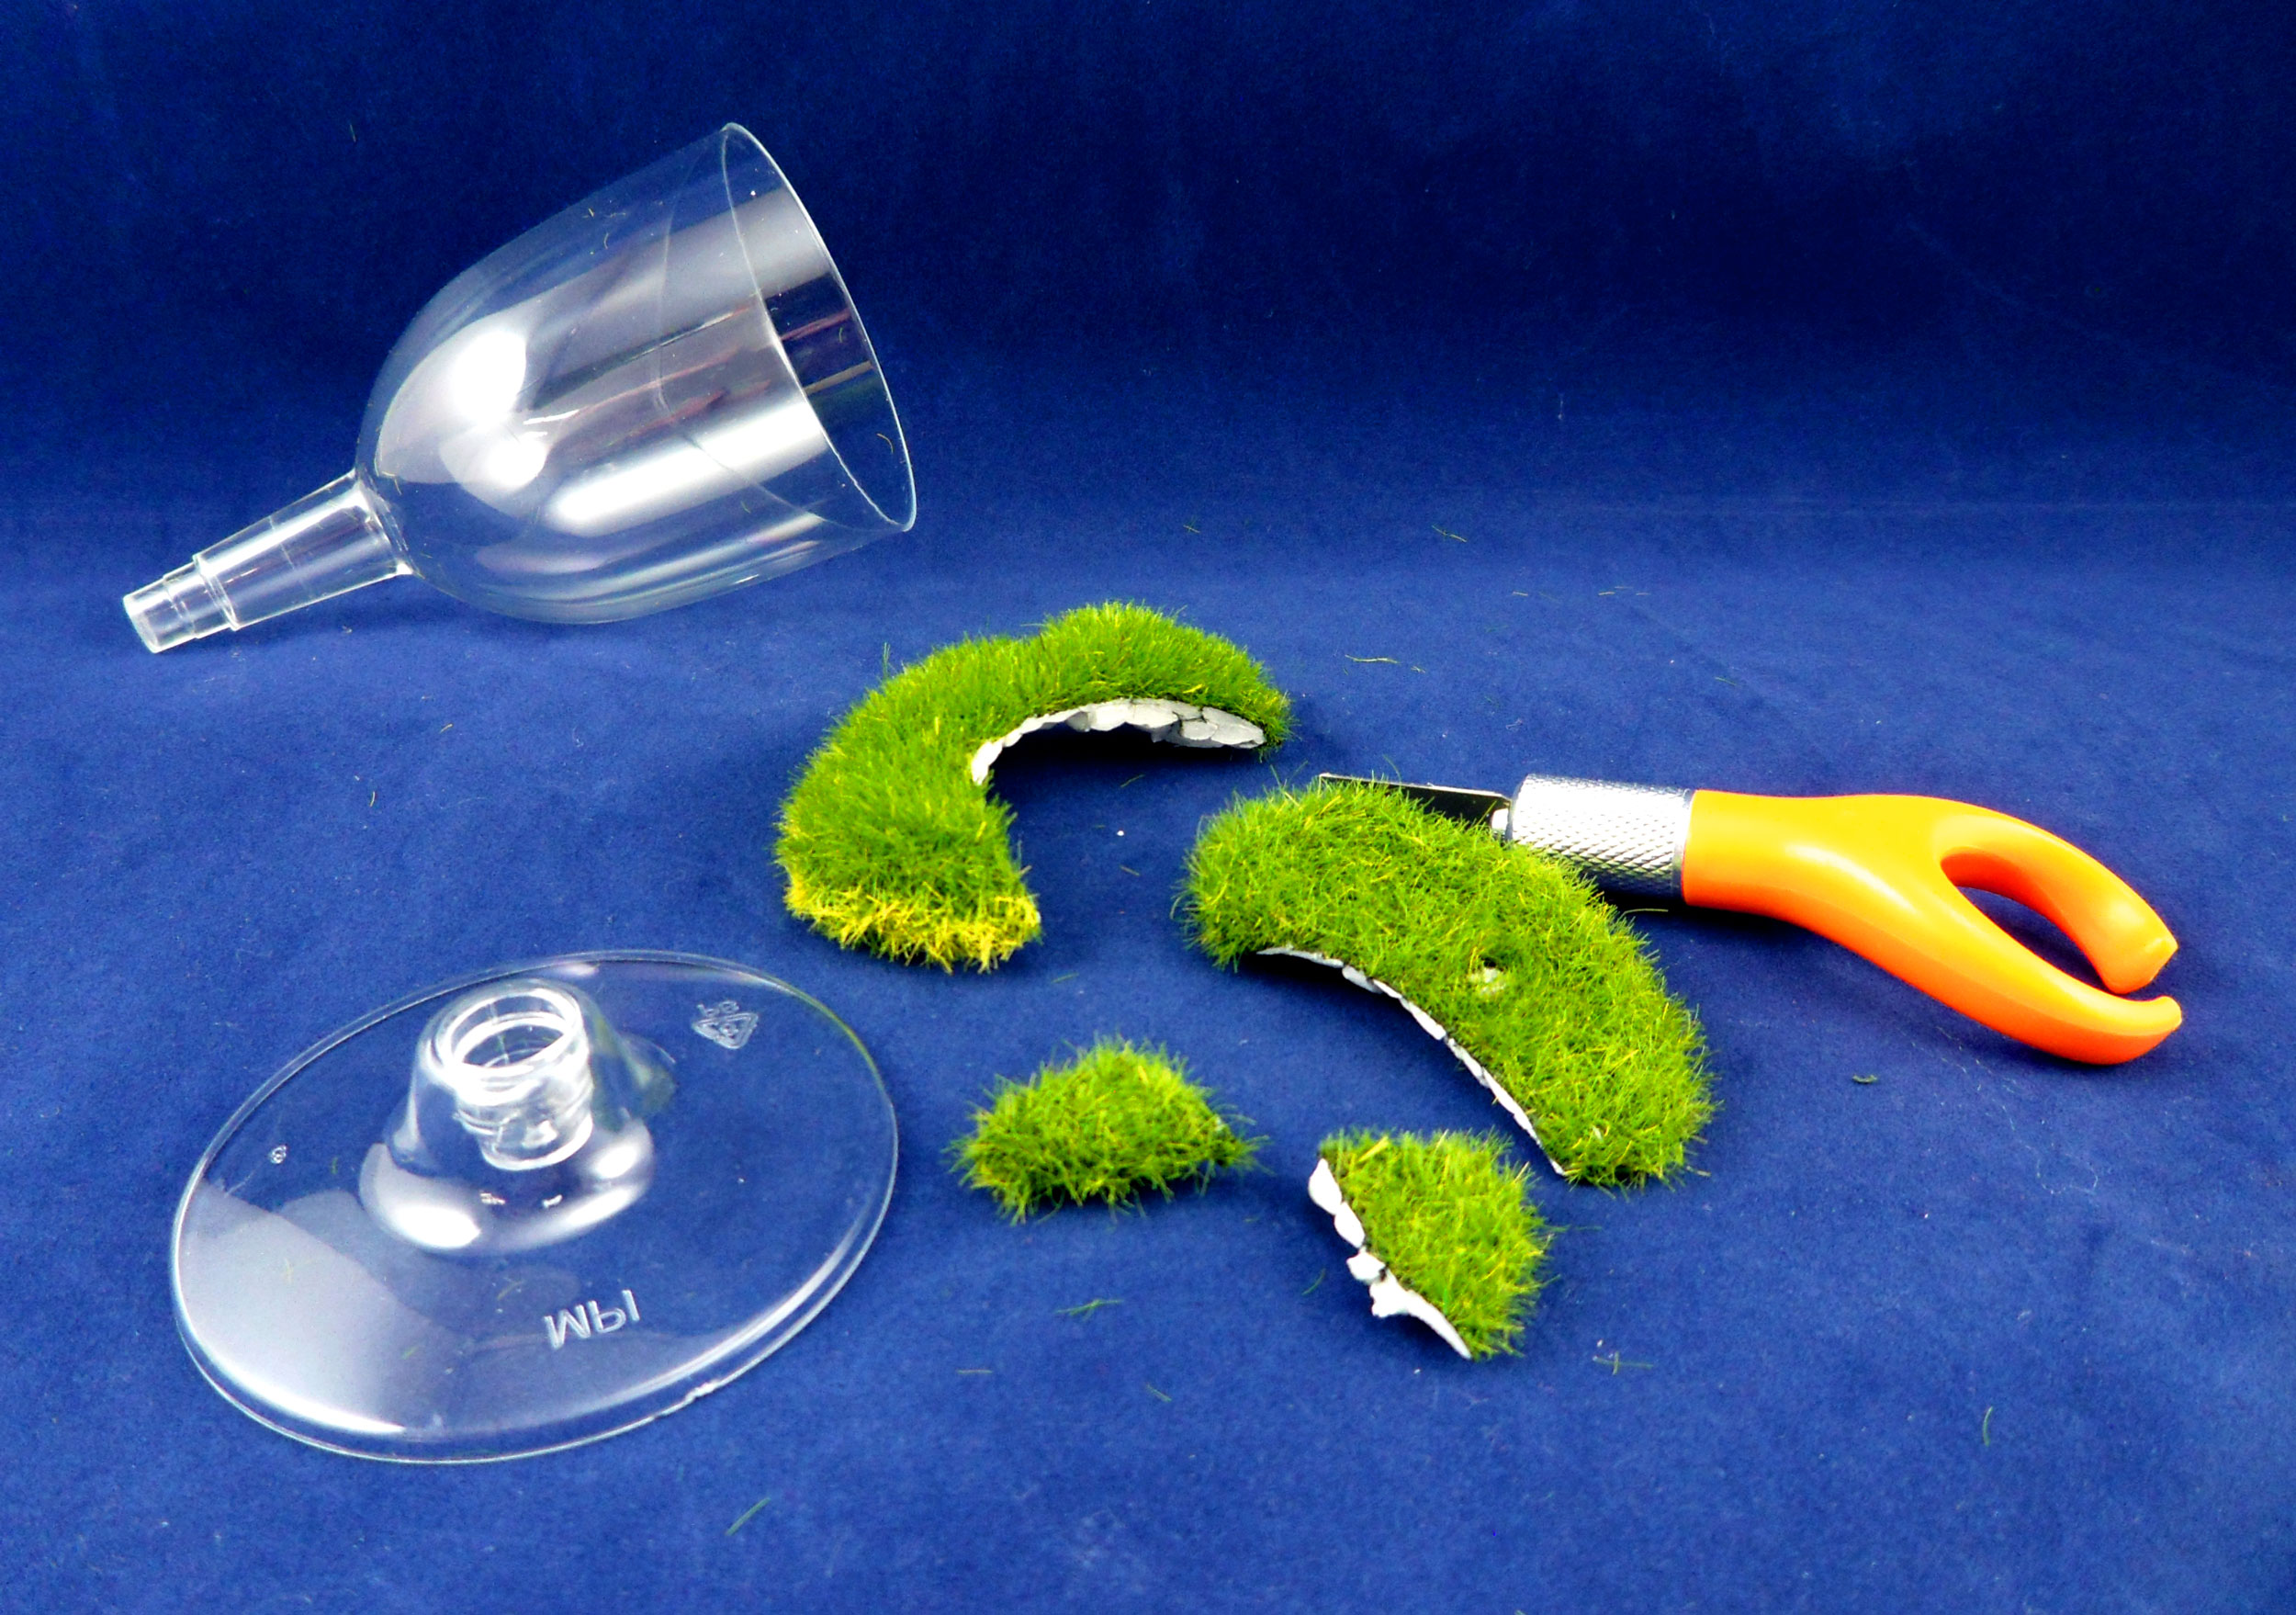
Step 2: Glue the grass or moss on top of the side that the wine glass step fits into.
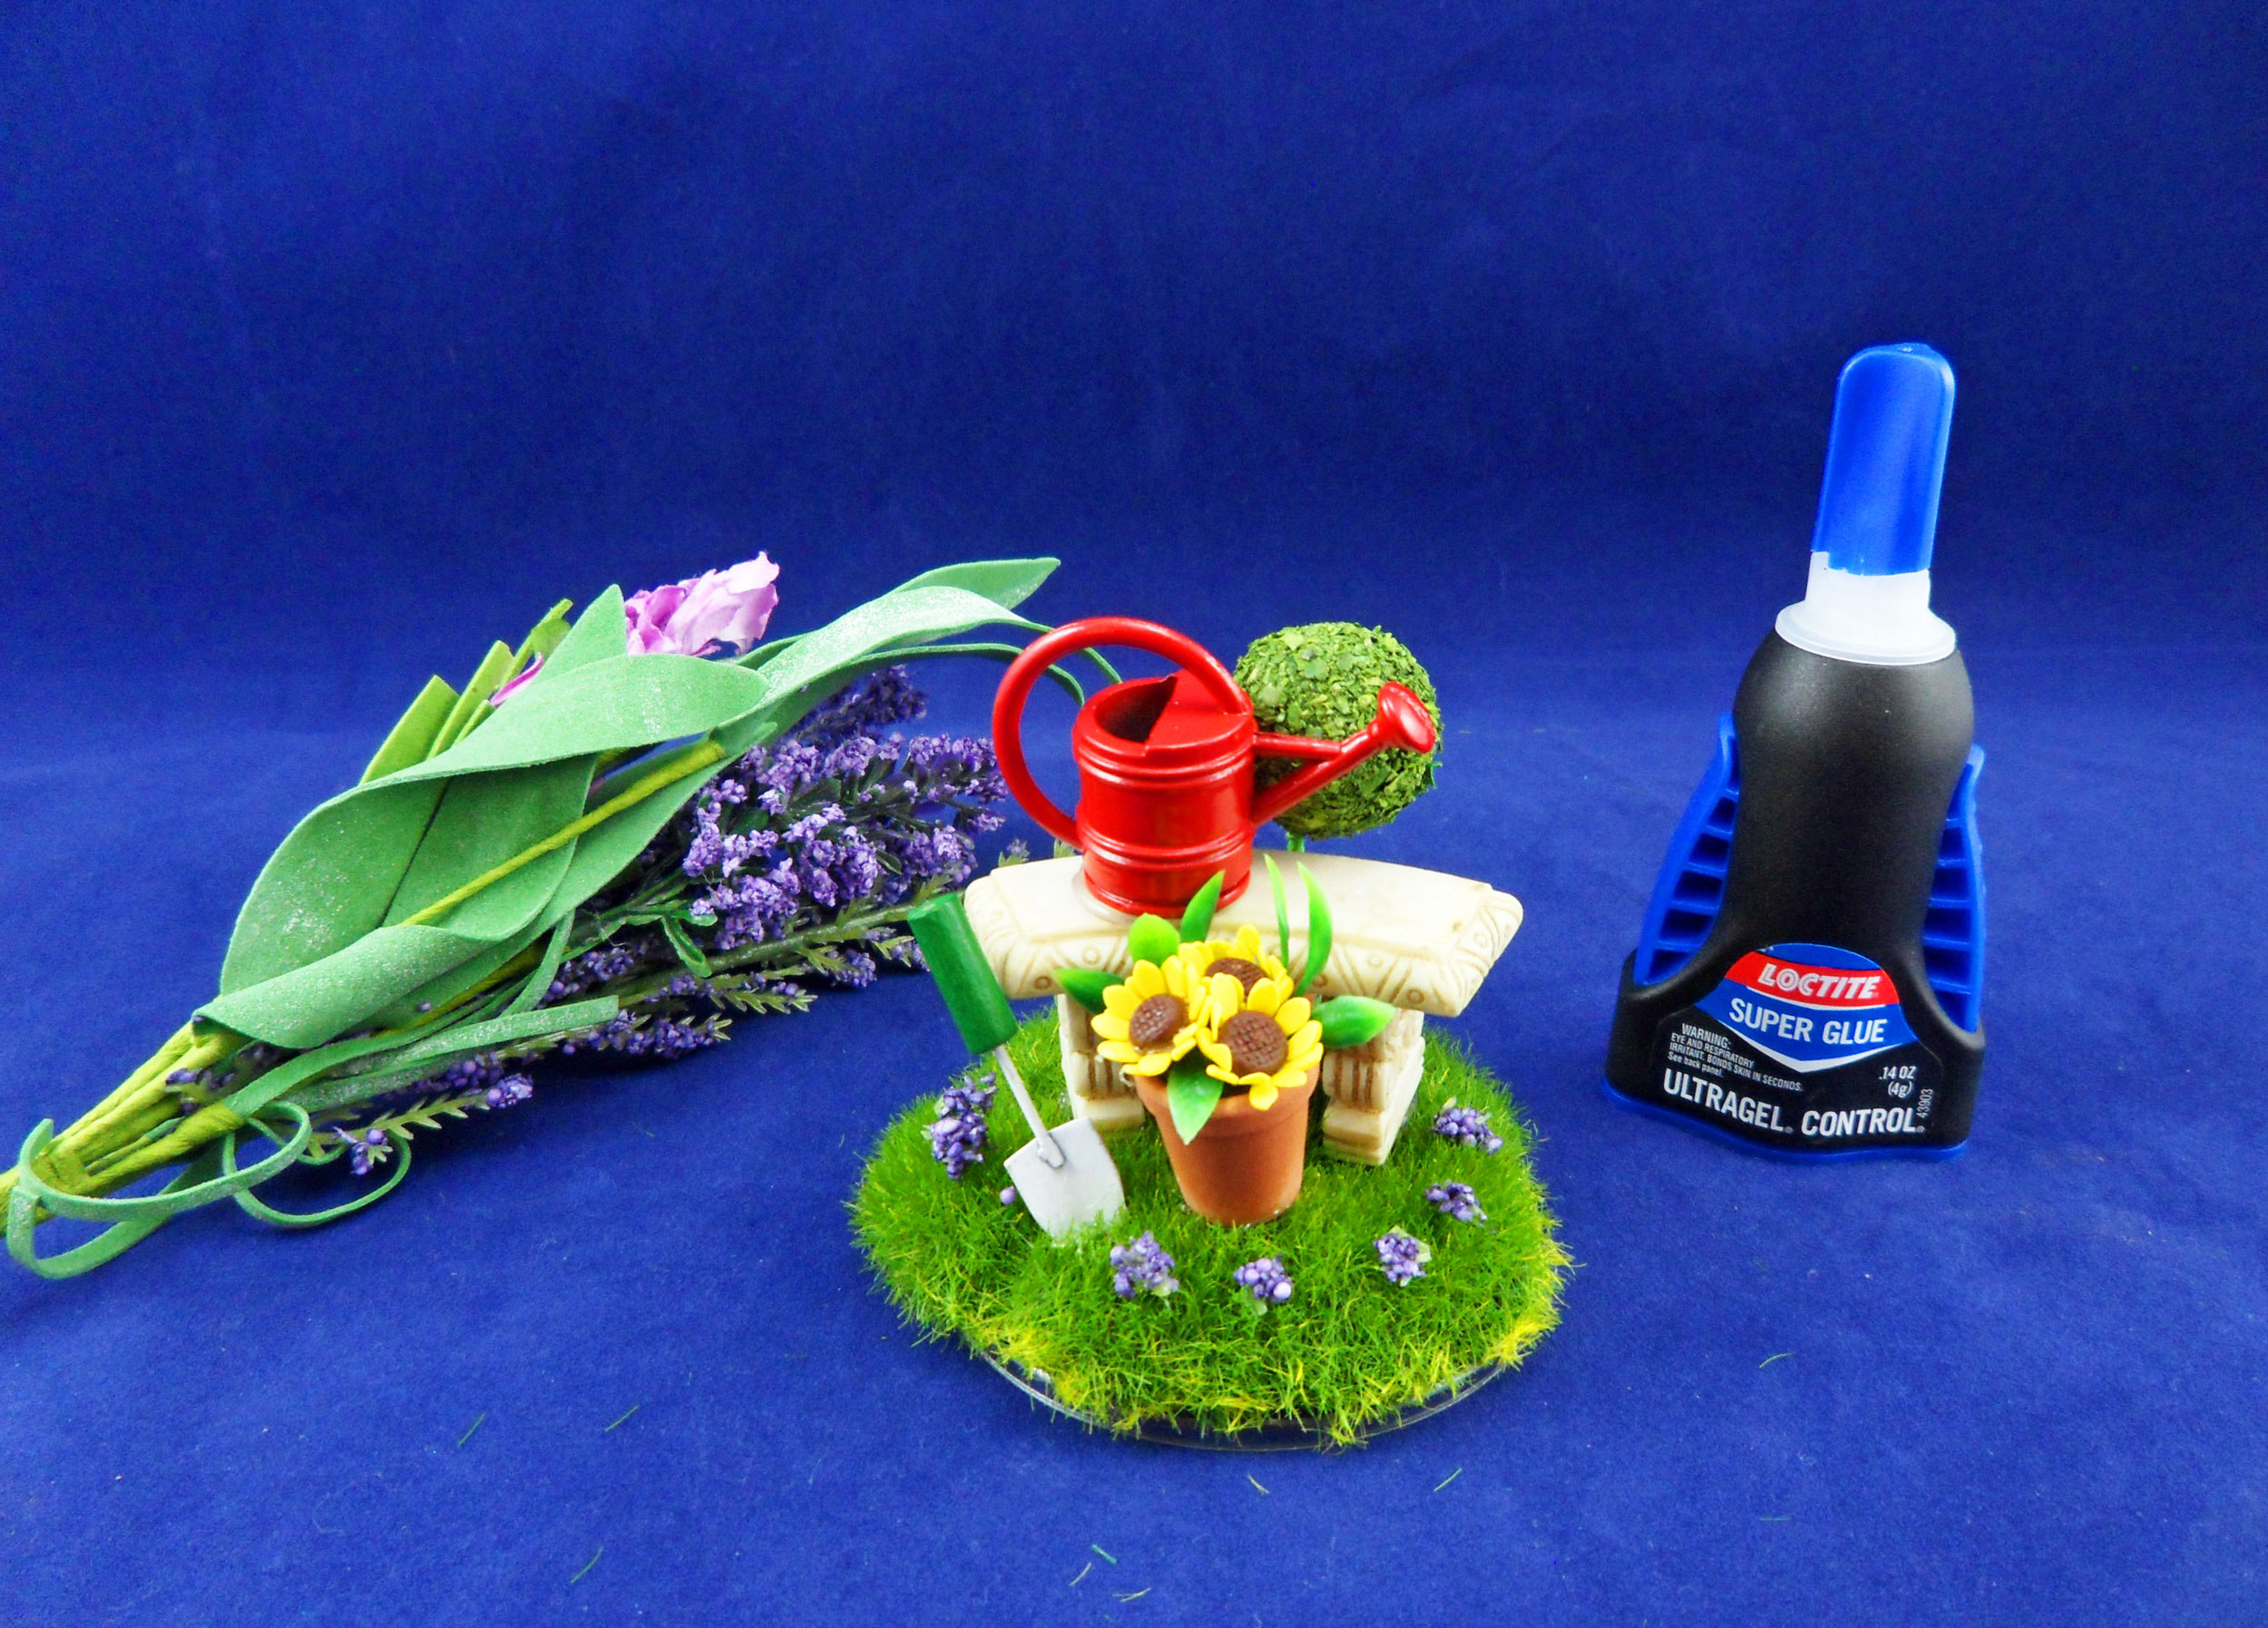
Step 3: Secure the miniature pieces of your spring scene with glue on top of the moss and let dry.
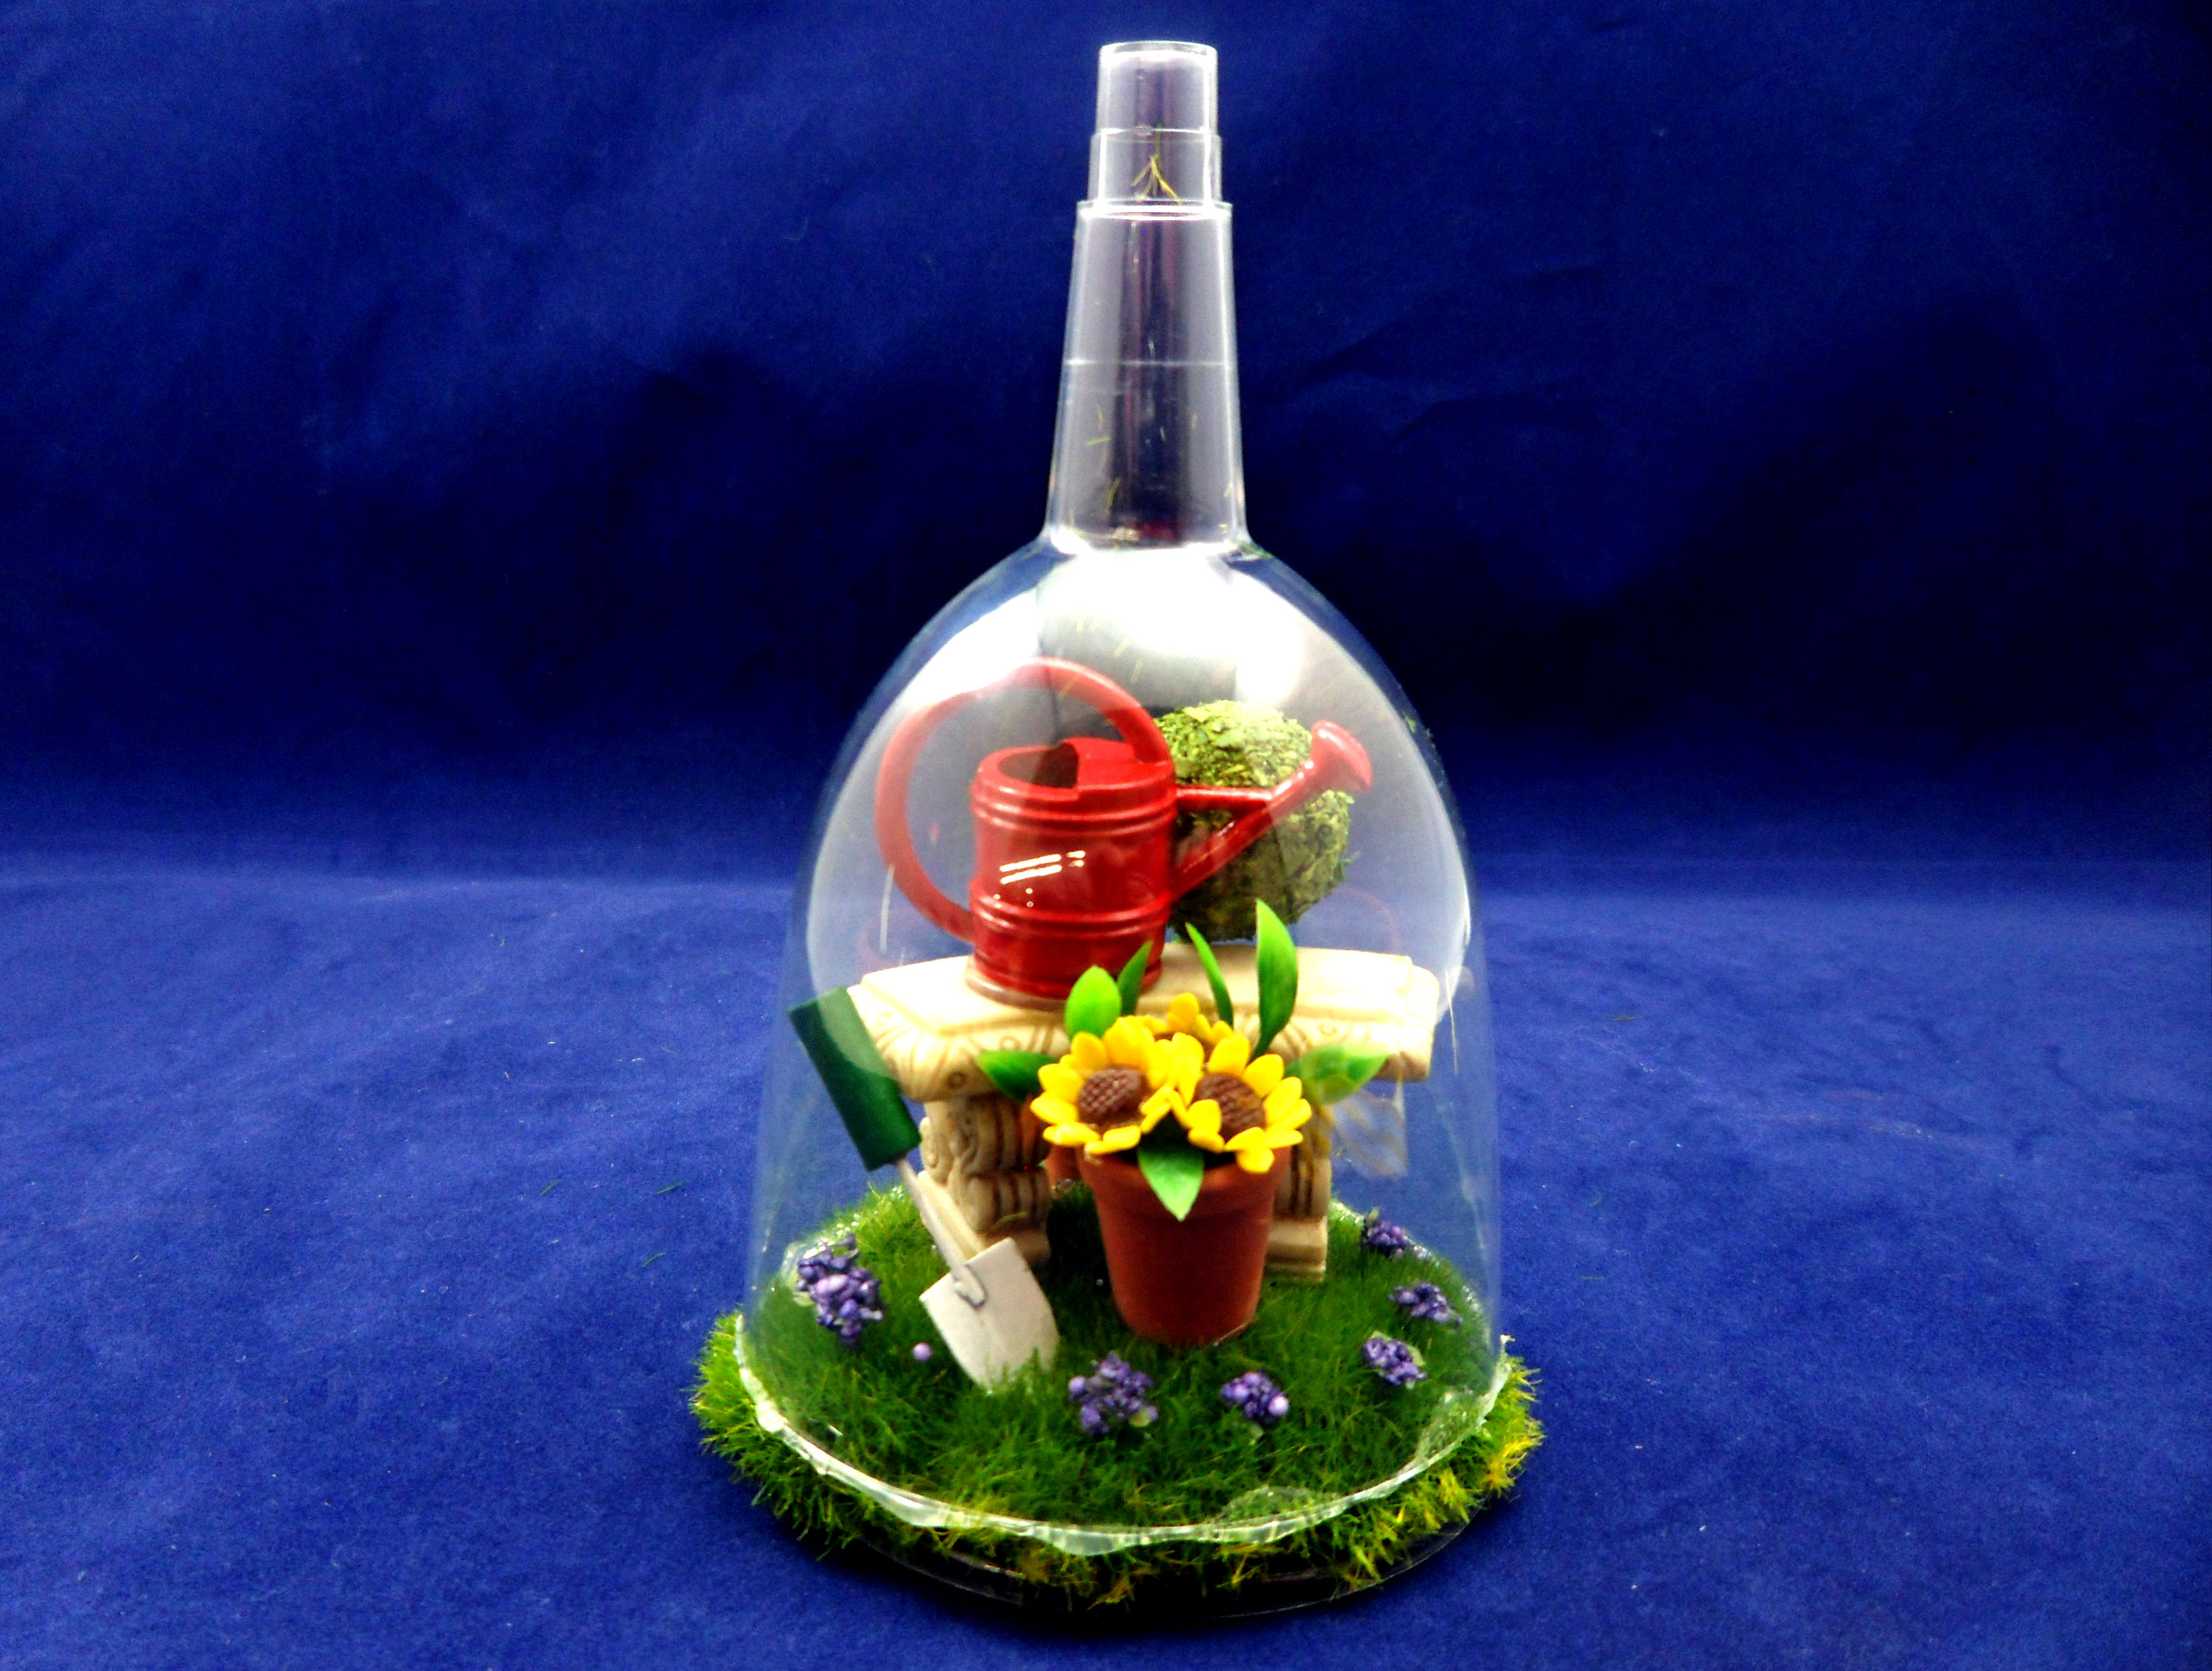
Step 4: Insert the wine glass upside down and cover edges with hot glue. Glue the upside down wine glass to the base and let it dry completely.
Step 5: Tie a ribbon around the top of the stem sticking up. Make sure you leave a loop for hanging.
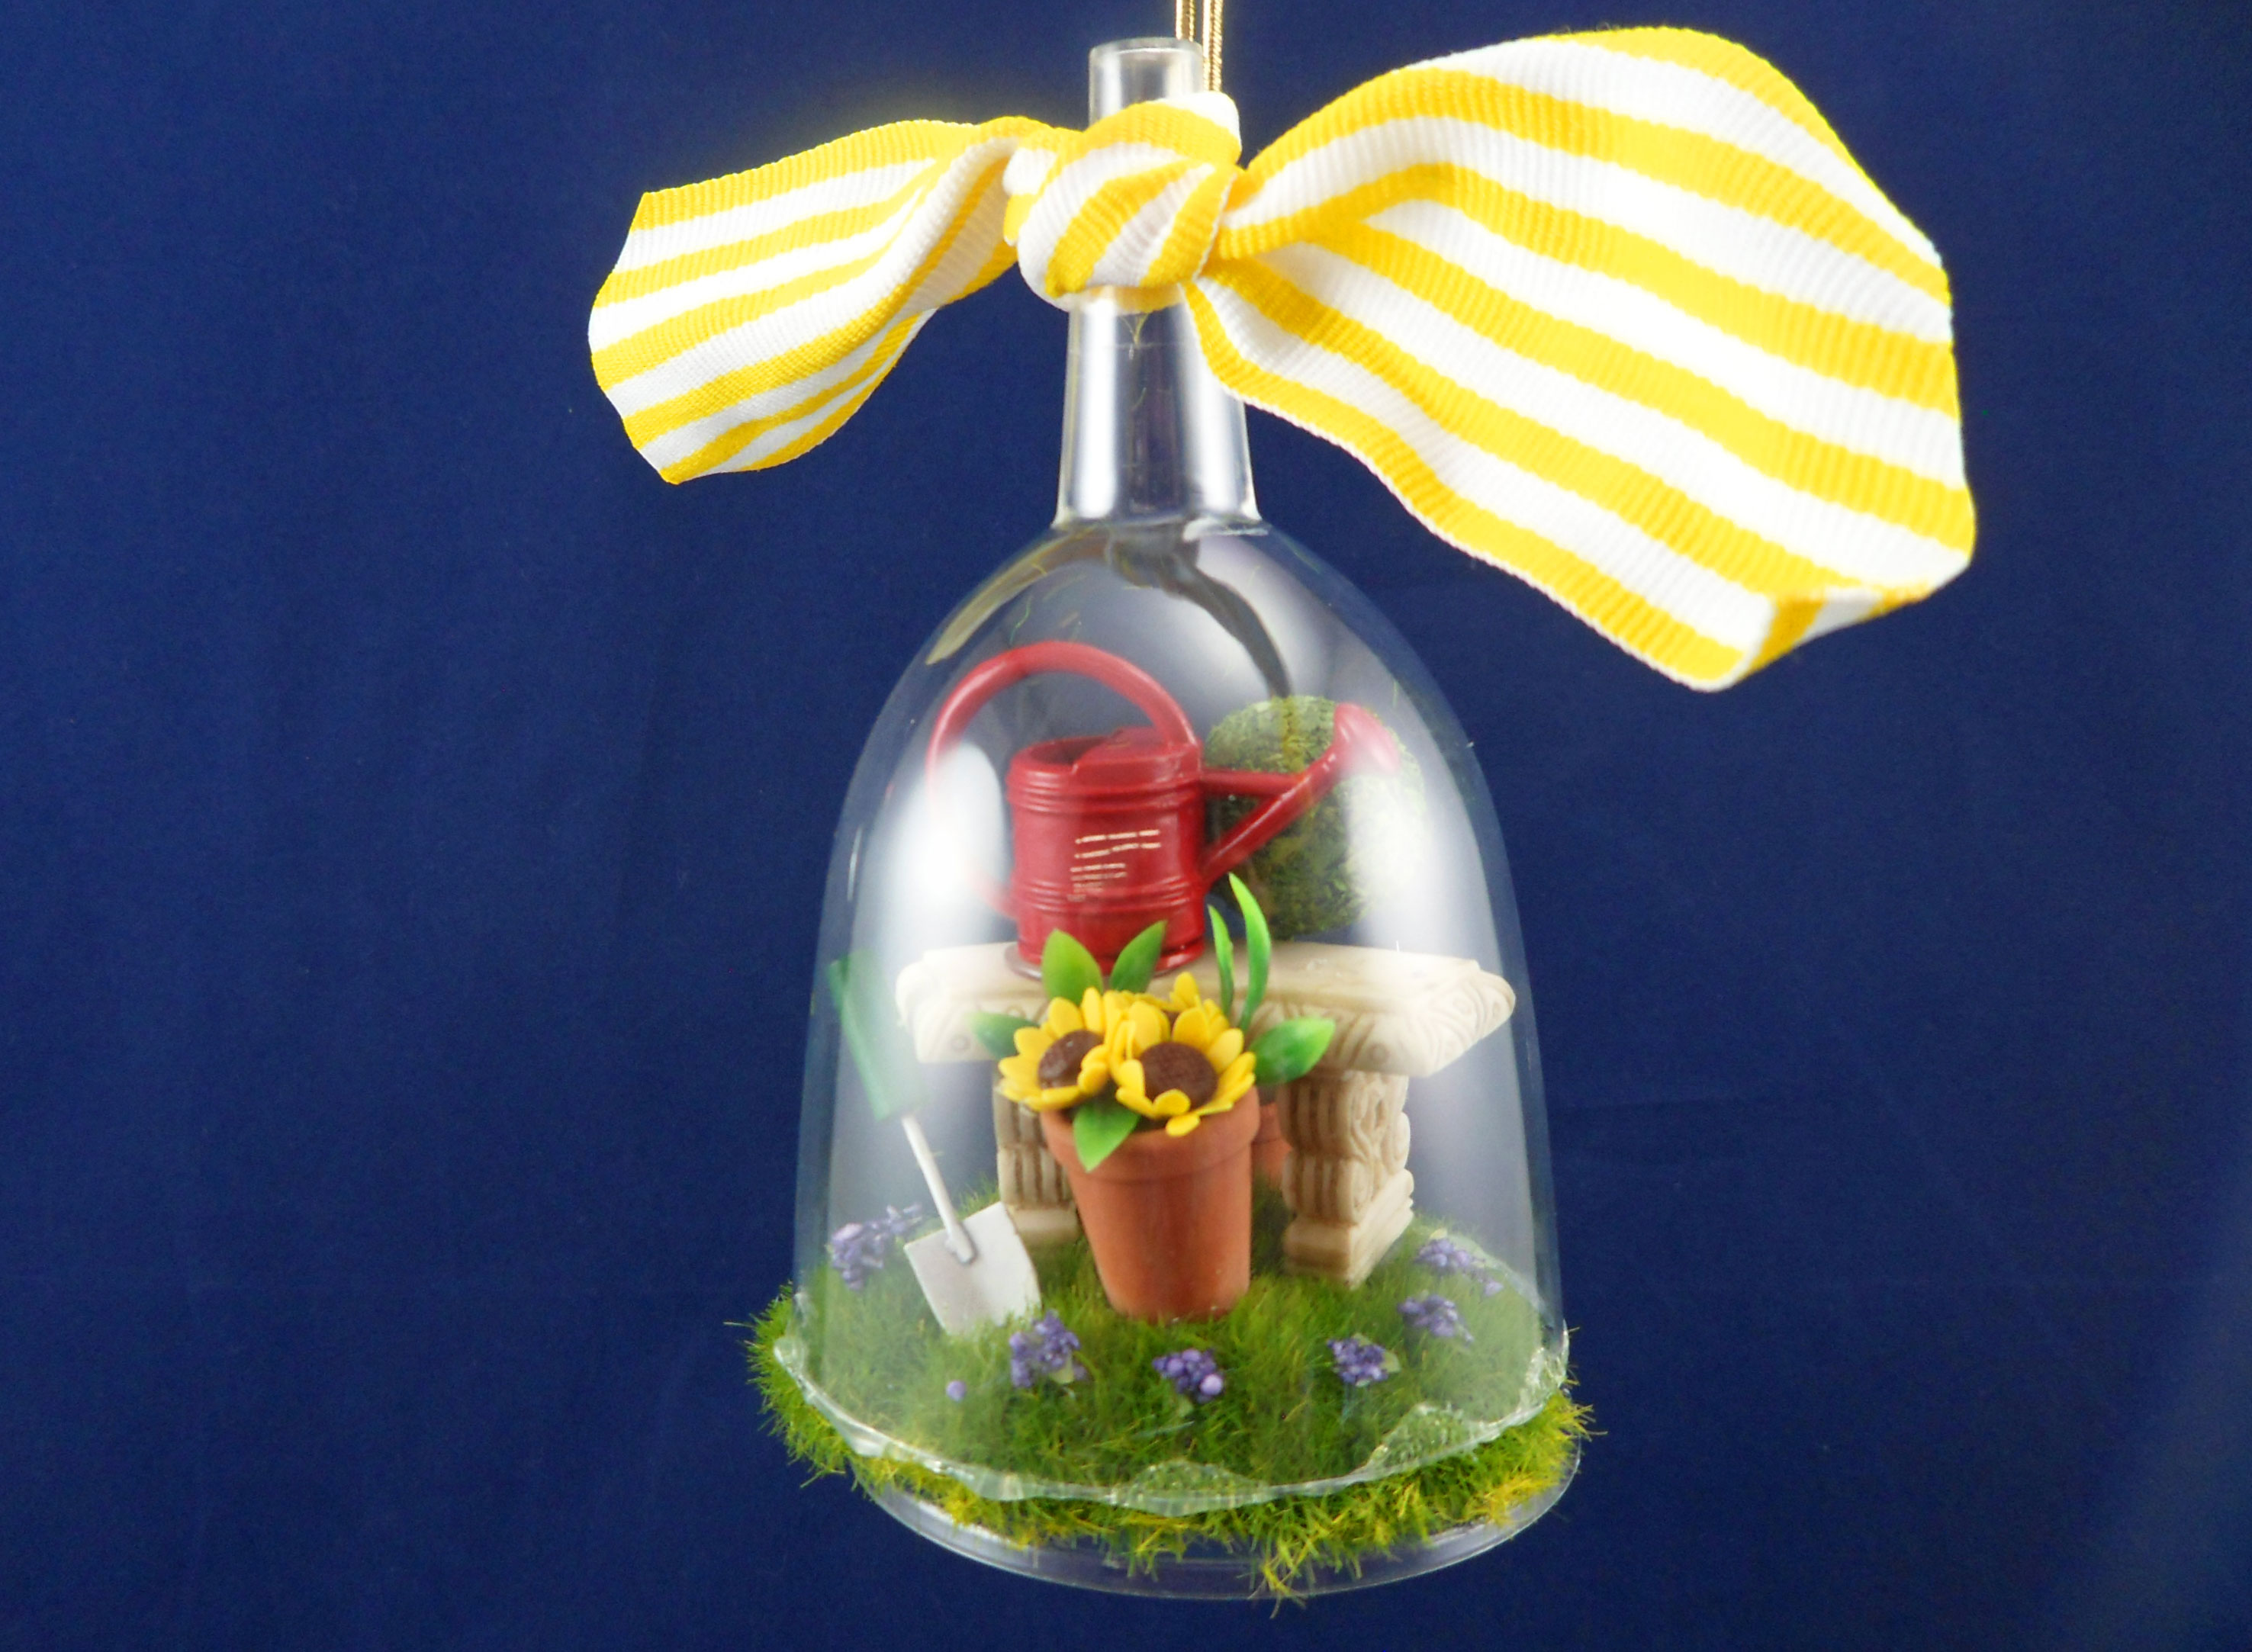
That’s it! Now you have your very own miniature cloche display that you can hang anywhere in your home, or hang from an ornament stand. It’s so easy and fun to do because you pick the scene and create spring decorations that are guaranteed to make you smile.
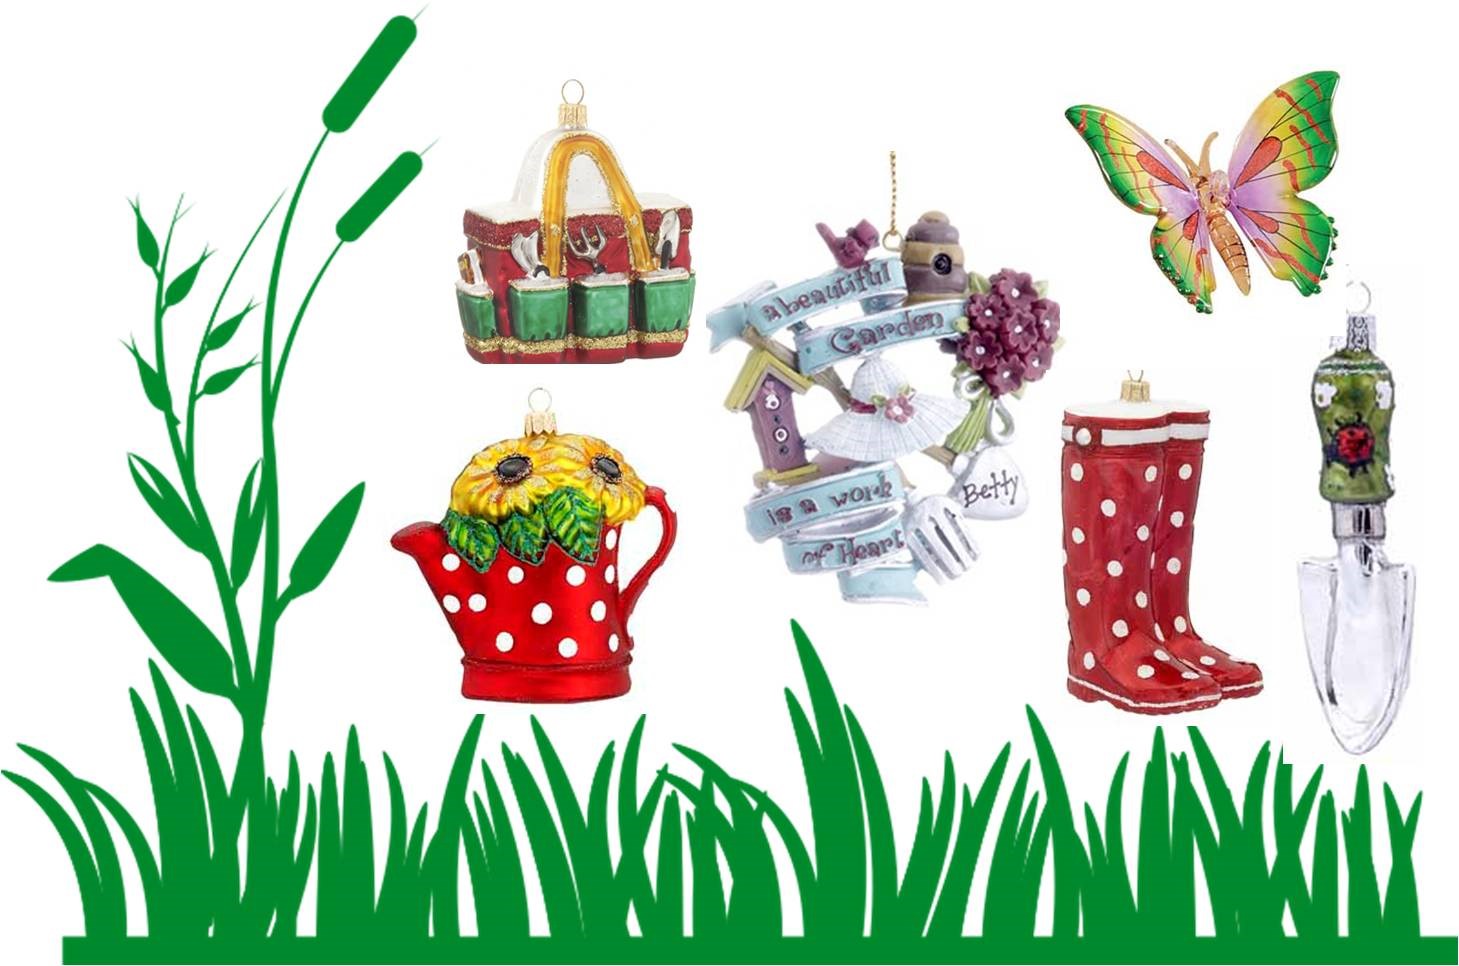
Not crafty but love spring decorations? Check out our selection of Personalized Hobby Ornaments that include gardening! Gardeny