Our DIY Pine Cone Elf Ornaments are Perfect Crafts For Fall!
Posted November 15, 2018 in DIY (Crafts) by Dianne Weller
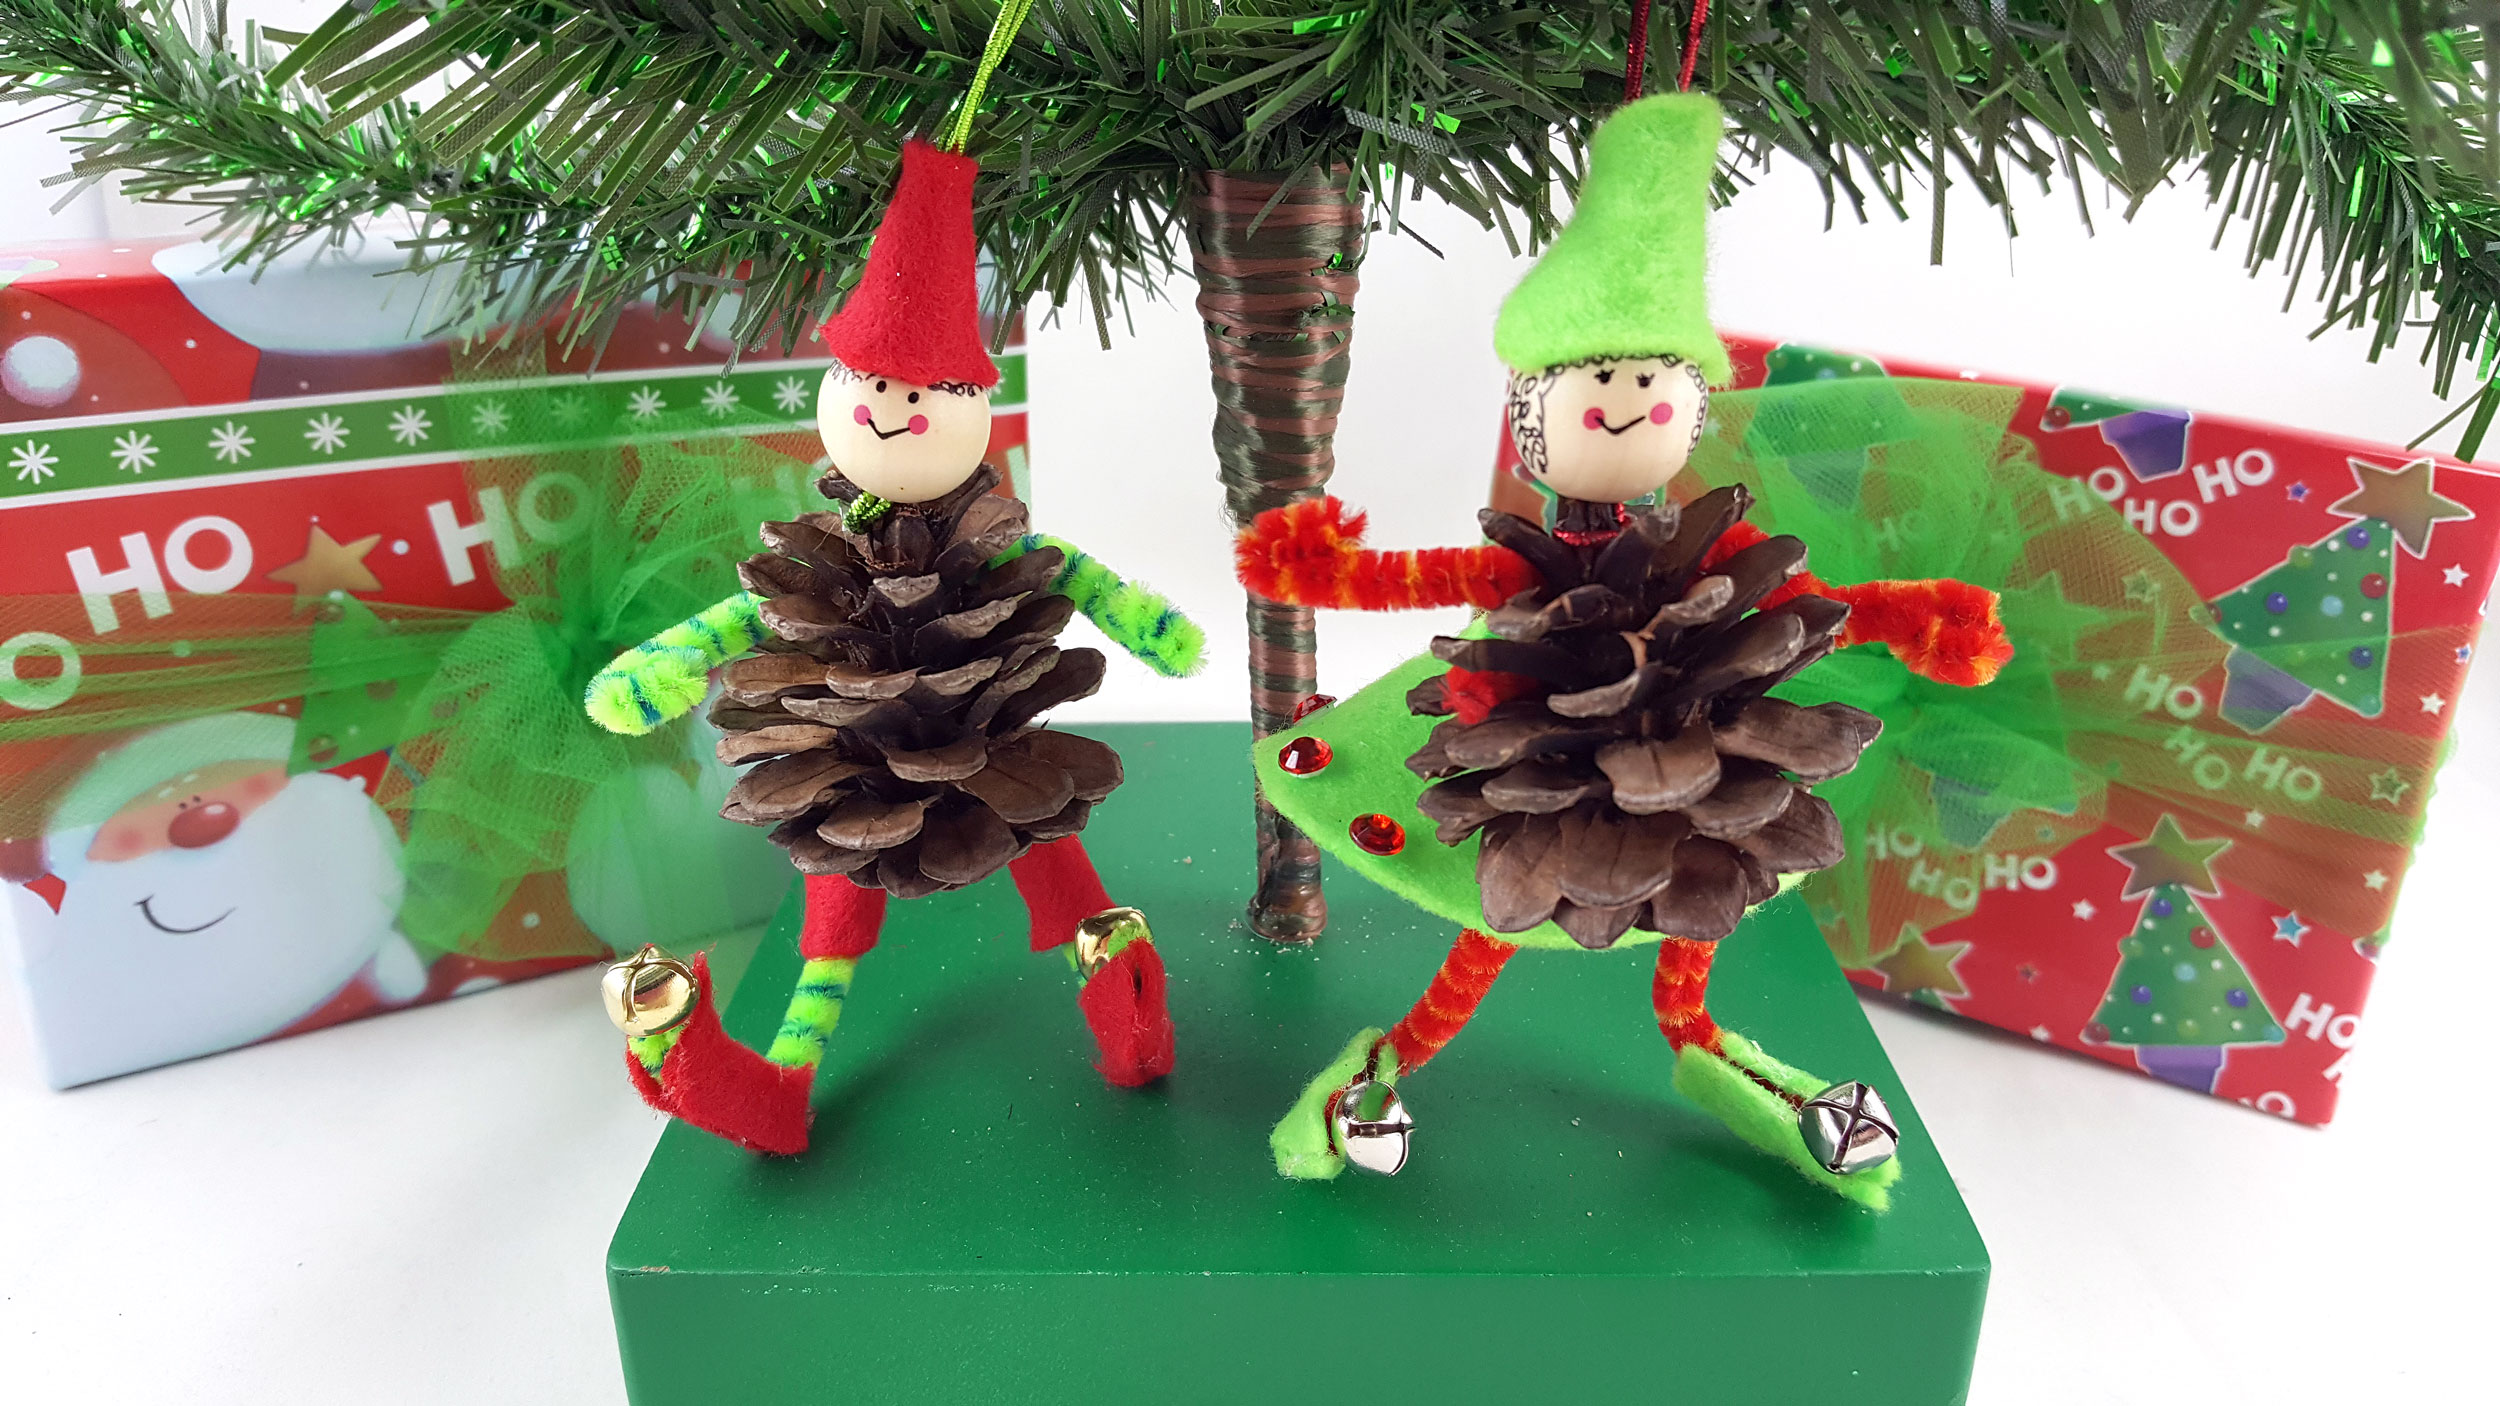
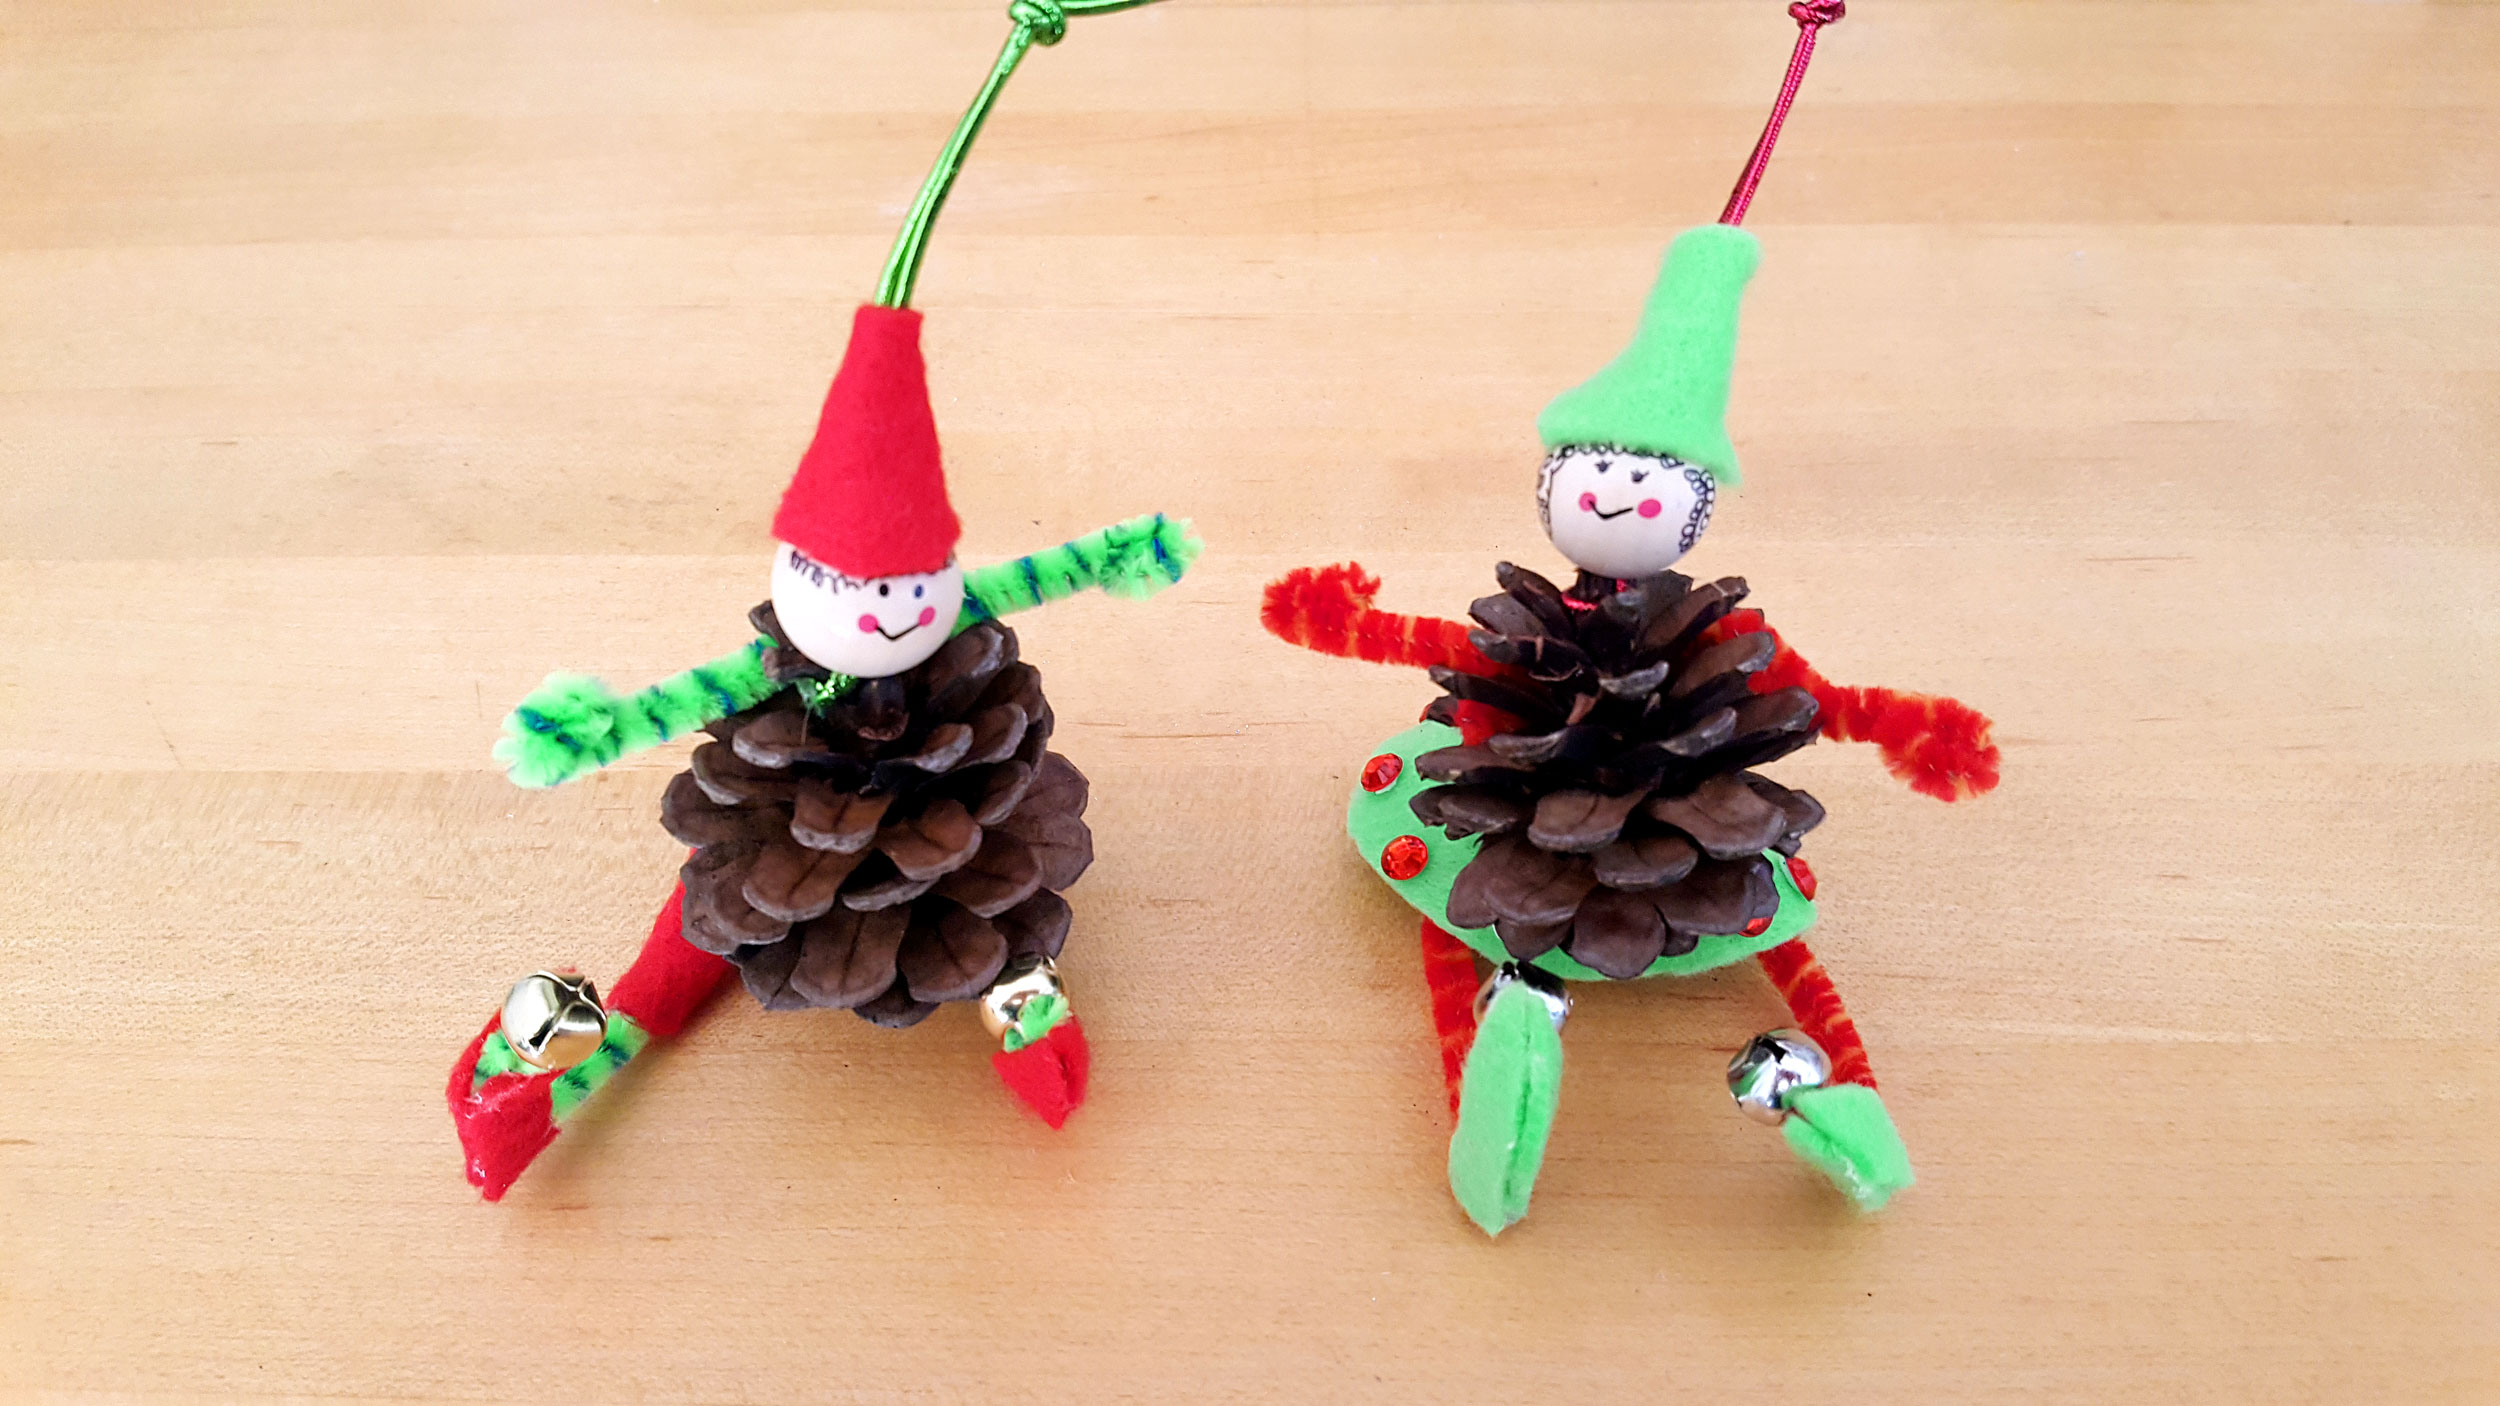
Pine cones are in abundance in the fall and it is easy to pick them off the ground to use in Pine Cone Crafts. These adorable little Christmas Elf Ornaments are fun to make and will bring joy to your holiday decorating. These Santa helpers look like they are straight from the North Pole and can be made into boys or girls.
These happy elf ornaments can be either boys or girls. Here we will show you how to make one of each. We used Christmas holiday colors in red and green, but feel free to make your elf ornaments any colors that you’d like. Grandparents, pine cone crafts such as these are a great way to give a gift to each one of your grandchildren, who will love their unique, personal elf.

How To Create Elf Pine Cone Craft Ornaments
Because every pine cone is unique, no two of your elf ornaments will be the same. Pine cone crafts are easy to work with and because we use pipe cleaners and felt, all you will need is a little bit of glue.
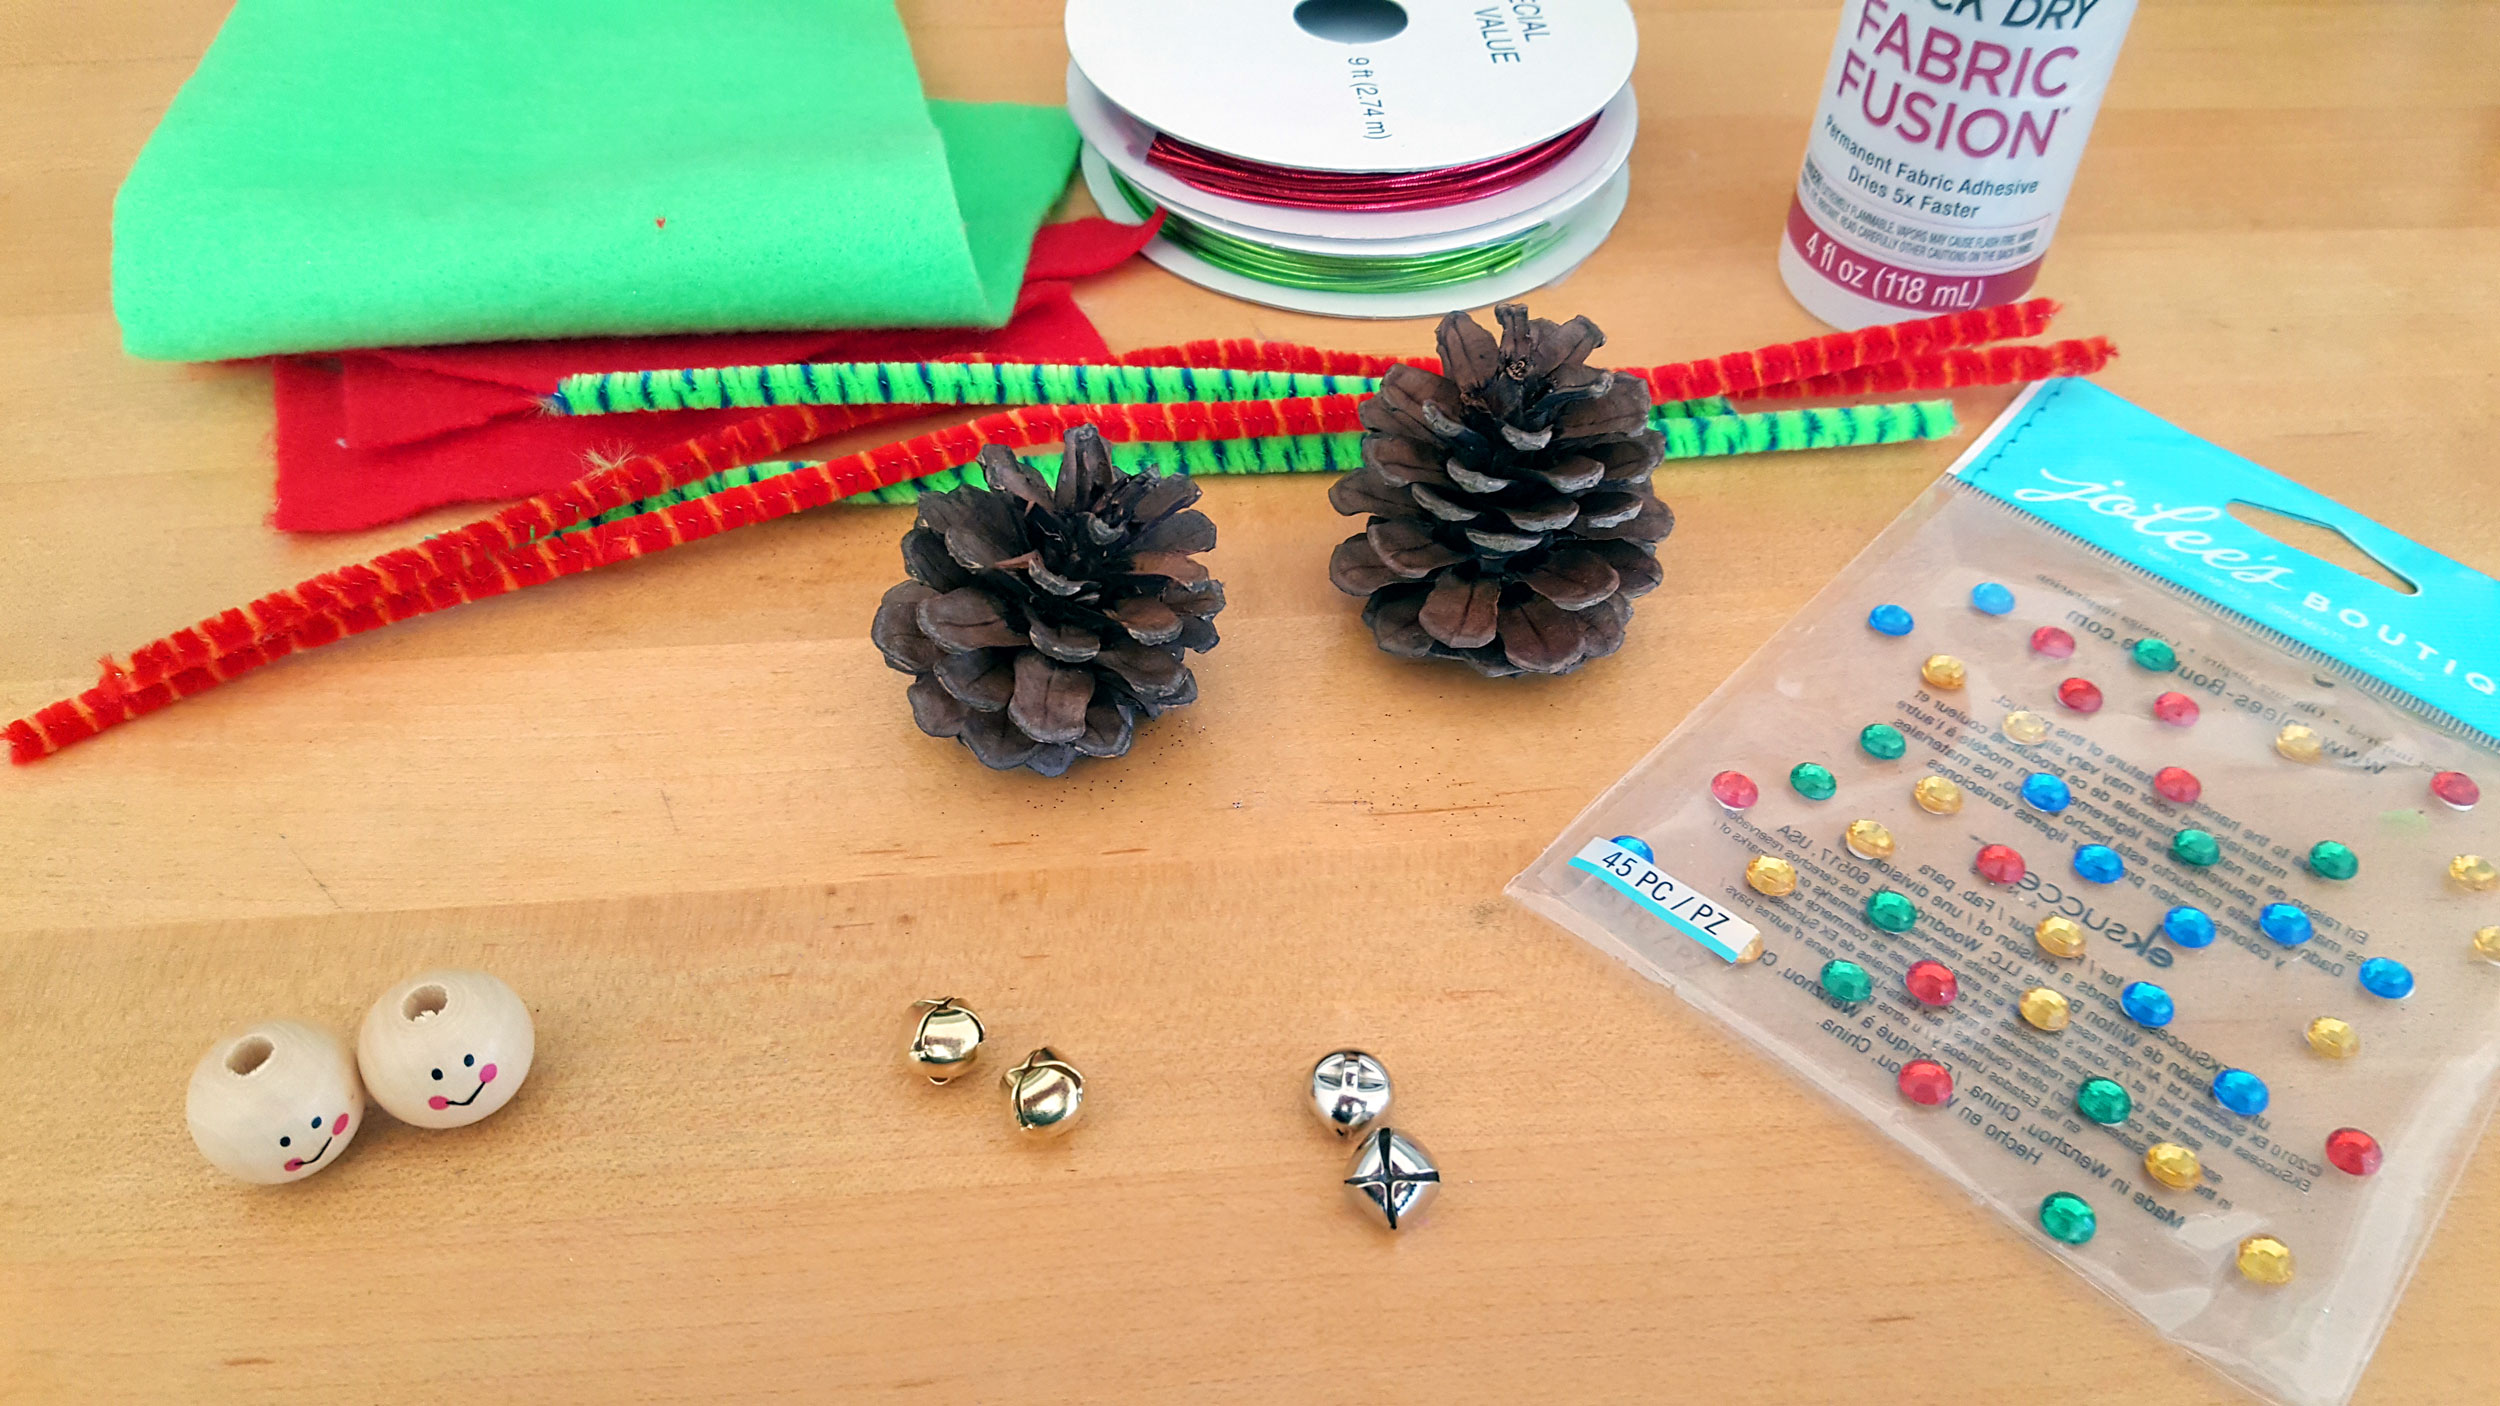
Supplies:
- Pine cones
- Pipe cleaners
- Red felt
- Green felt
- Scissors
- Fabric glue
- Wooden beads with faces (if you can’t find ones with faces, you can draw them on)
- Small jingle bells
- Jeweled embellishments
- Ribbon for hanging
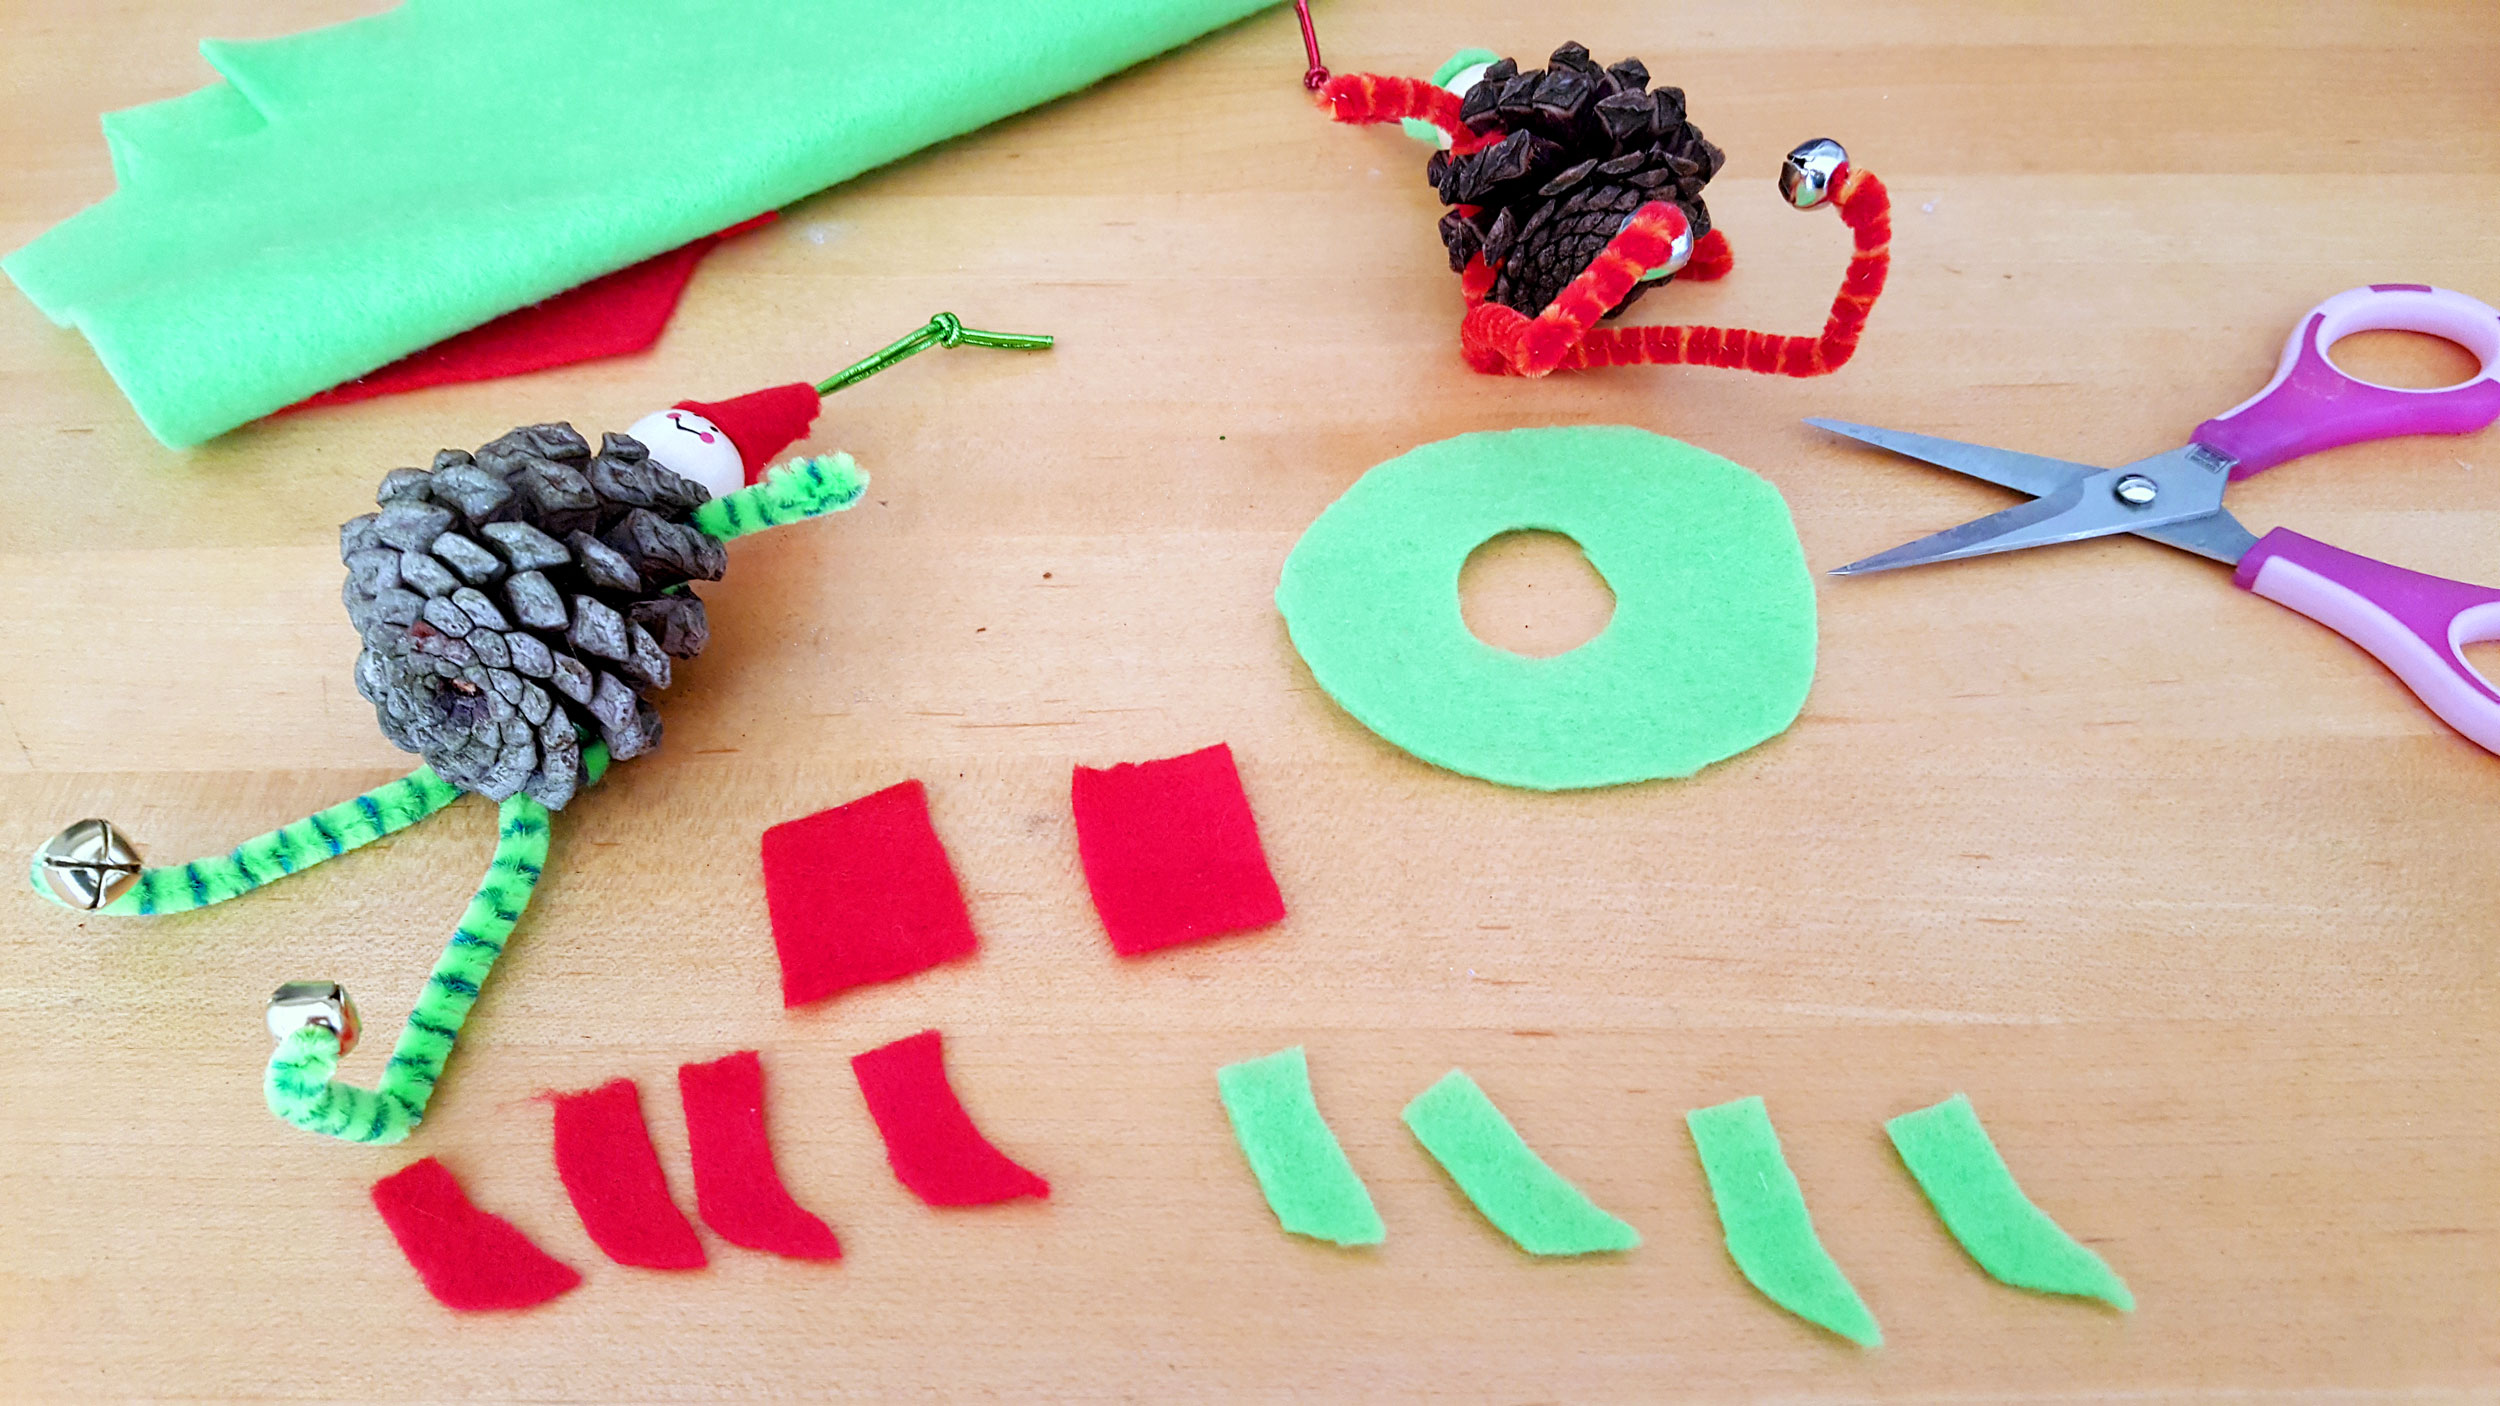
Elf Pine Cone Craft Ornaments Steps 1 – 5
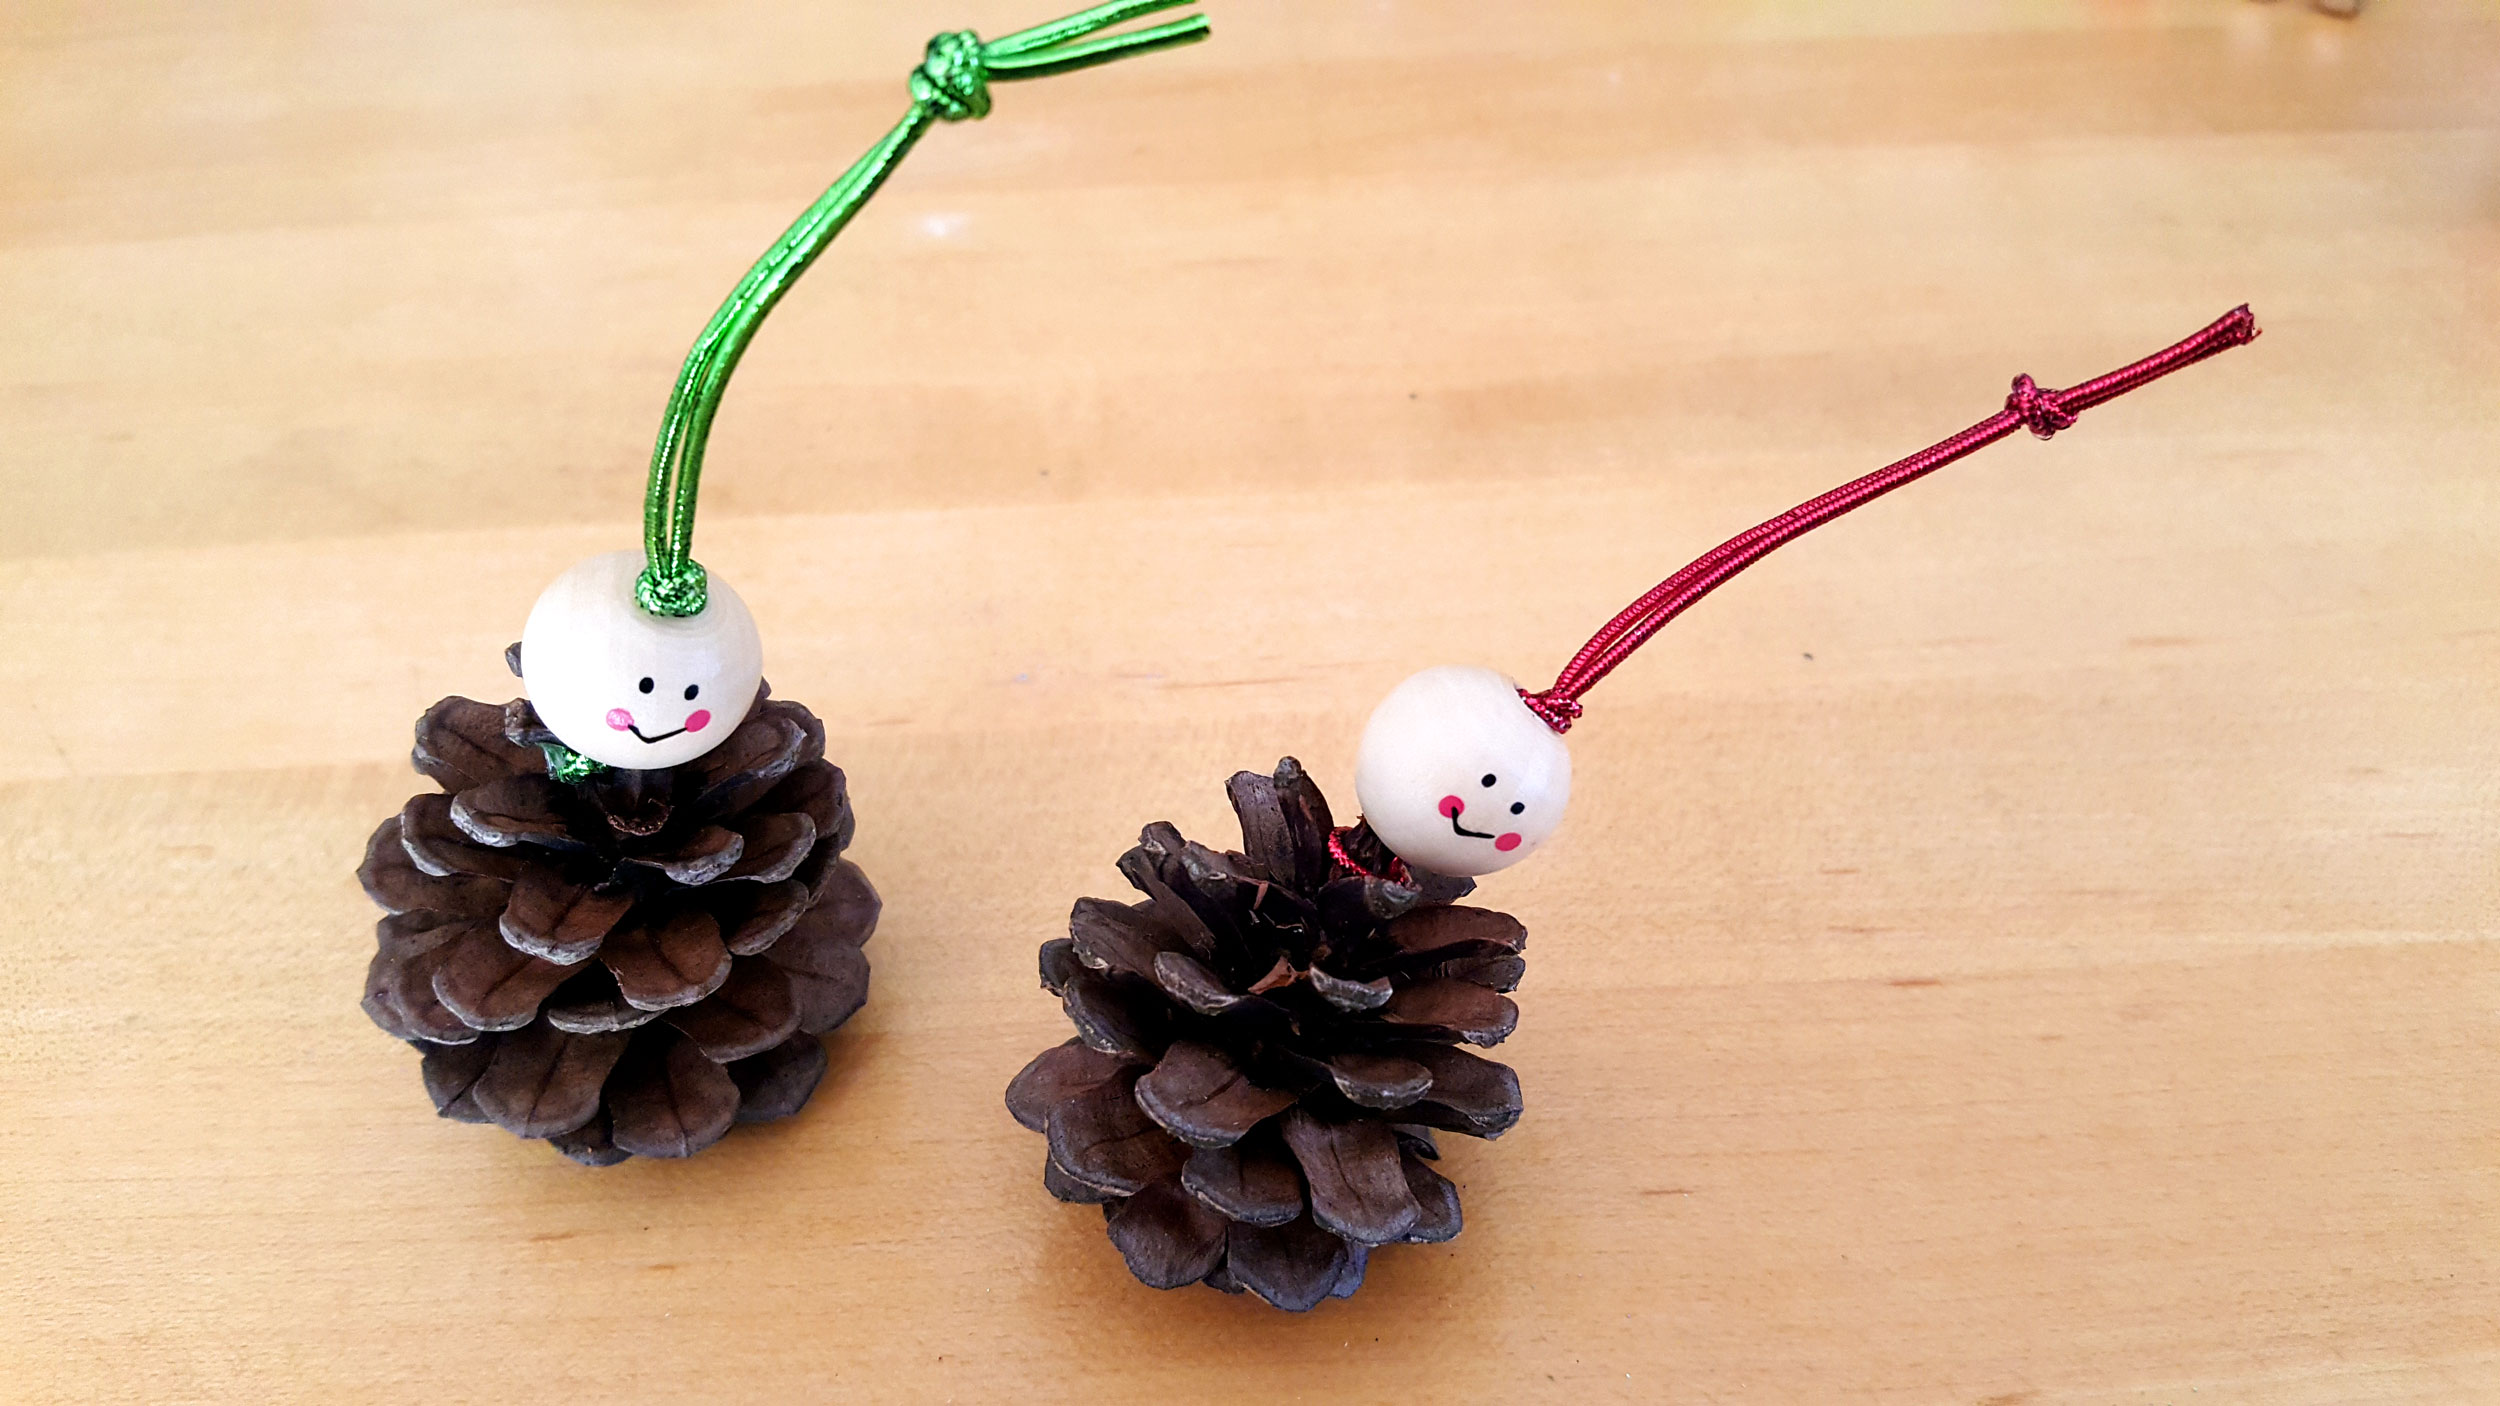
Step 1: Cut a strand of ribbon or string and then tie it around the stem in the top of the pine cone. Make a knot and to secure it. If needed, add a dab of glue to make sure it will hold when you hang the elf ornaments.
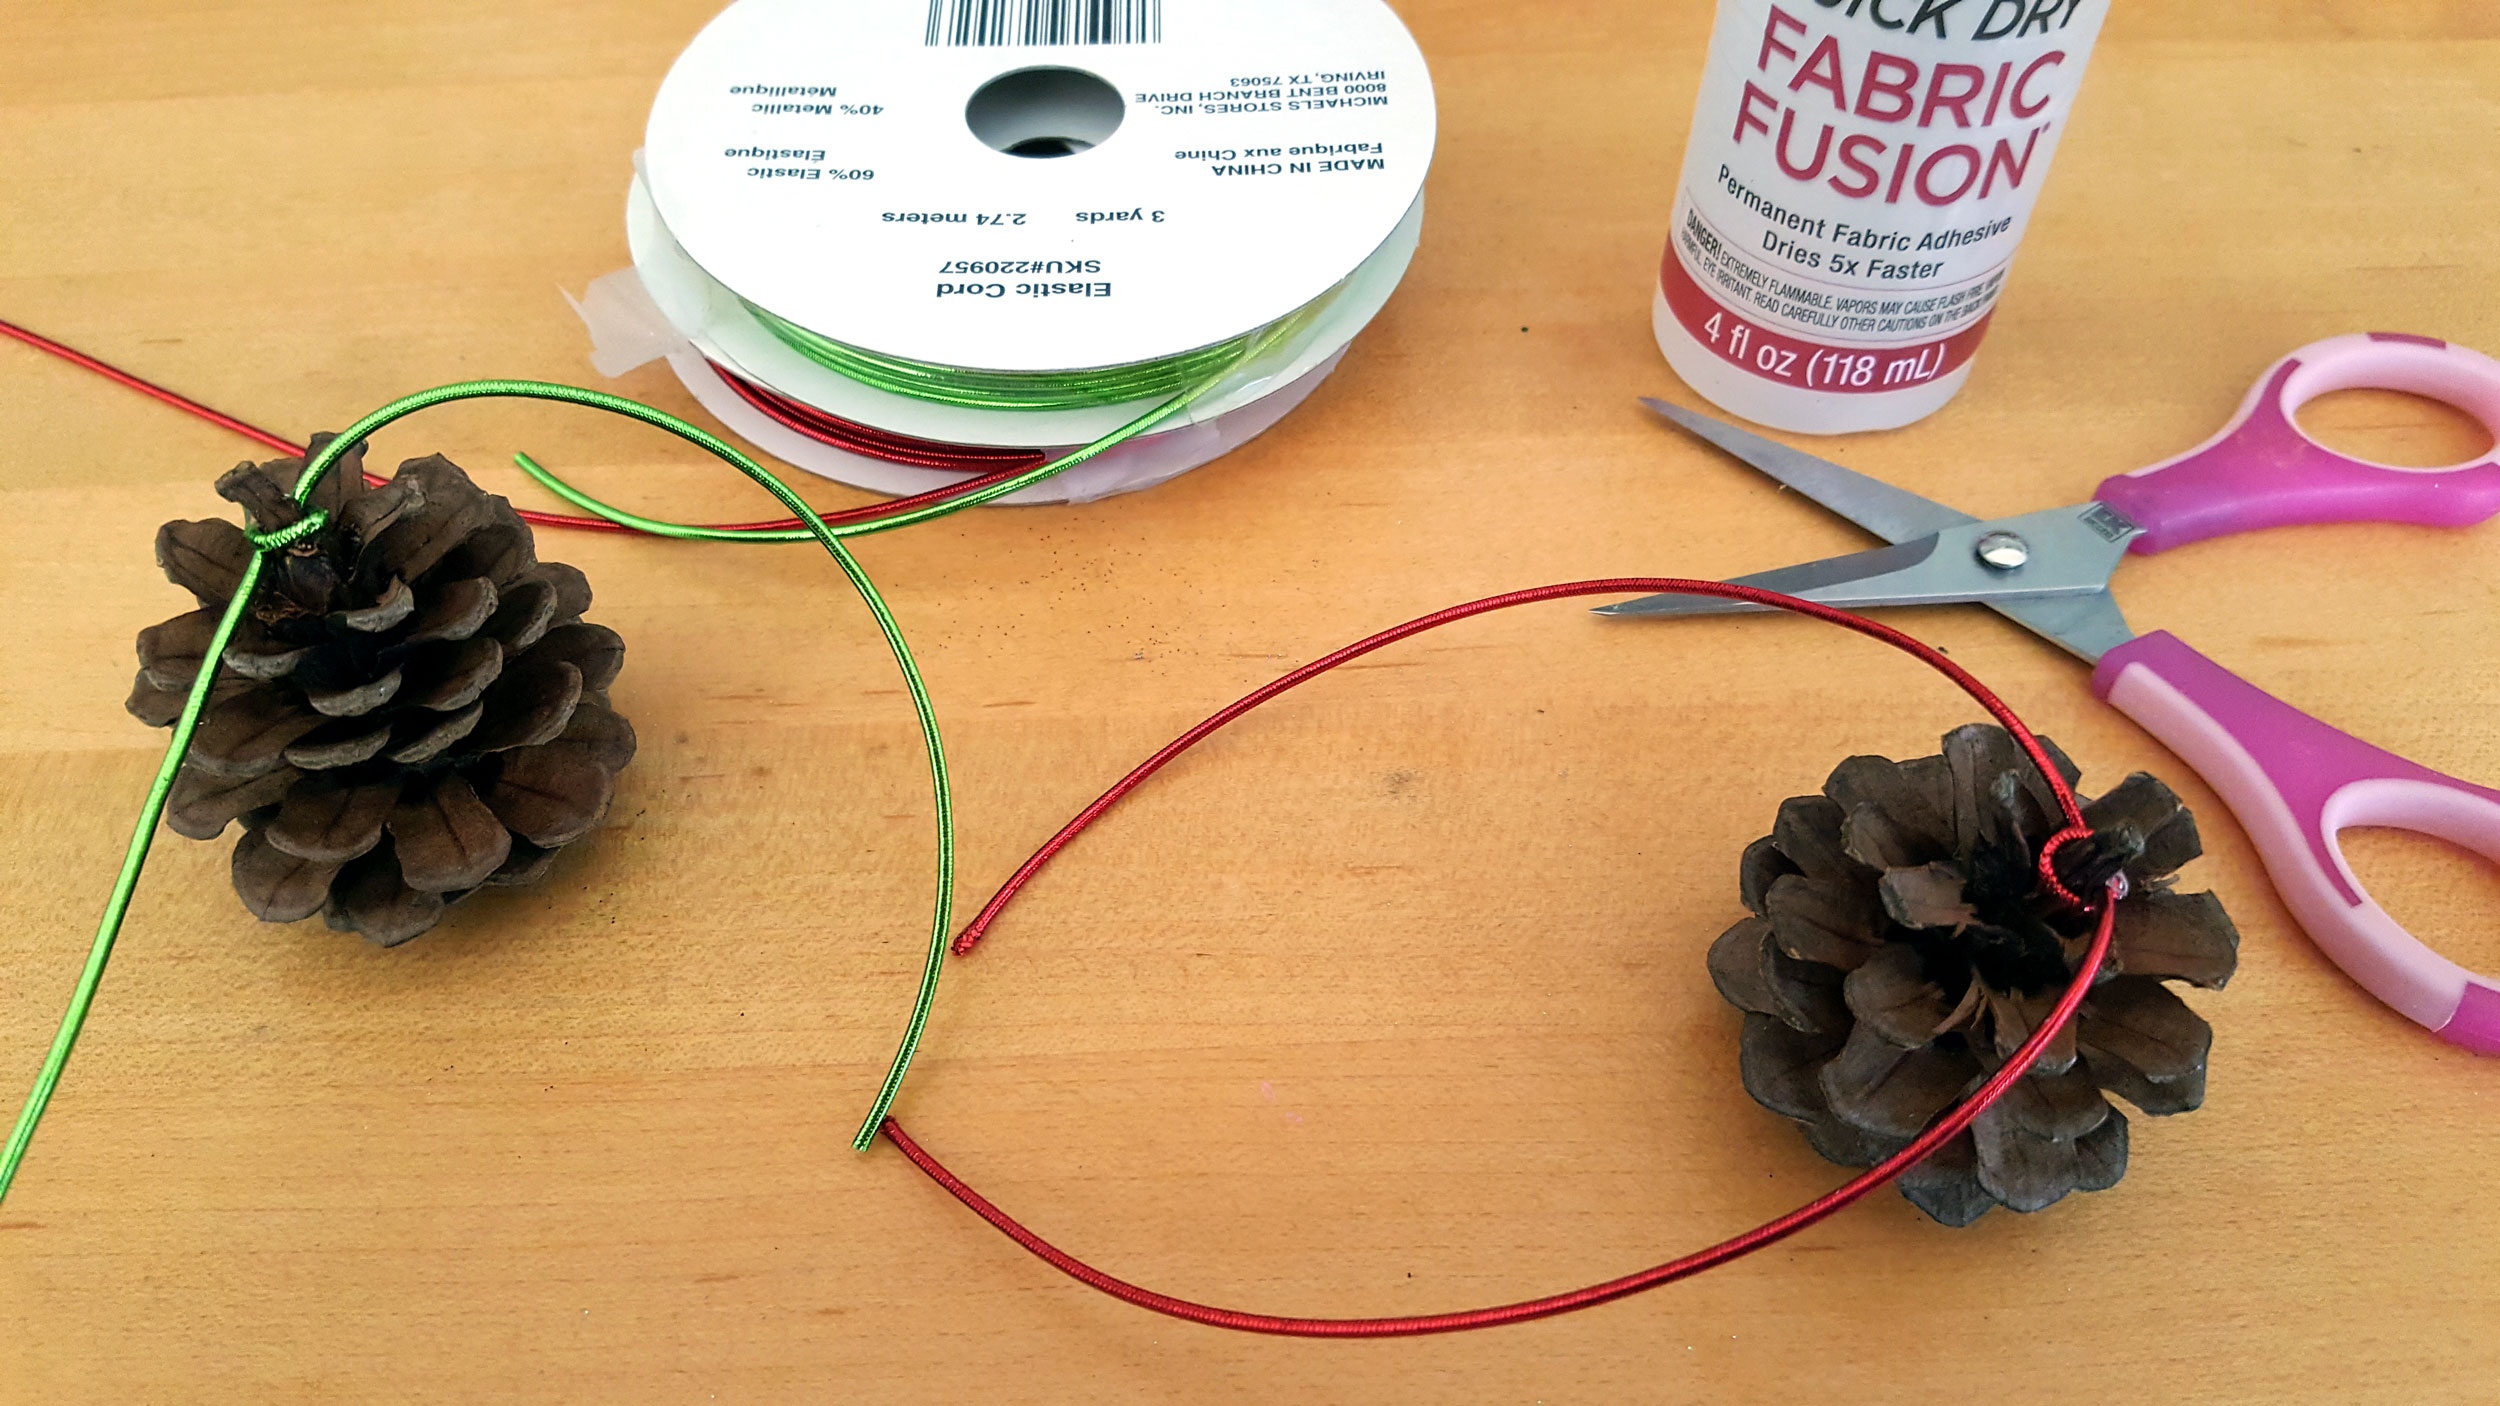
Step 2: Thread the head bead over the two ends of the string. Tie a knot as close to the head bead as you can get, then tie another knot at the top for hanging.
Step 3: Using scissors, cut two arms and two legs from the pipe cleaners.
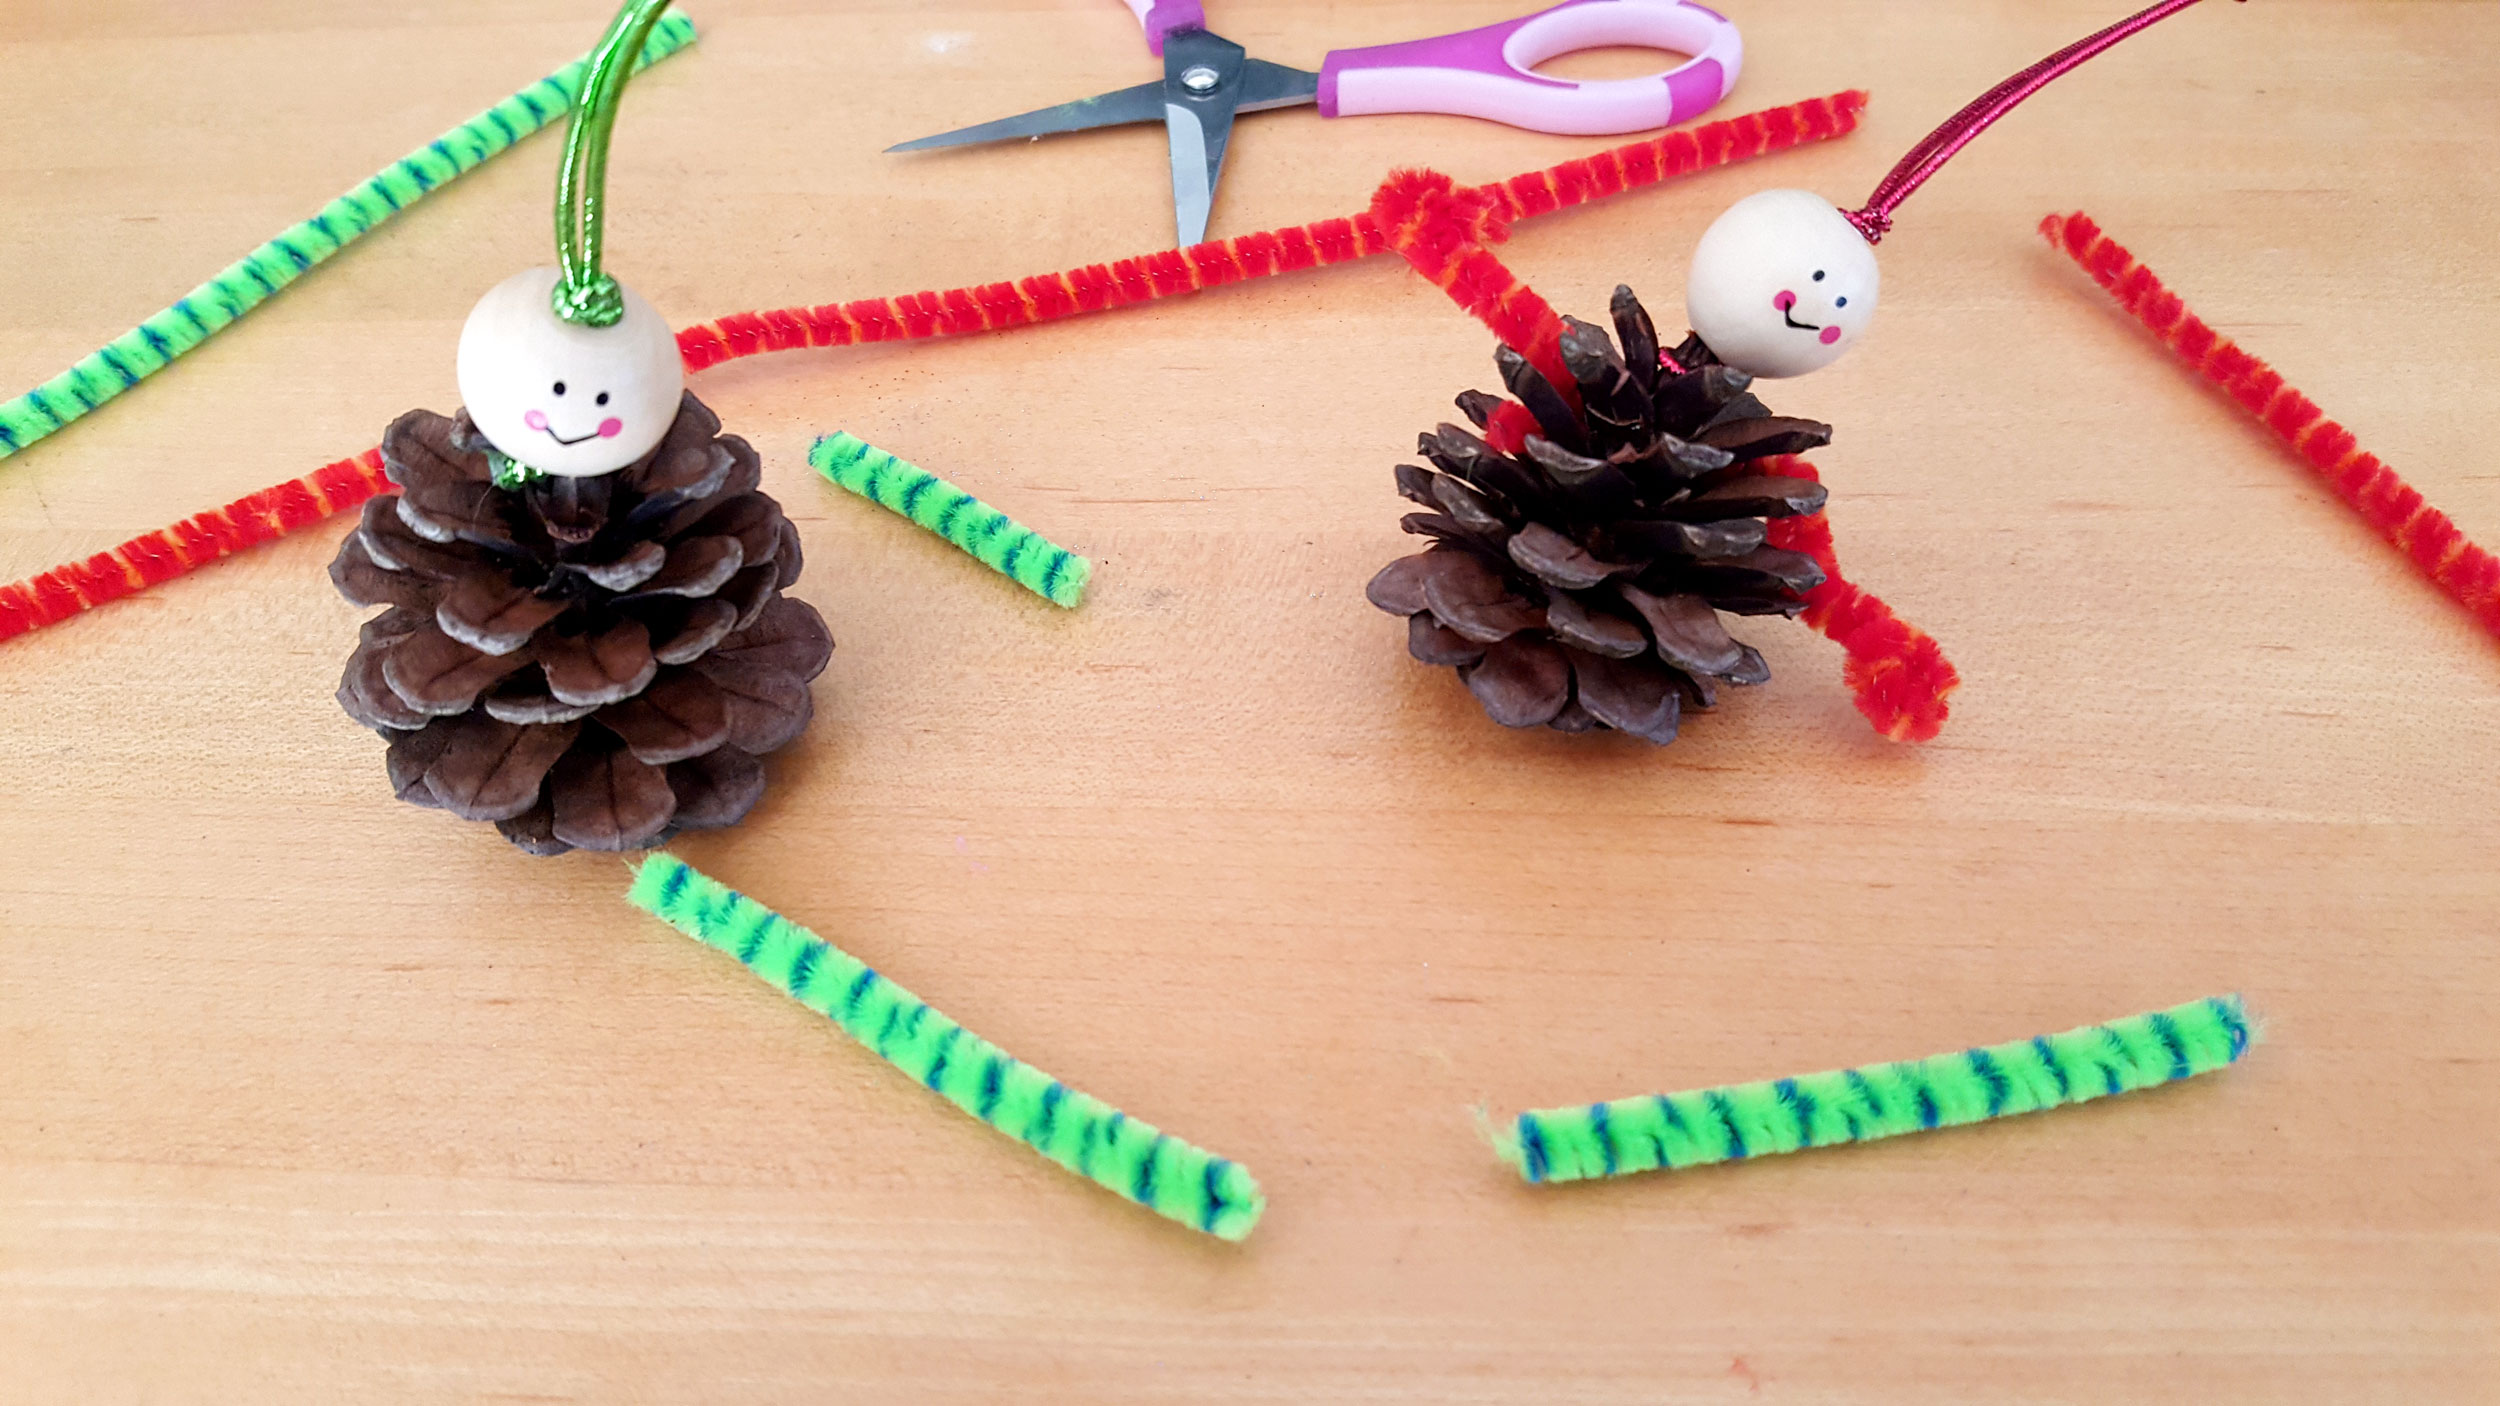
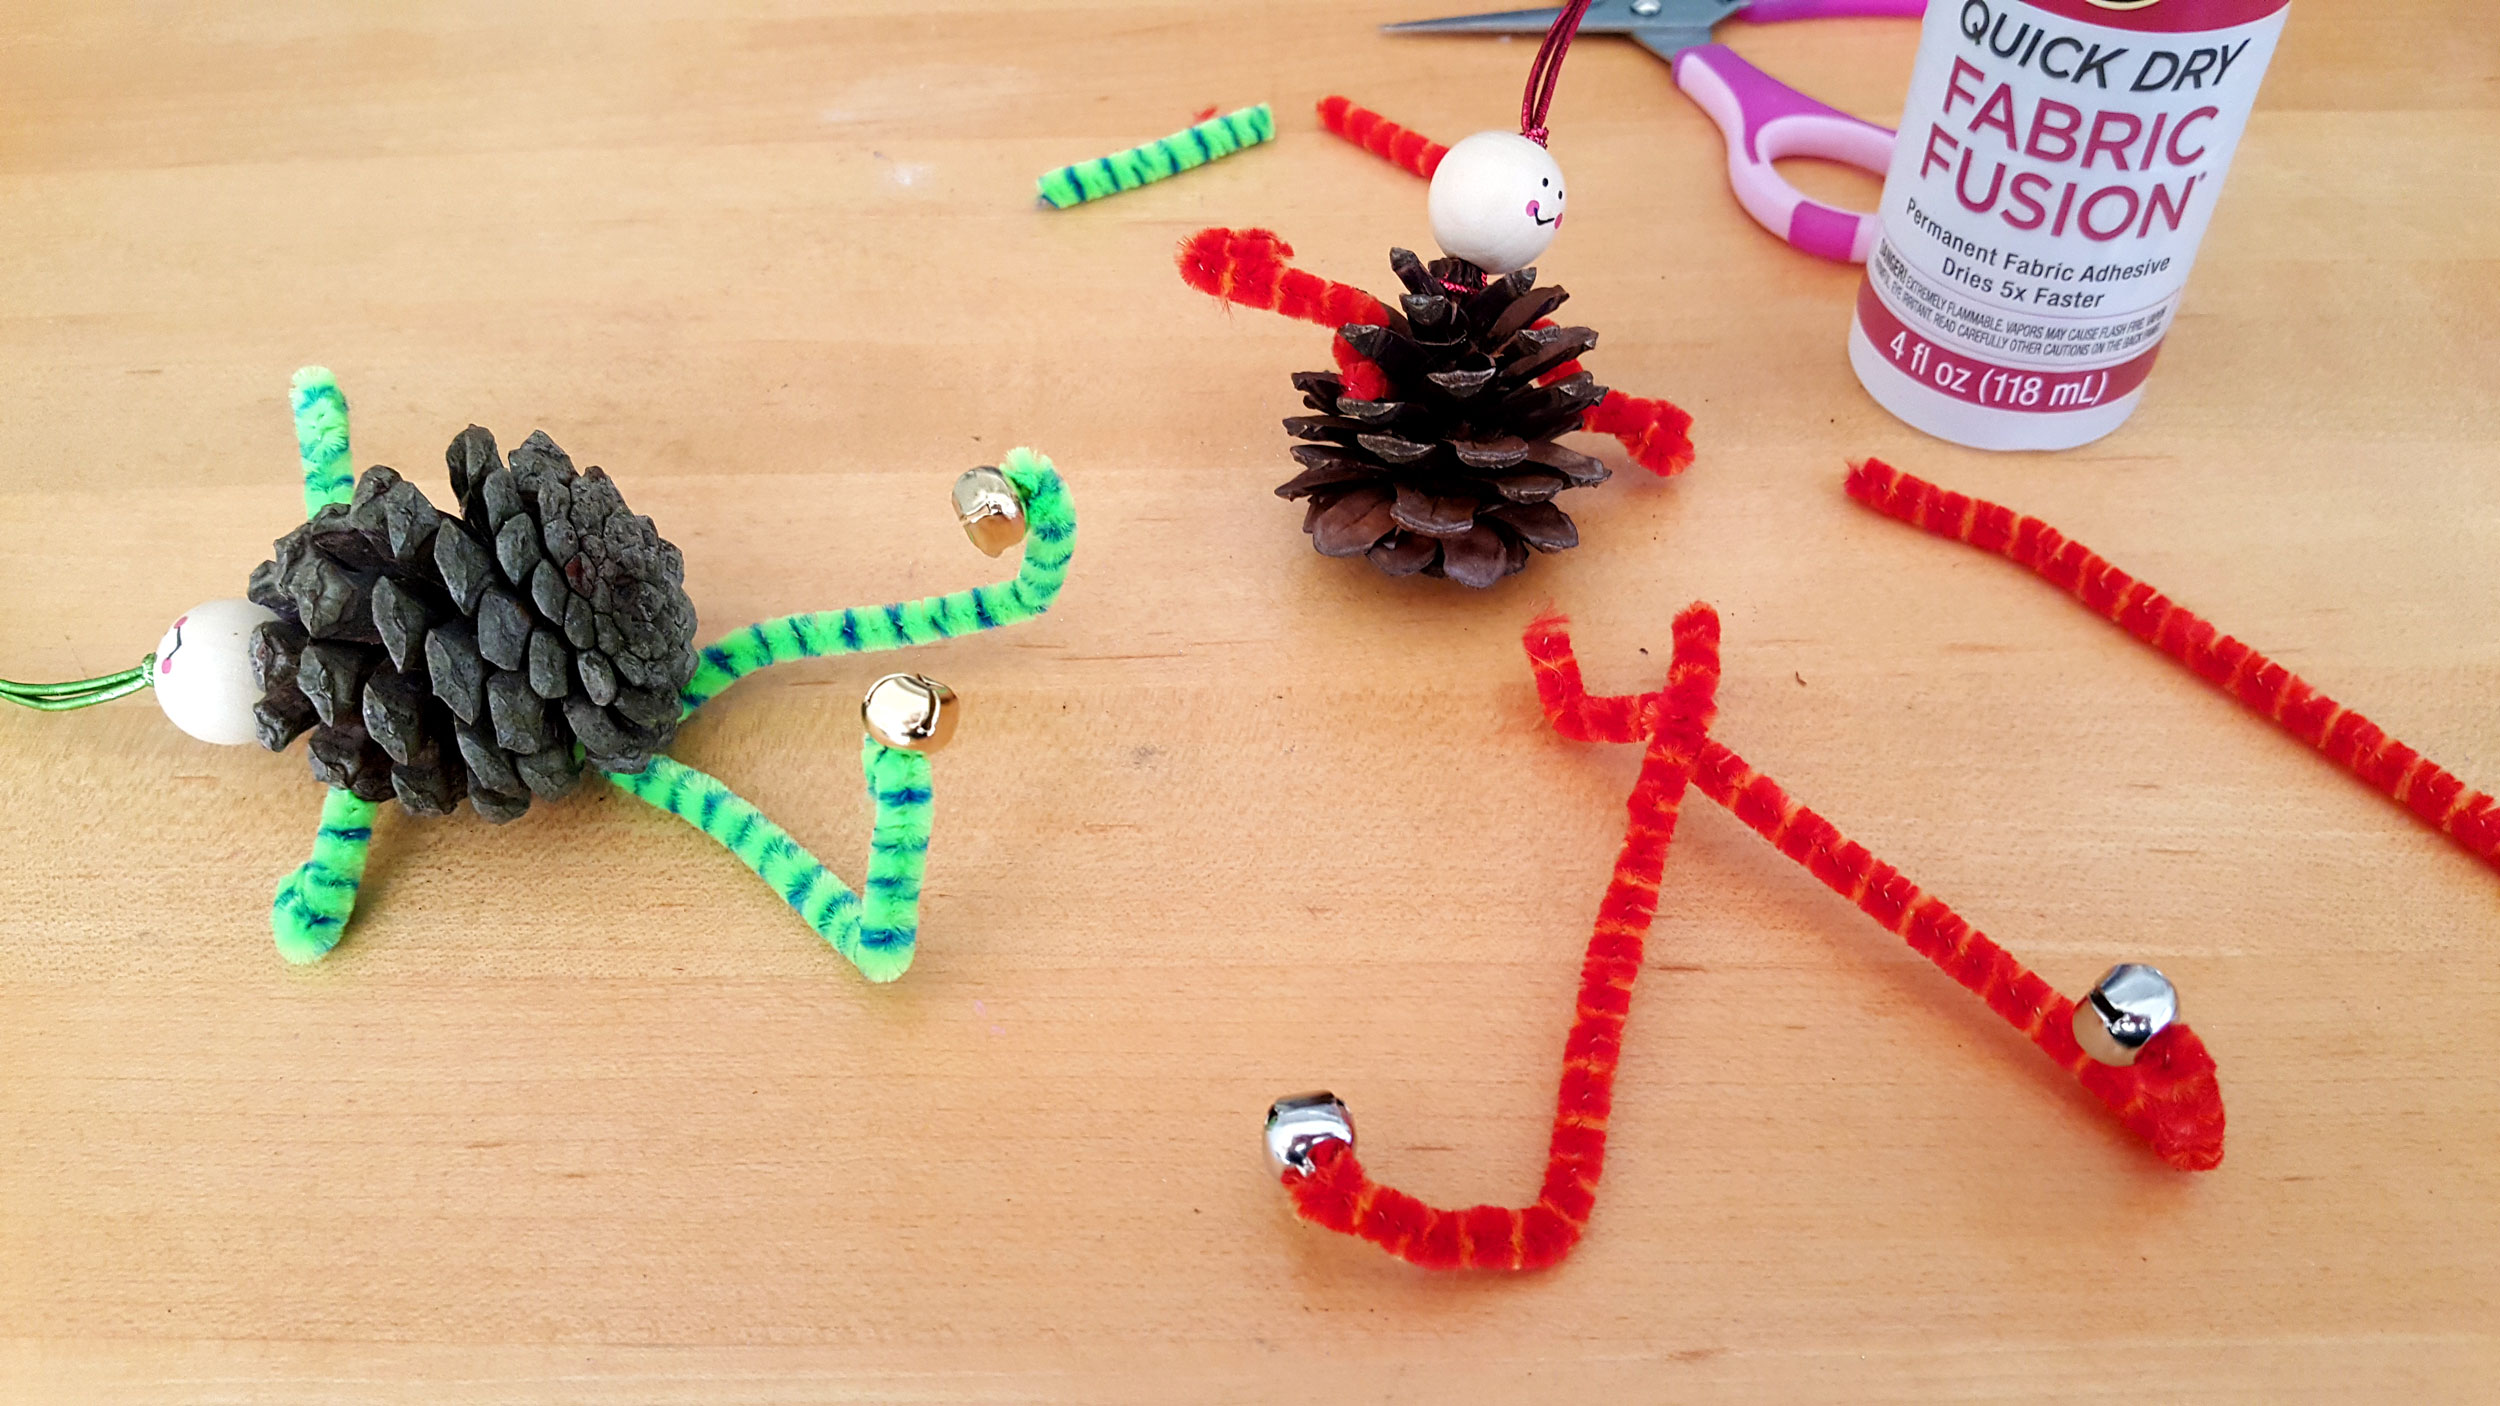
Step 4: Bend the ends of the arms to make hands and then bend the bottoms of the legs perpendicular to make the feet. Thread a jingle bell on each of the ends of the feet and bend the end of the wire around the jingle bell hook to secure. With some glue, attach the arms and legs to the back of the pine cone.
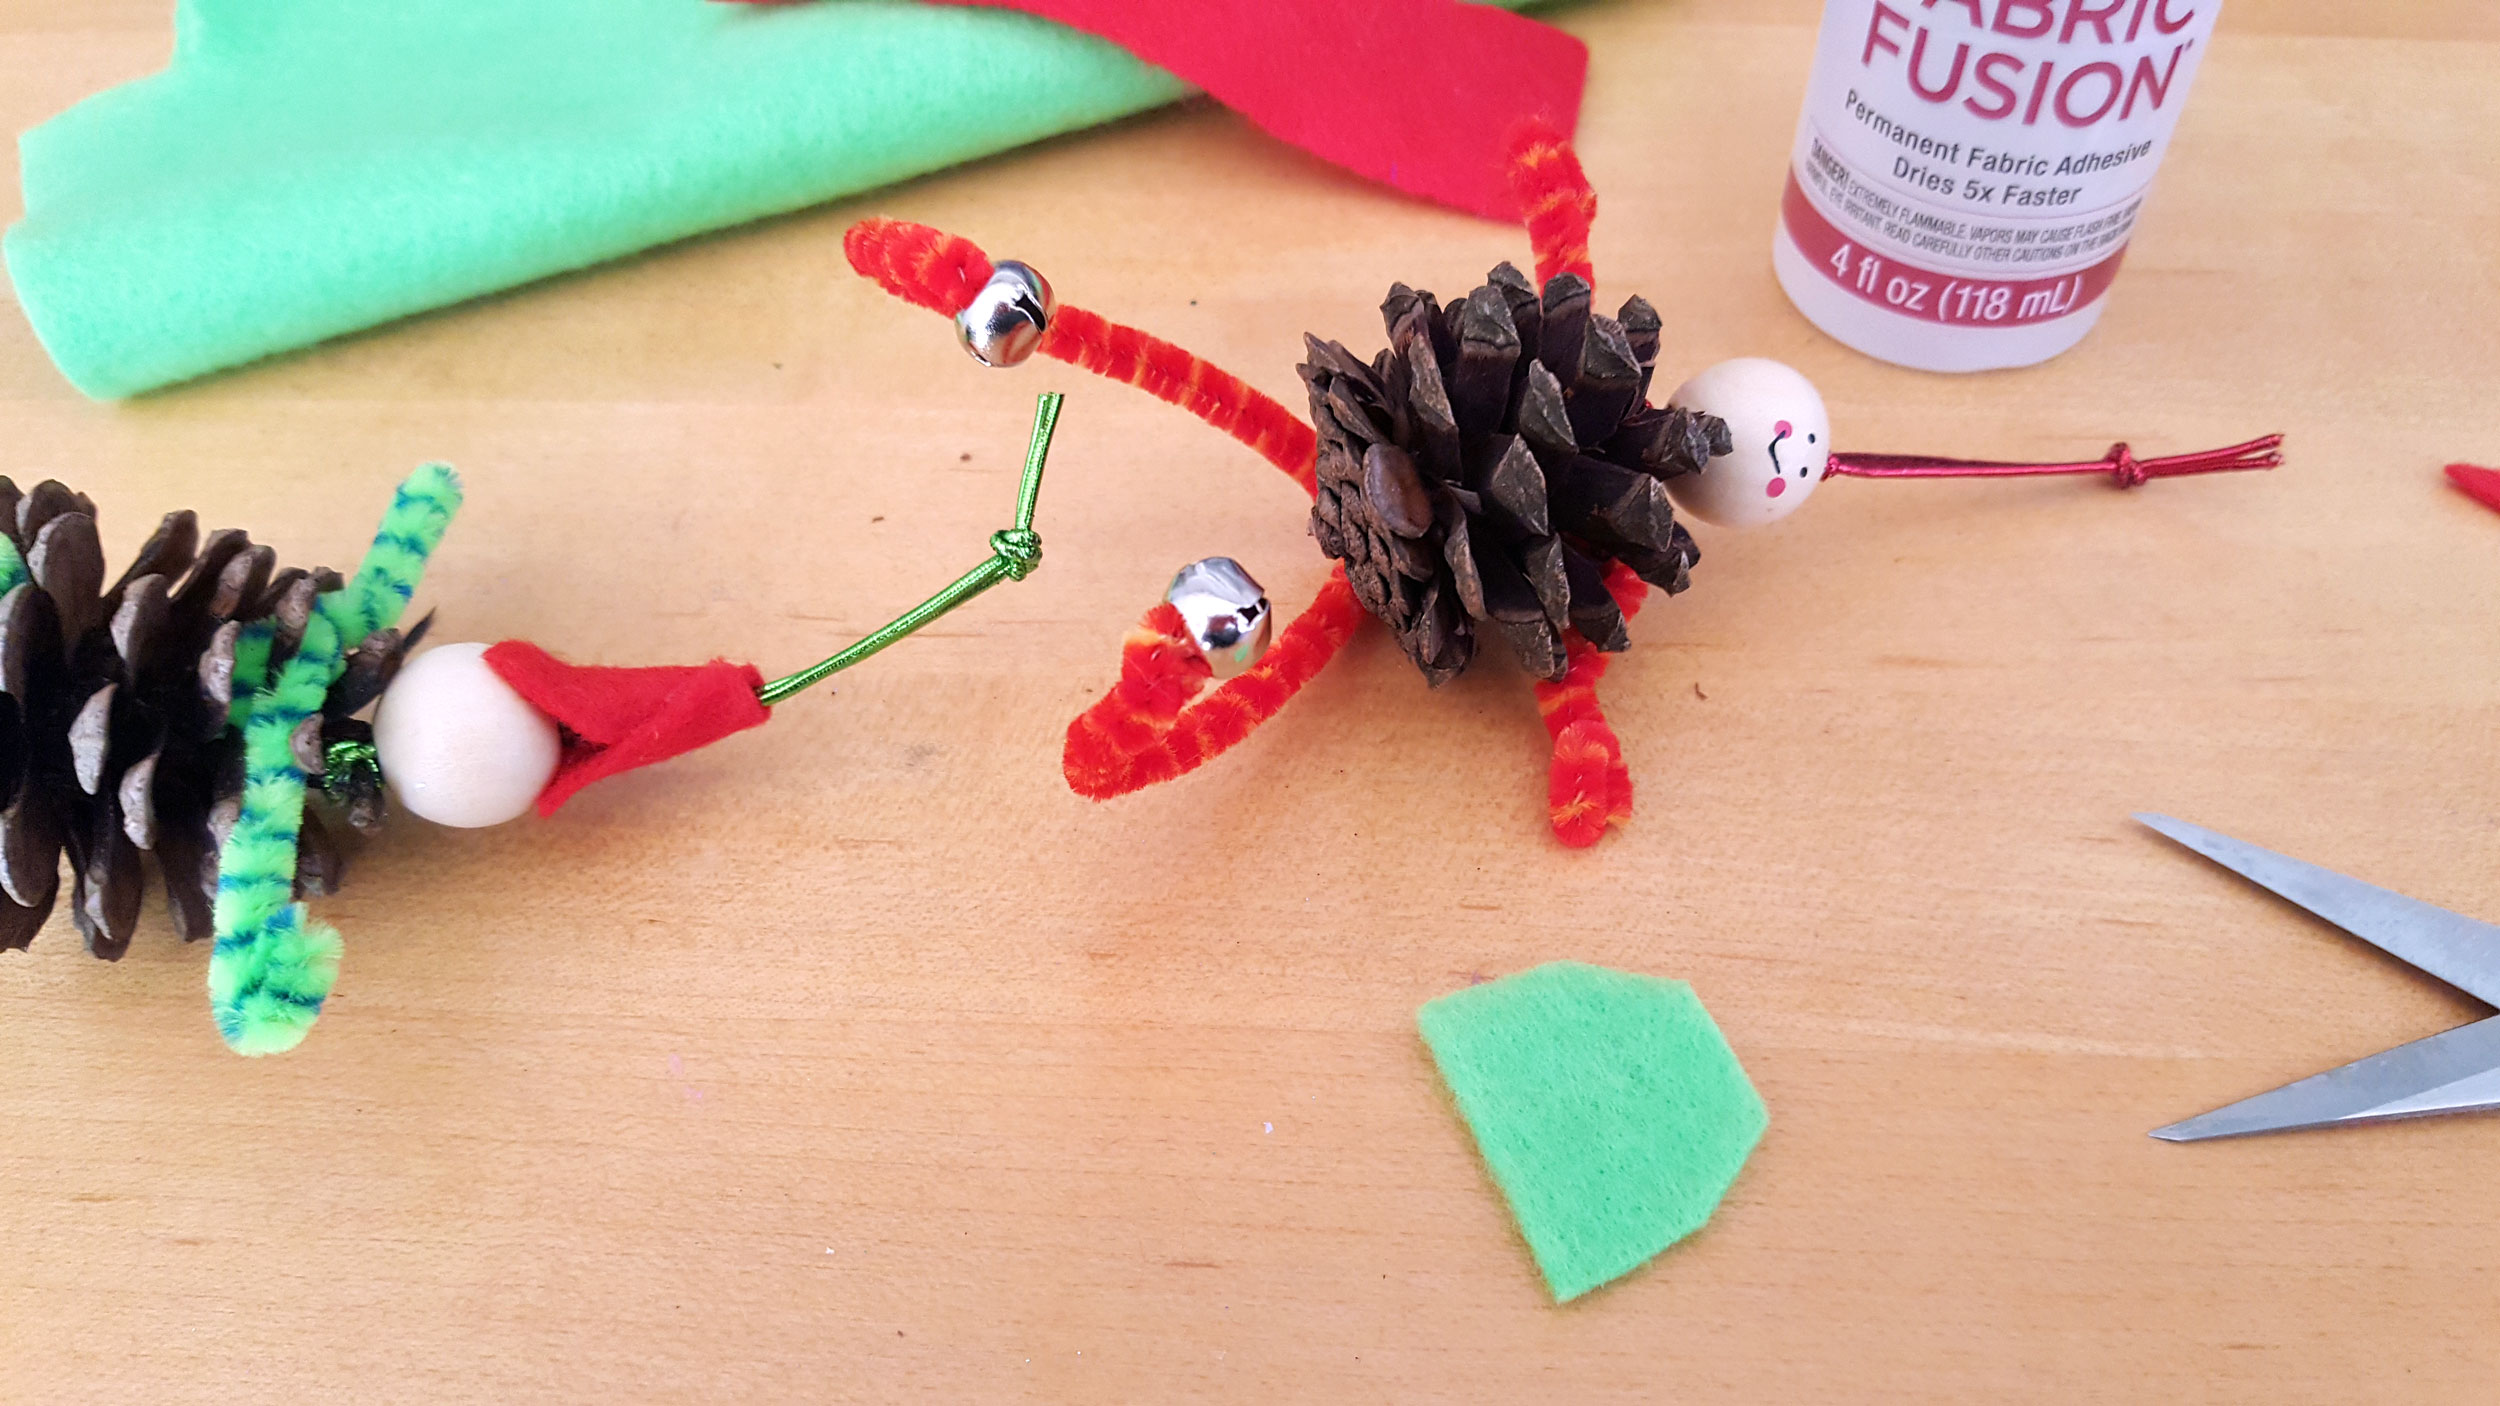
Step 5: Now it’s time to make the elf hat. Cut ½ of an octagon shape out of the felt in a size that will fit the wooden head bead. Curl until you have a cone shape and glue the top ends together. Next, glue it to the bead itself, making sure that your hanging string comes out of the top.
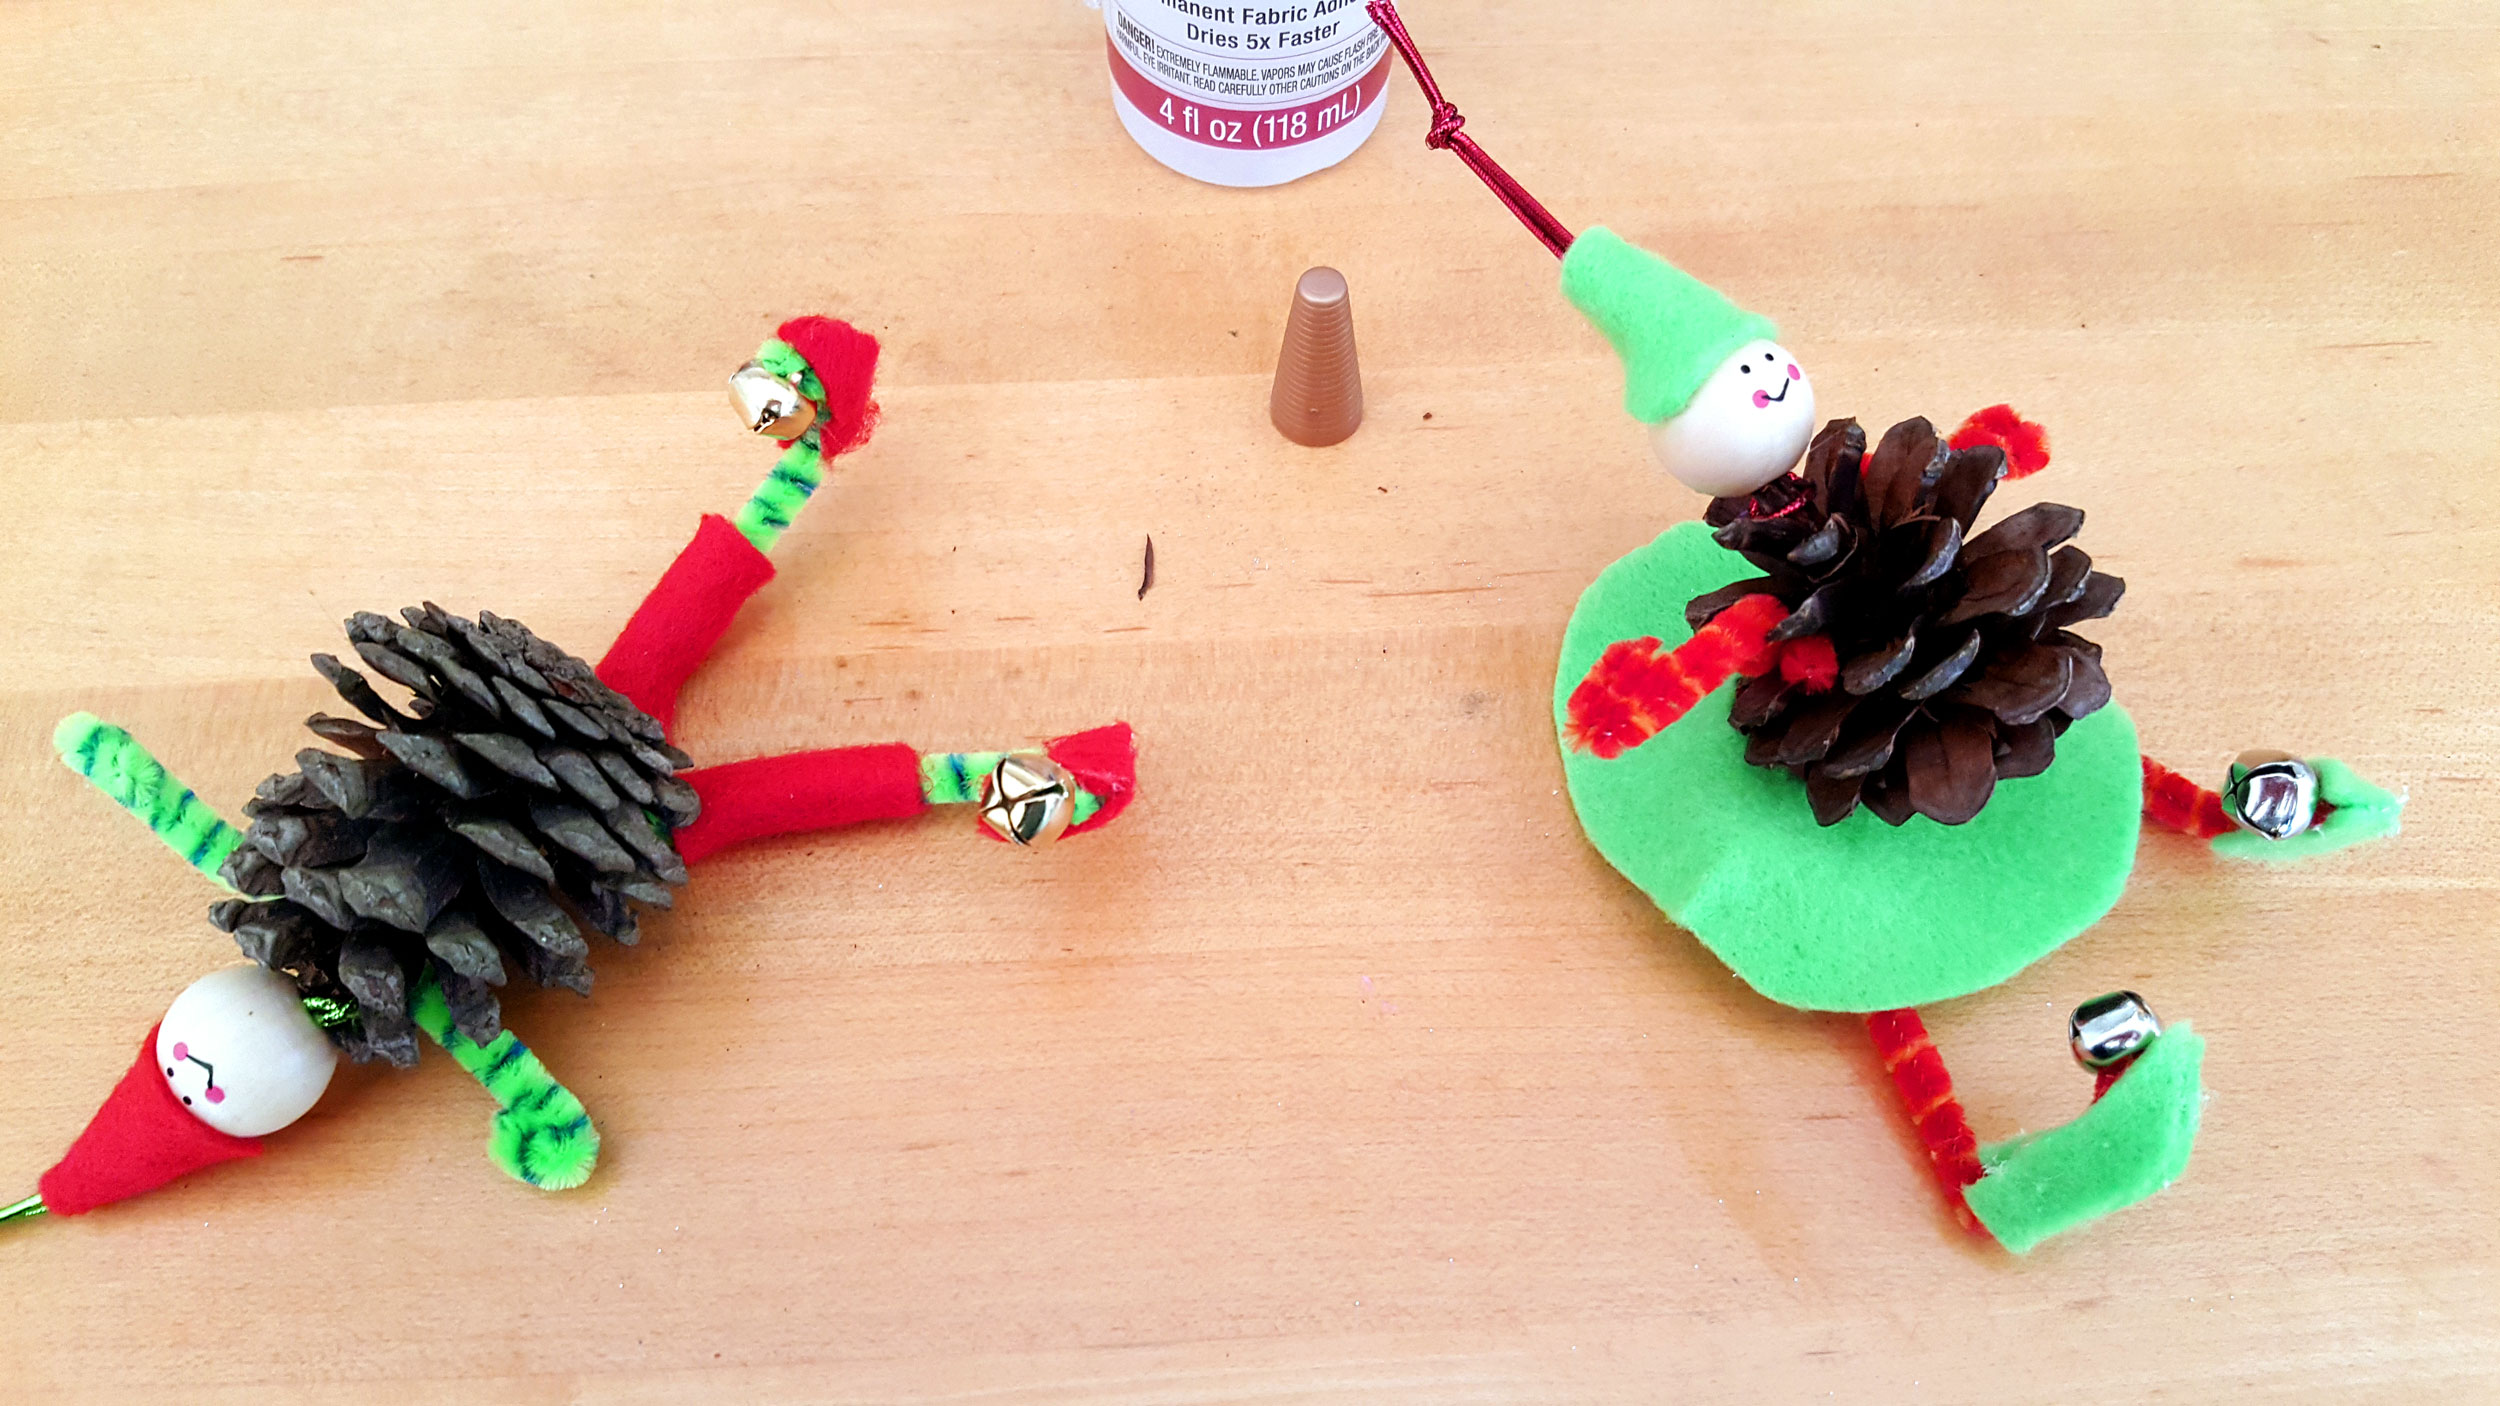
Elf Pine Cone Craft Ornaments Steps 6 – 9
Step 6: Here comes the fun part! It’s time to make the clothes for your elf ornaments. For the boy, cut two rectangles for pants and 4 bootie shaped feet pieces with pointed up ends. For the girl, you will need the same booties, but for the skirt, simply cut a doughnut shape out of the felt.
Step 7: Using the fabric glue, secure the clothes on the elf ornaments. For the boy, the pants get wrapped around the legs and the booties get glued on either side of the foot. For the girl, follow the same procedure for the booties and then glue the skirt to the bottom of the pine cone.
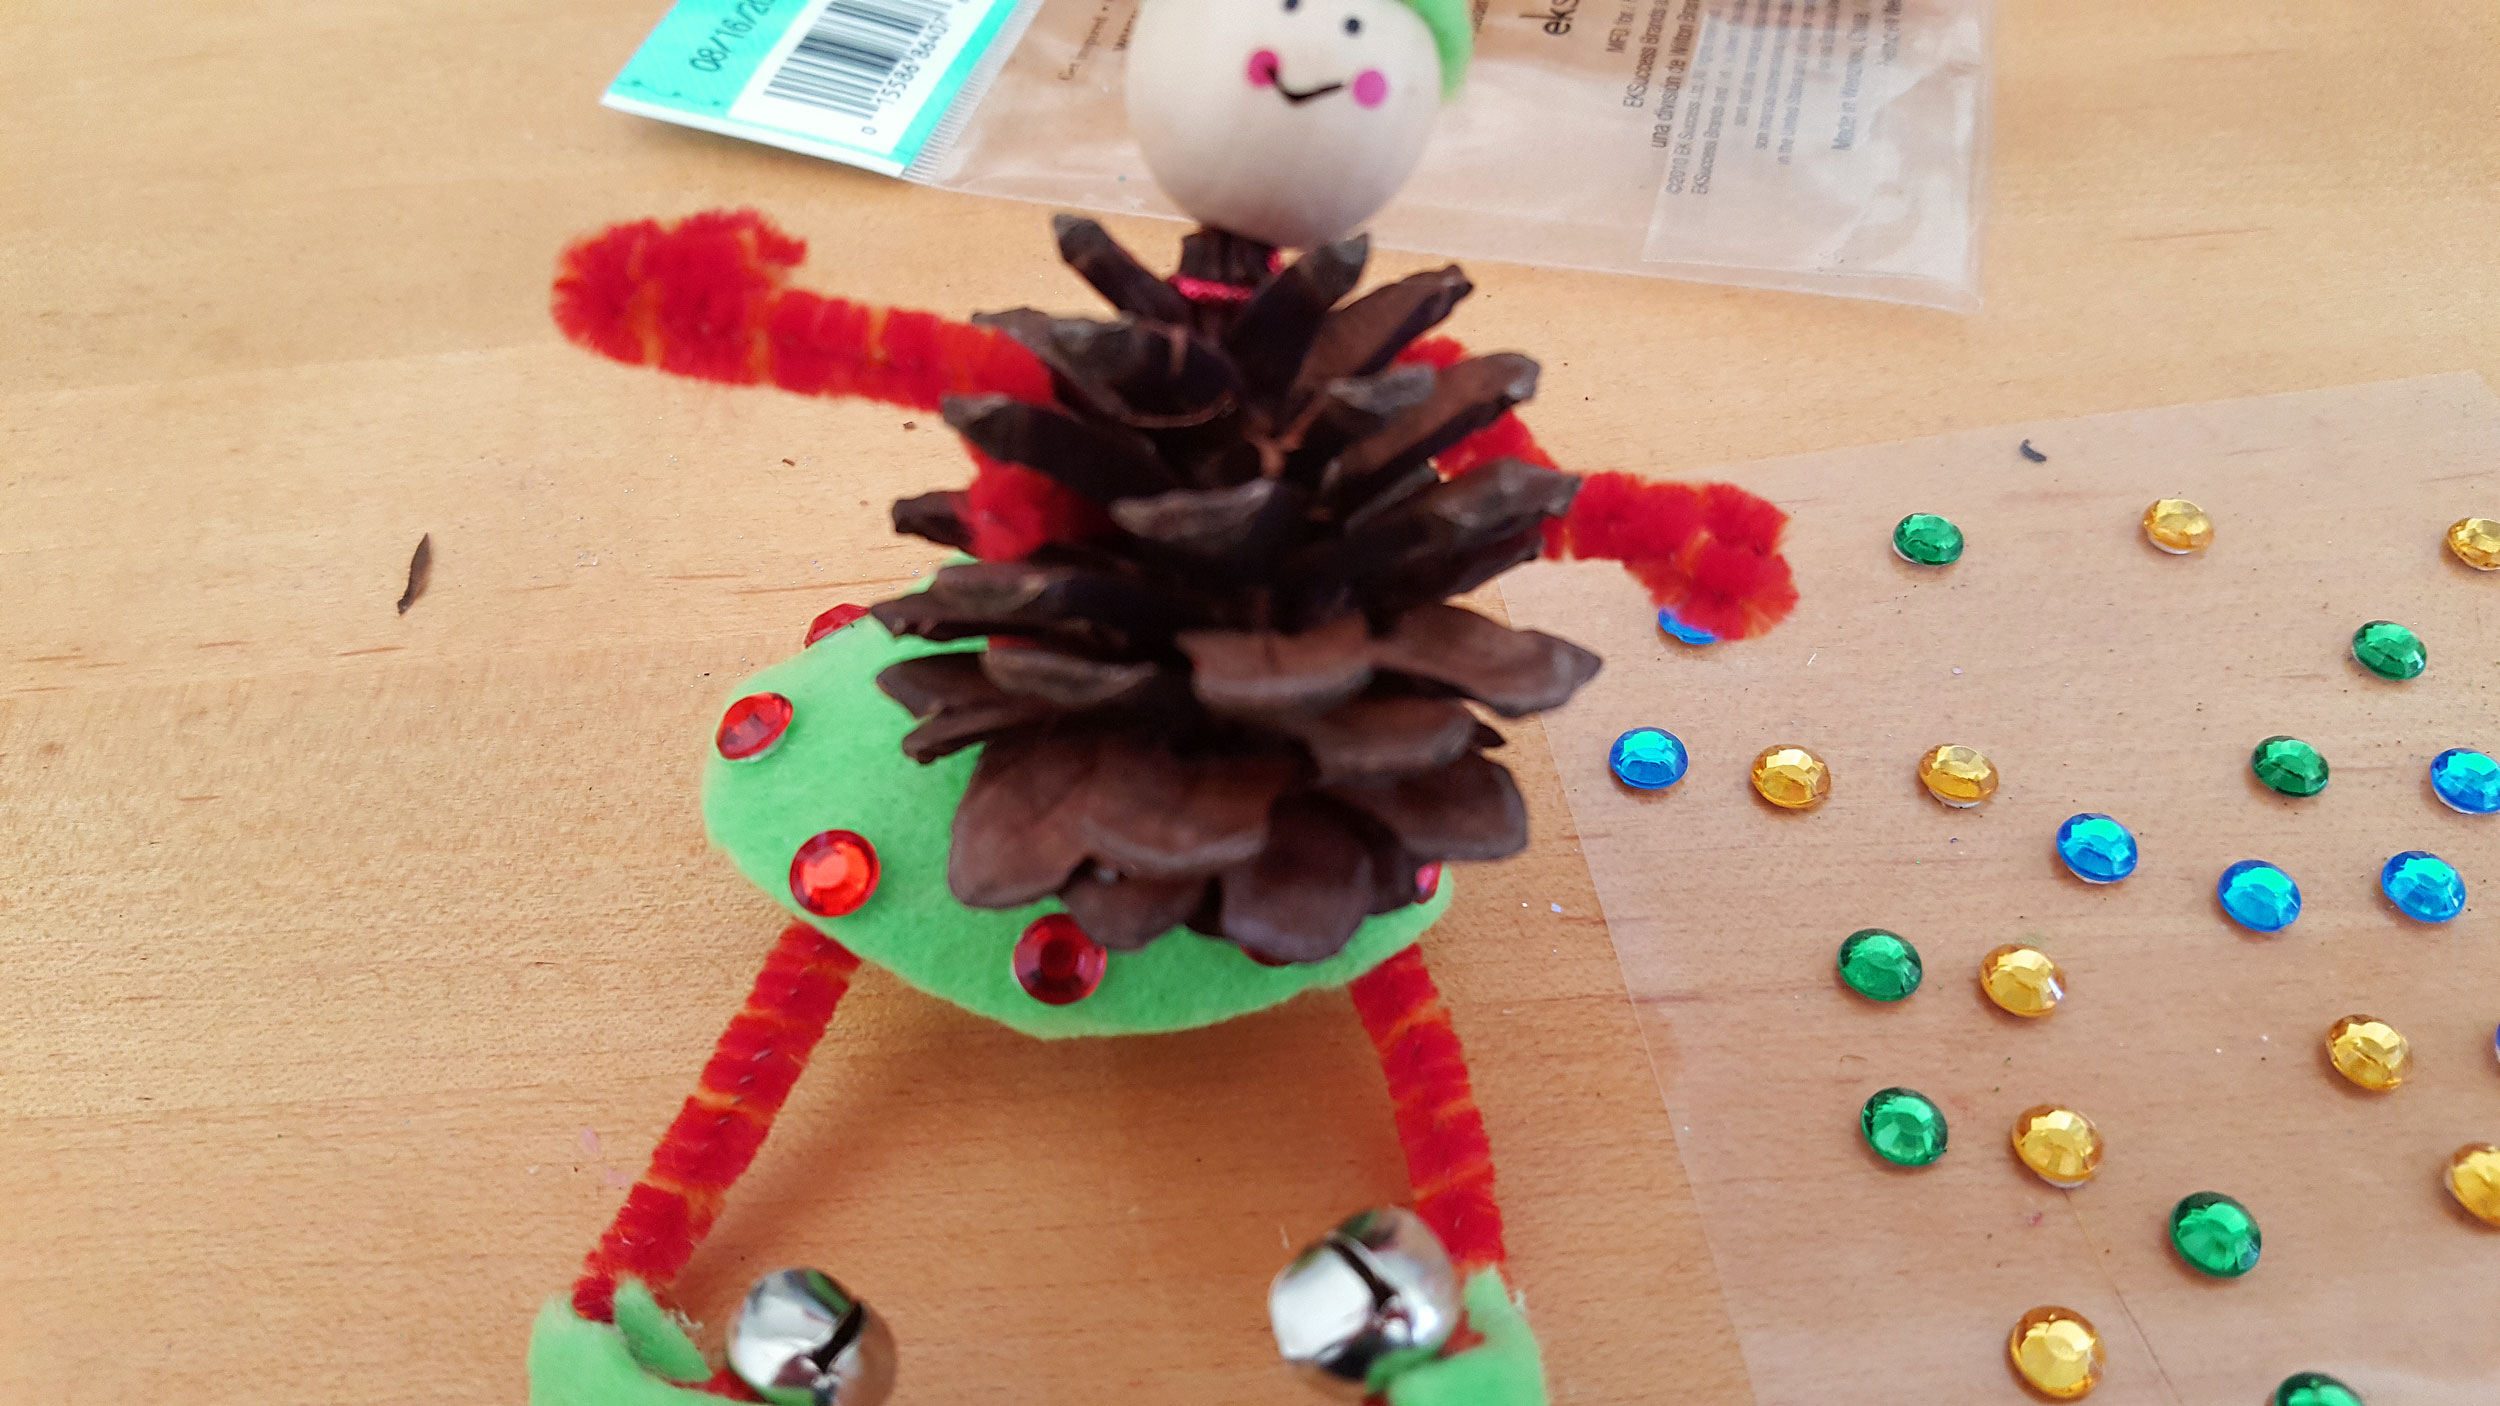
Step 8: For the girl, we added some jewel embellishments to her skirt to give her a little sparkle.
Step 9: Finally, use a marker to draw a bit of hair sticking out from underneath the hat.
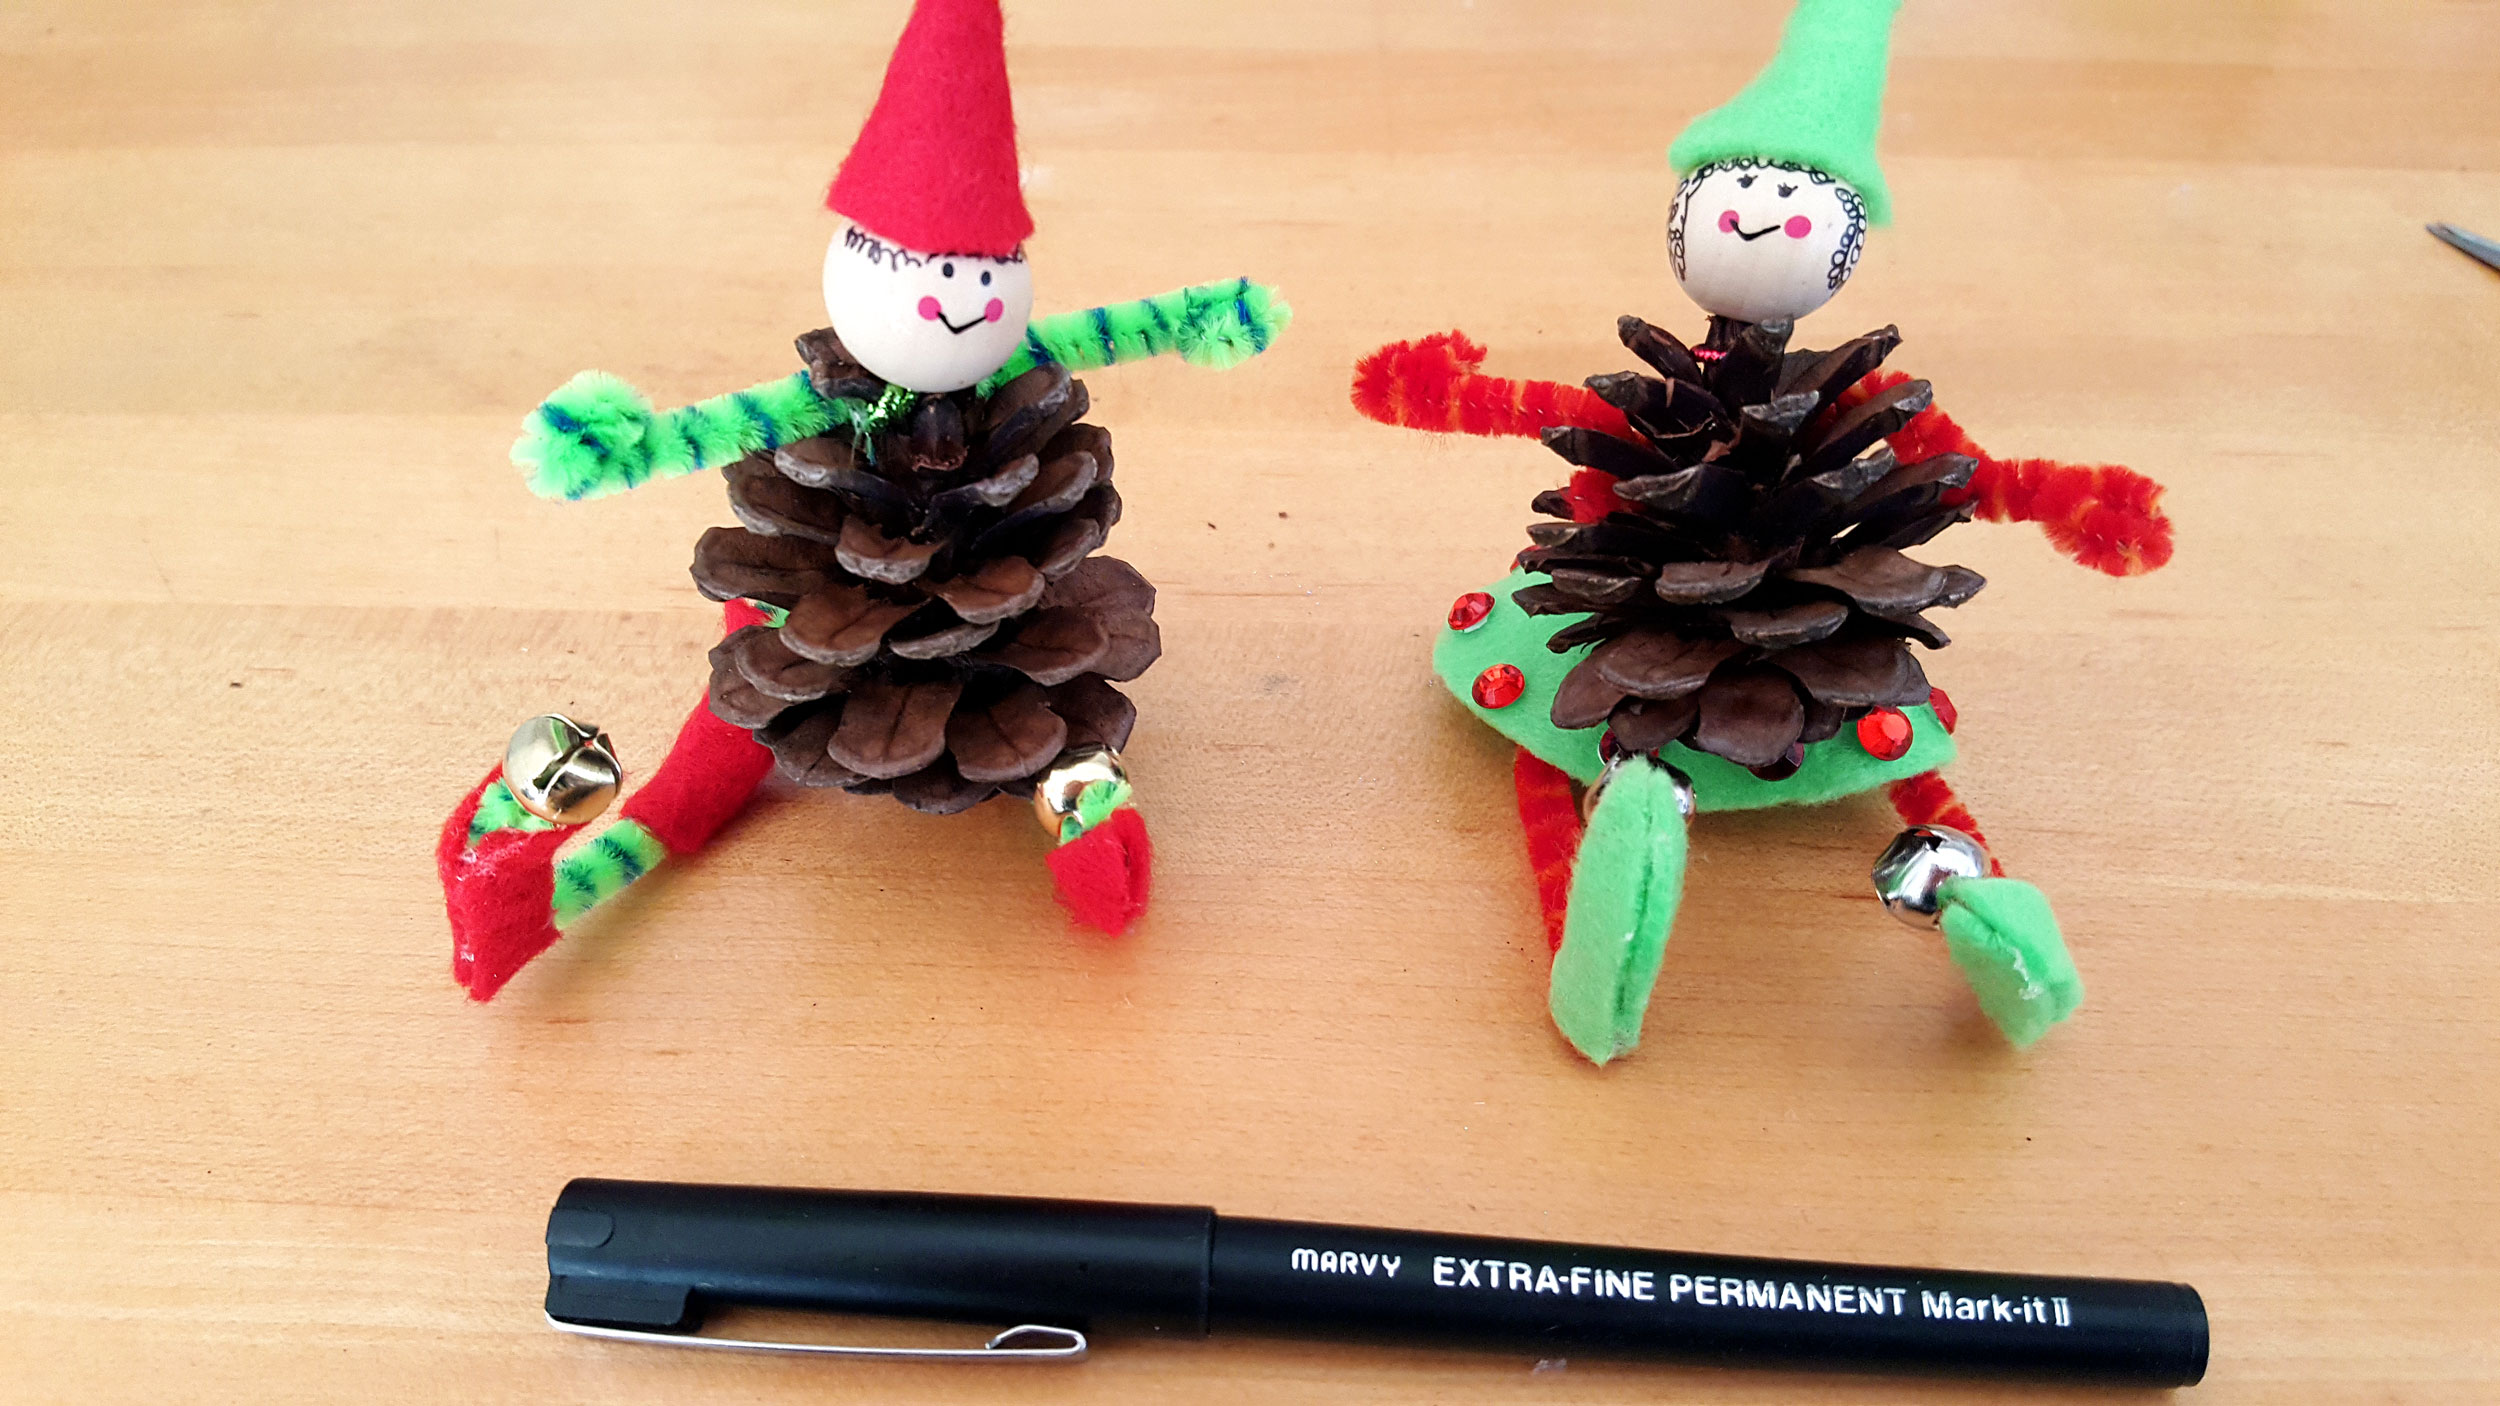
That’s it! Now you have created elf ornaments using pine cone crafts in your home. They are ready to hang around or you can even sit them on a shelf for a cute Christmas decoration or holiday display in your home. Tie elf ornaments to the top of a Christmas present for someone special. They are guaranteed to bring a smile to the recipient’s face!
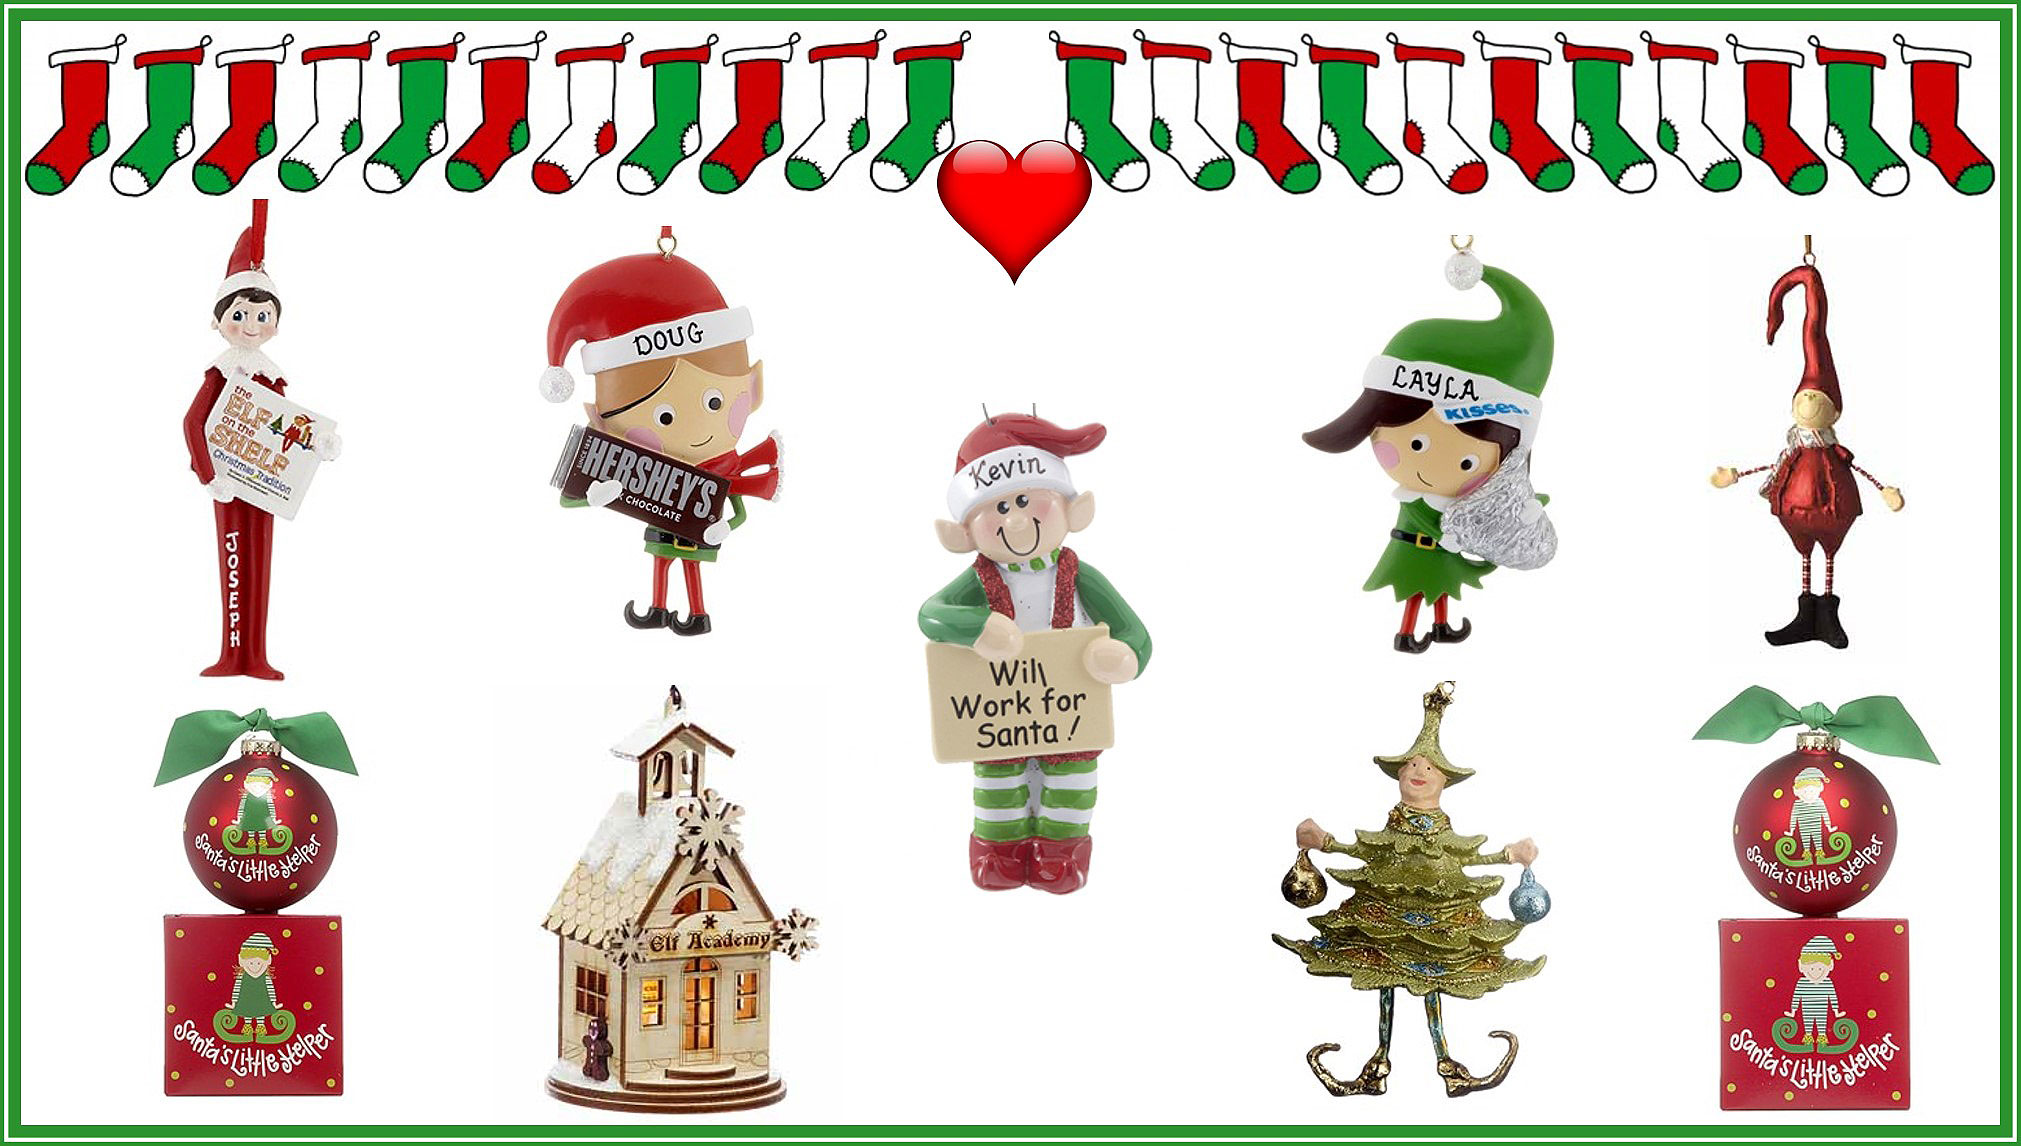
Love elf ornaments but don’t have time to pine cone crafts to make your own? Not to worry! We carry a variety of personalized elf ornaments that are perfect for the holidays! All of them can have a name on them and many of them allow room for your own personal messaging!