Every Girl Needs This DIY Magical Fairy Garden Ornament
Posted May 13, 2016 in DIY (Crafts) by Dianne Weller
Did you ever wonder what a Fairy Garden looks like? Was it colorful, sparkling and magical, a happy place to frolic with fairies flying everywhere covering flowers with a fairy dust? Do you believe in fairies?
If your little girl dreams of having her very own fairy garden, here’s a fun DIY that she’s sure to love. Building your own fairy garden is a great way to create a magical fairy land using tiny, miniature supplies. Be warned that it requires a colorful imagination and a little sprinkling of patience!

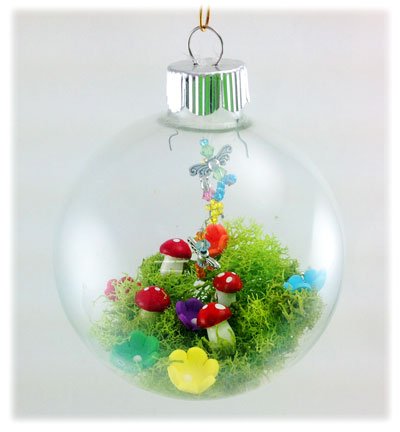
Captured Fairies In A Fairy Garden Ornament
A fun craft project for a sunny afternoon, your daughter or granddaughter will delight in making tiny little fairies to go inside her fairy garden ornament. As long as she is able to thread tiny seed beads, she can make this fairy garden with a little help from an adult.
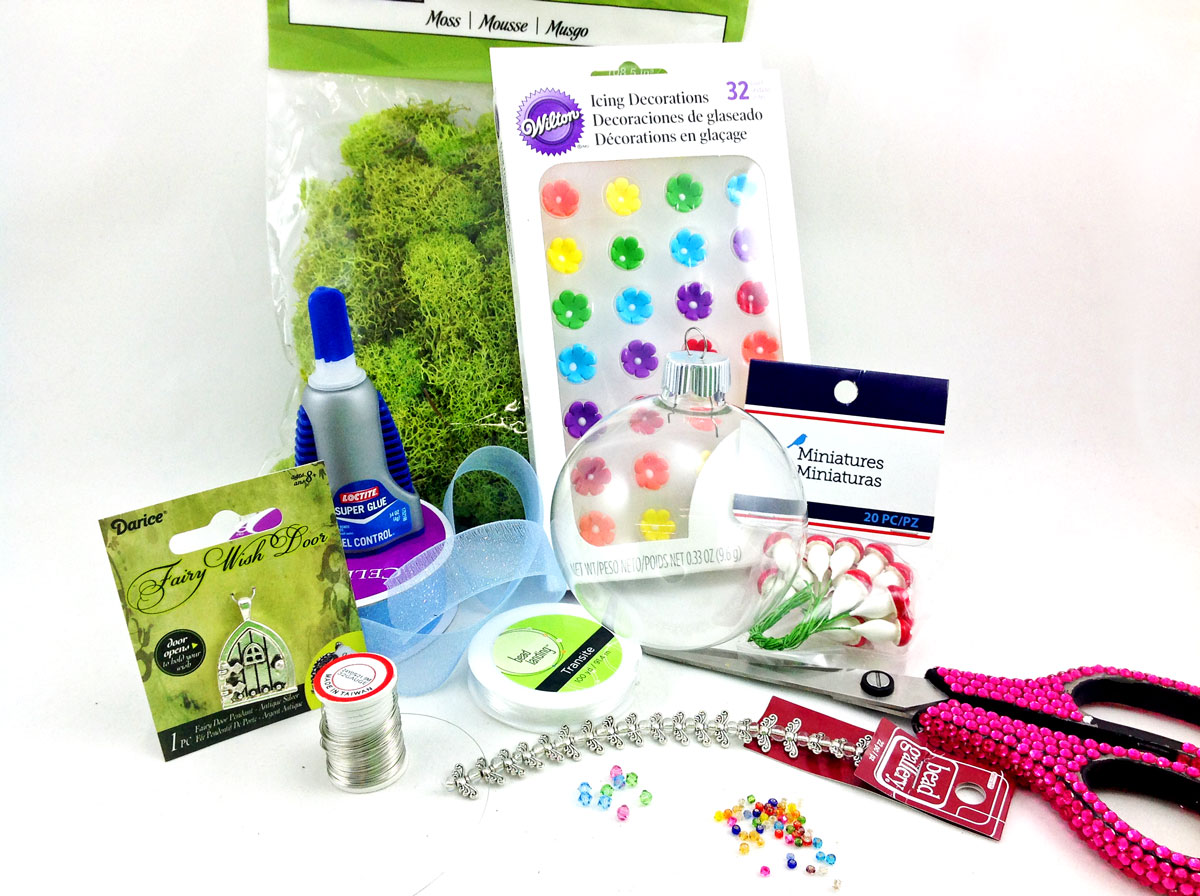
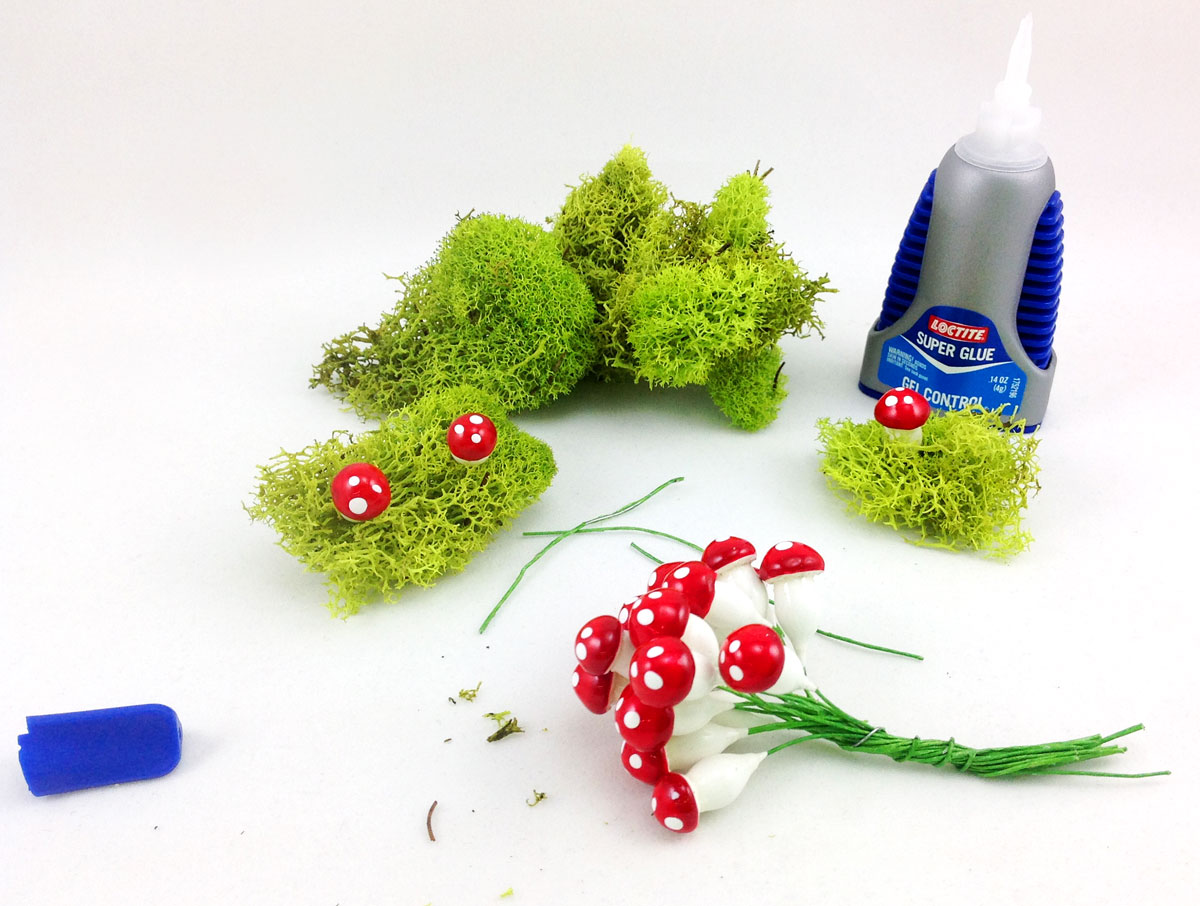
Supplies for Fairy Garden Ornament:
- Clear glass ball ornament
- Decorative moss (floral department of a craft store)
- Miniature mushrooms
- Miniature flowers
- Glitter
- Glue
- Seed beads
- Small crystal beads
- Wing beads
- 32 gauge metal “thread”
- Fishing line or clear beading thread
- Sheer glitter ribbon
- Fairy door charm (optional)
- Scissors
Step 1: Separate the moss into small pieces. Glue miniature mushrooms to the moss. We cut the long stems off of ours to make this easier.
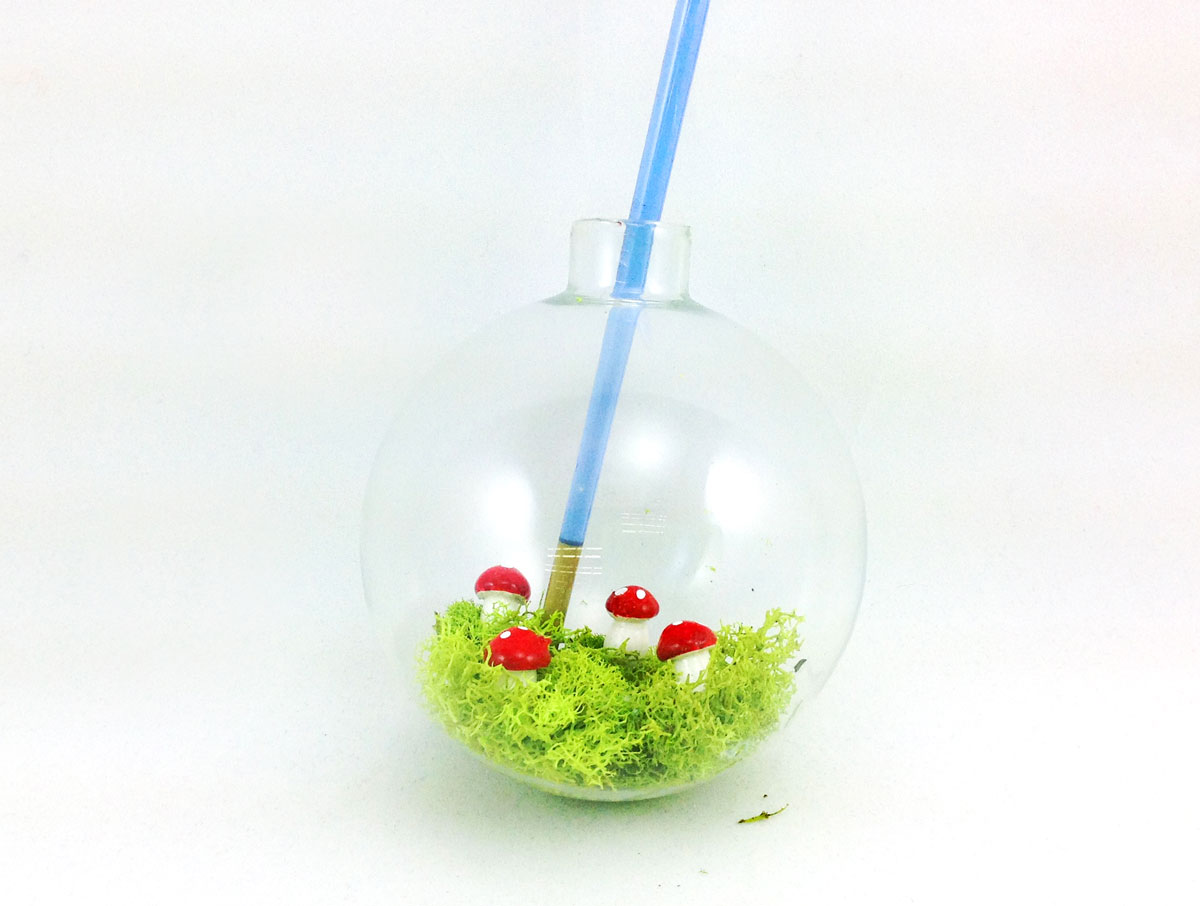
Step 2: Drizzle some glue into the bottom of the glass ball. Carefully stuff the moss pieces into the hole of the glass ball. Using a stick or the end of a paintbrush, move the moss into place so that the mushrooms are standing upright.
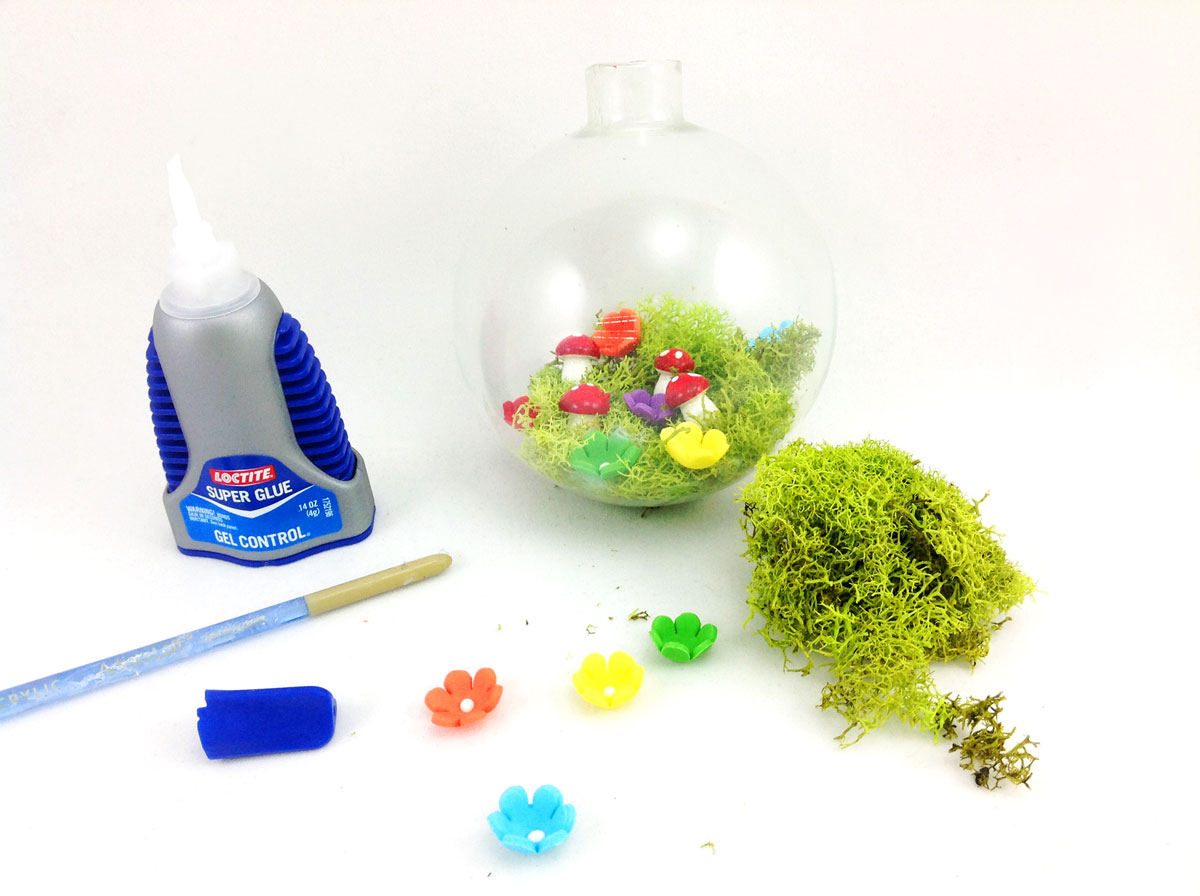
Step 3: Coat the bottom of the flowers with glue and gently drop them into the hole of the glass ball and again place them with the end of a paintbrush or stick. Do these one at a time so the glue doesn’t dry. Make sure to hold your glass ball ornament at an angle to drop the flowers in the area that you want them to stick in your fairy garden.
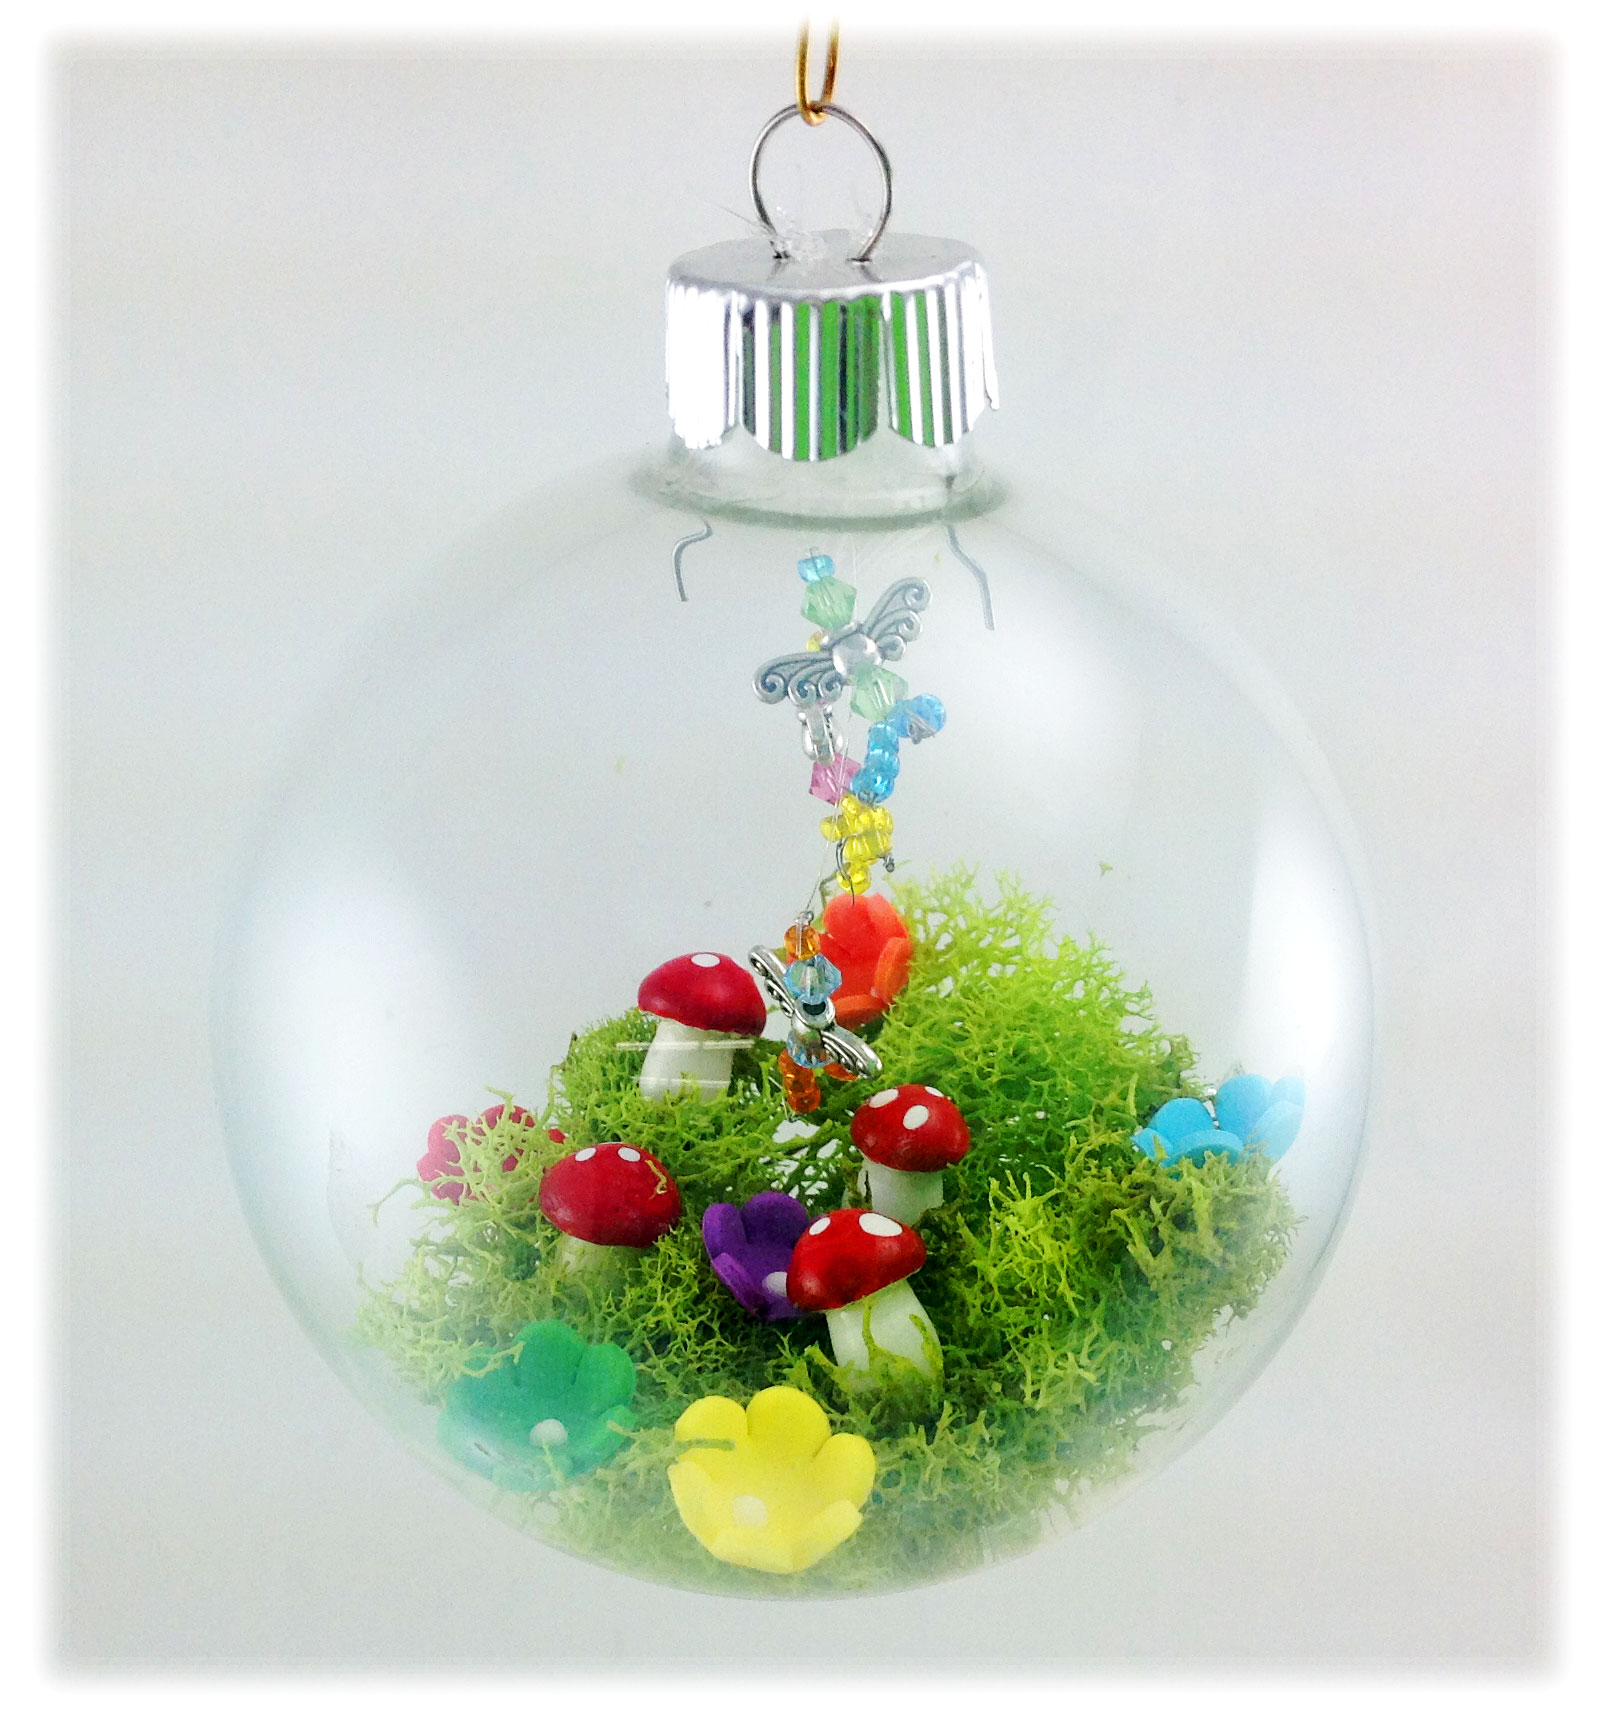
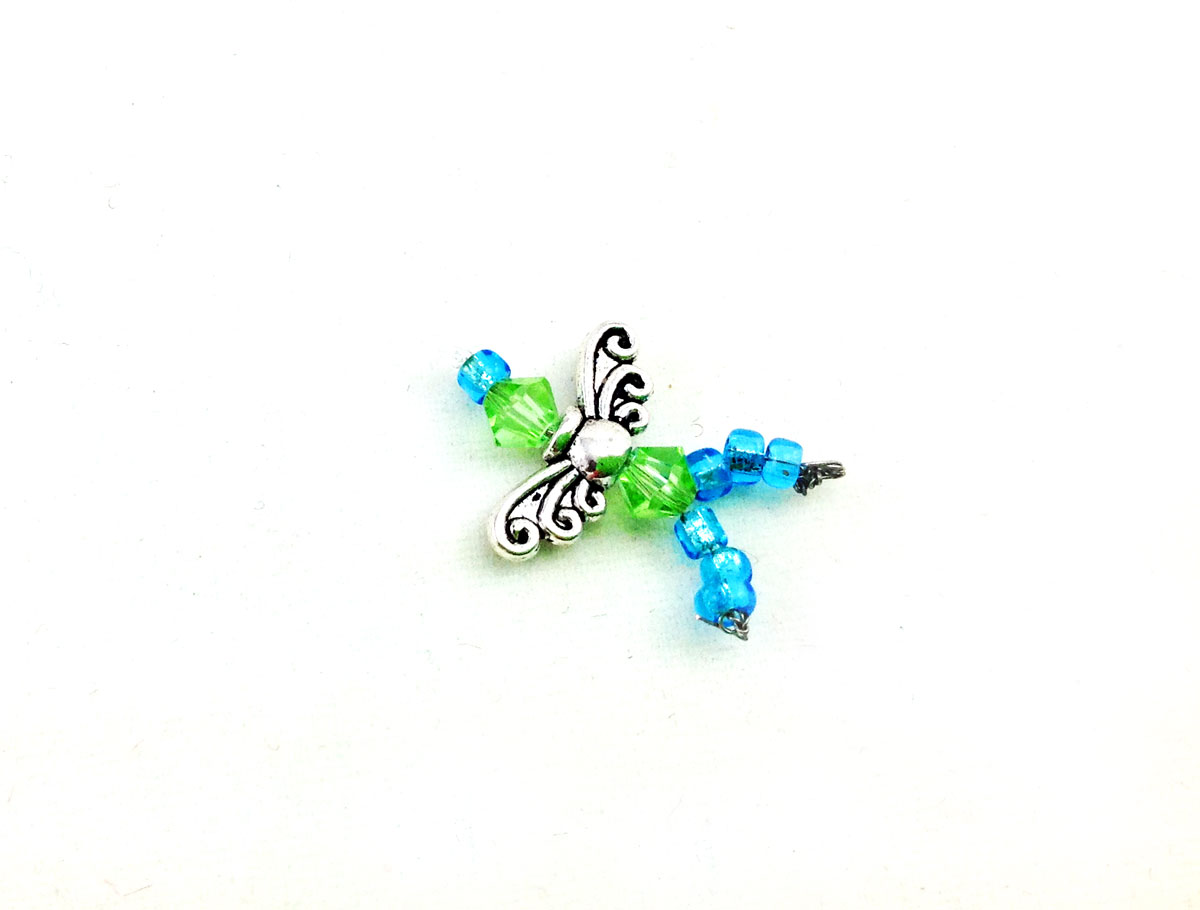
Step 4: A fairy garden wouldn’t be complete without some fairies, so now it’s time for little fingers, reading glasses and practicing the art of patience! Cut a 6 inch piece of the metal thread and a 5 inch piece of the fishing line. Knot the fishing line around the center of the piece of metal thread and trim the knotted end off.
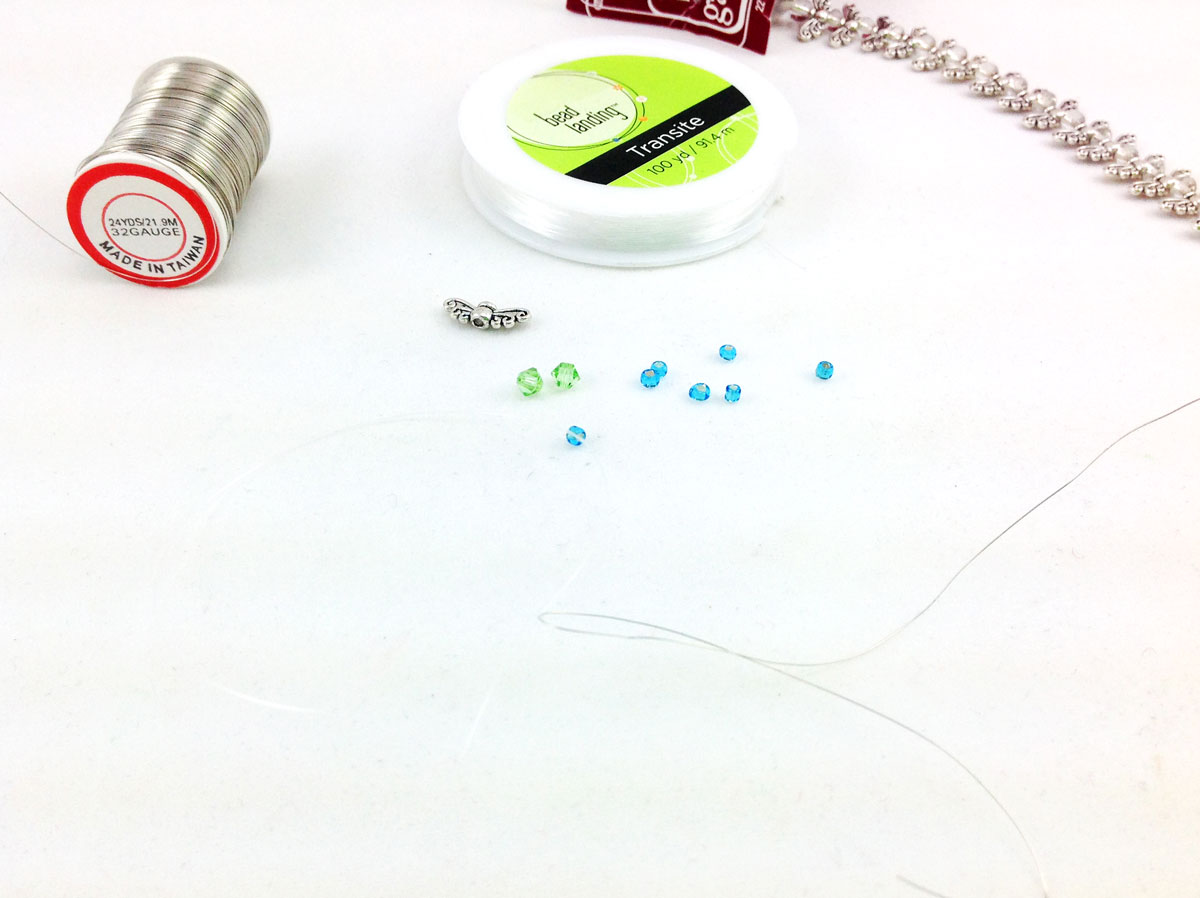
Step 5: Thread the following beads through BOTH ends of the metal thread:
- Seed bead
- Crystal bead
- Wings bead
- Crystal bead
Now twist the ends together a bit. Thread 3 seed beads through ONE side of the metal thread and crimp or knot off the end. In the same manner thread 3 seed beads through the OTHER side of the metal thread end and crimp or knot it. These are the two fairy legs. Your fairy should look like this!
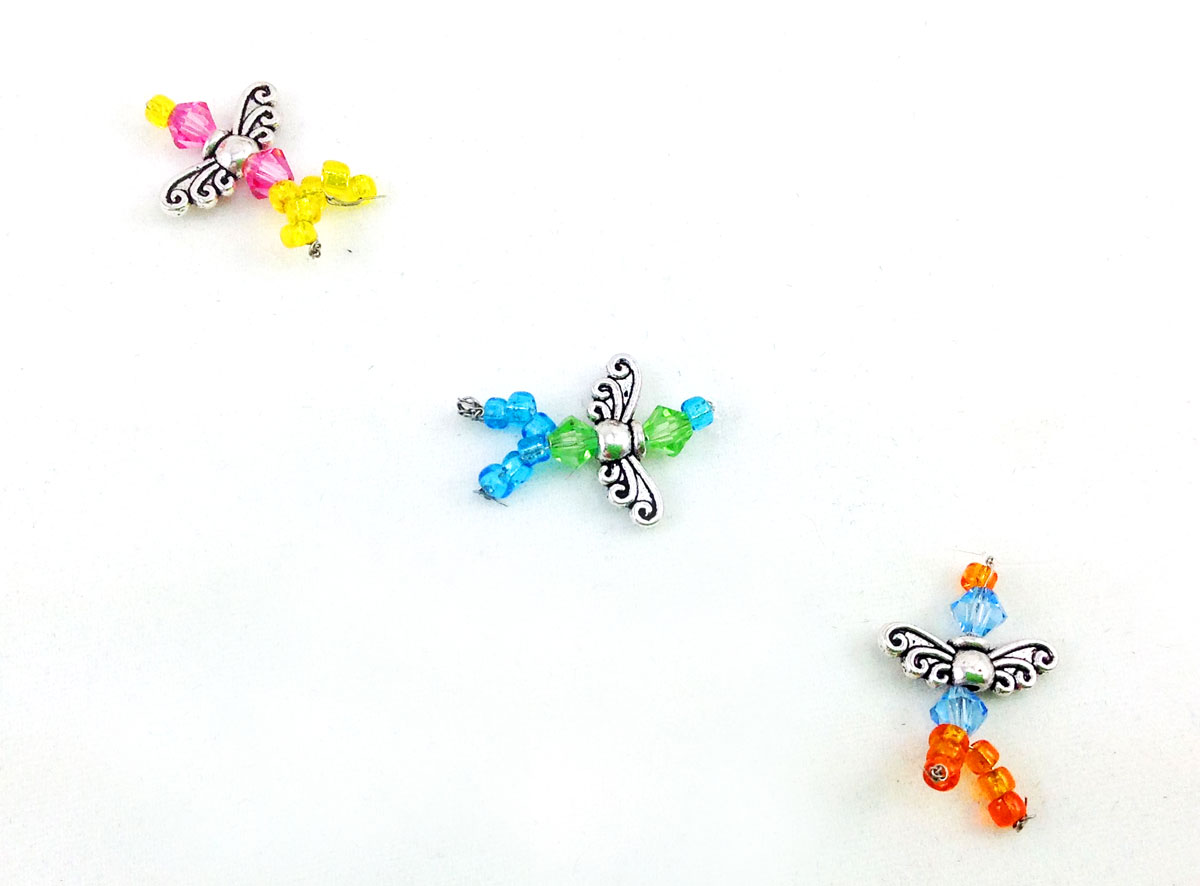
Step 6: Make three fairies for your fairy garden using whatever colors your imagination fancies, following the same instructions as above, so you have three individual strands of fairies. One at a time, thread the fishing line through the holes in the cap of the glass ball ornament and knot them through the top, trimming the ends off. Hang the fairies at various heights and bend them into flying poses.
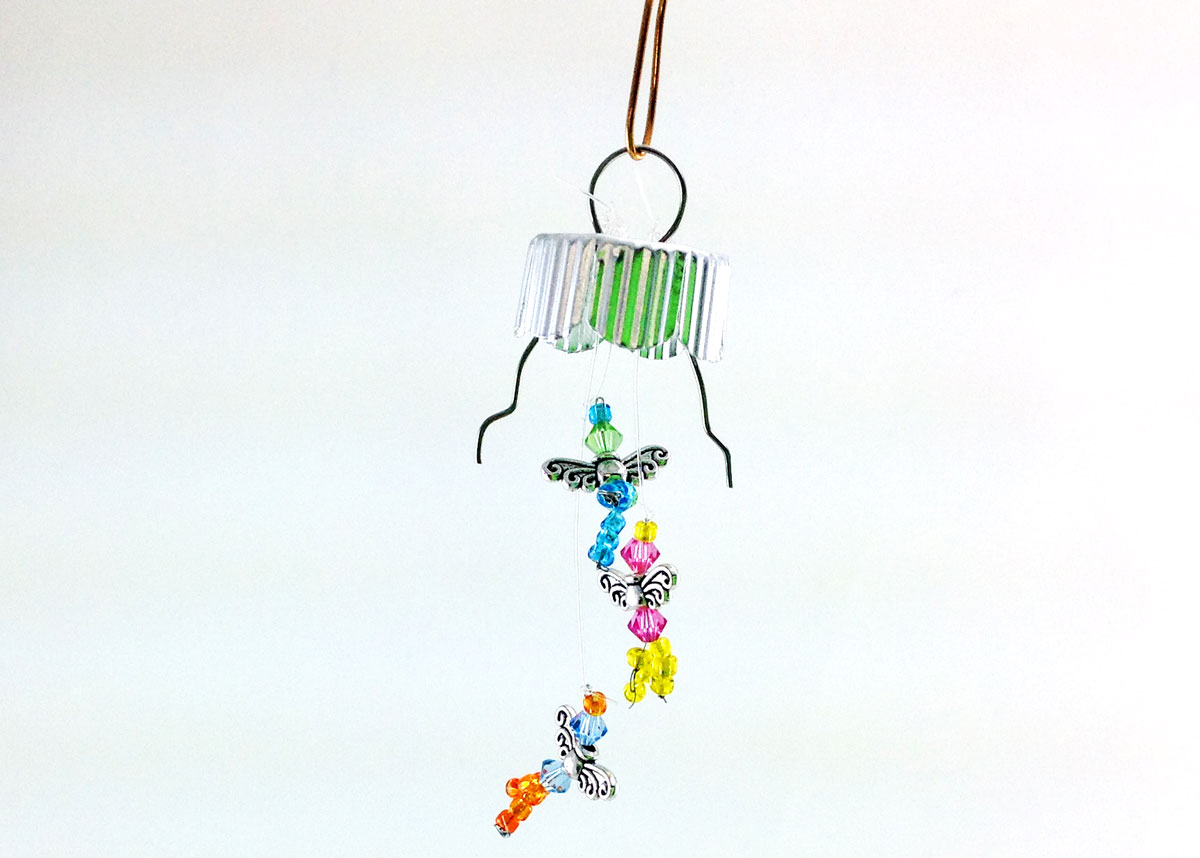
Have your child make a wish and throw a little sparkling glitter (fairy dust) inside for good measure! Carefully feed your fairies through the hole of your ornament and replace the cap. Tie a pretty ribbon on the top and as an option, attach a fairy door charm. That’s it! Your fairy garden is complete!

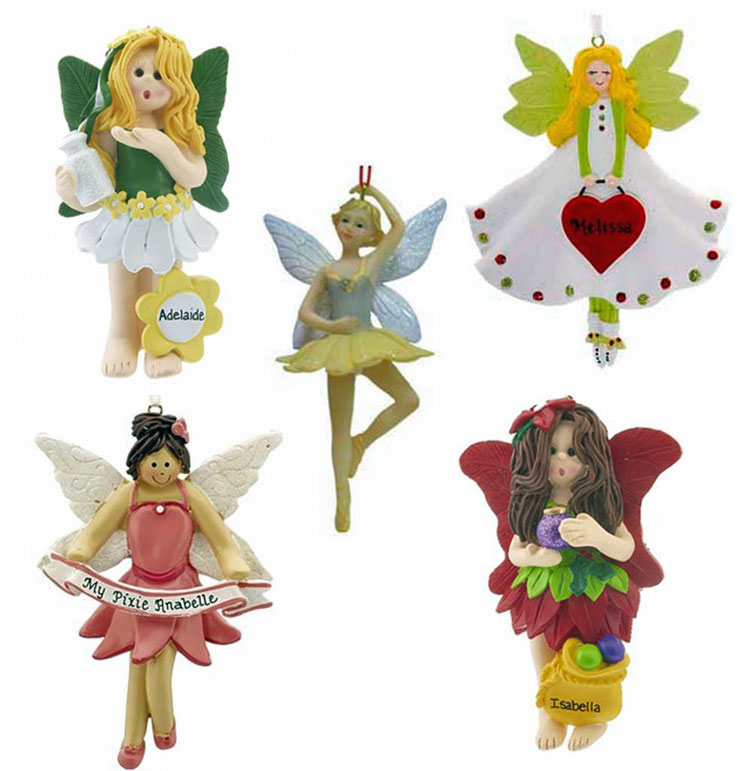
Fairies are not only magical, but they are fun! If you want a similar charming decoration without the work, we have personalized fairy ornaments of many types to satisfy her fantastical imagination. Gardeny