
DIY Velvet Pumpkin Craft: Happy Fall Y’all!
Posted September 23, 2015 in DIY (Crafts) by Dianne Weller
Making a velvet pumpkin decoration for the autumn season is fun and easy! It adds a special kind of pizzazz to your autumn decor and that’s why I’ve asked my friend Donni from MagicOnions.com to lead you through a wonderful step by step tutorial!
You can make it in the beautiful fall colors of orange and brown, but including a bright teal or chartreuse will make them STANDOUT showstoppers!
How To Make A DIY Velvet Pumpkin Autumn Decoration
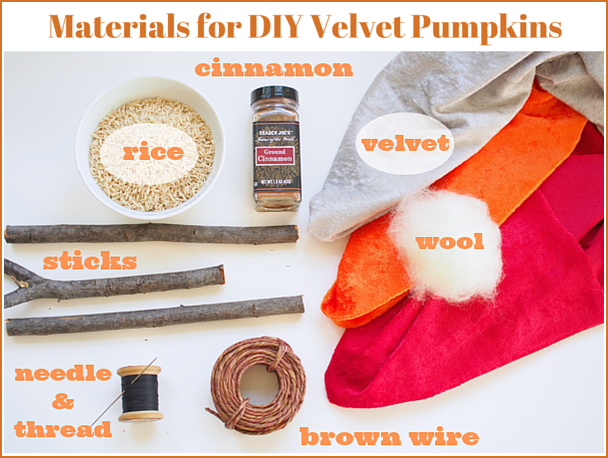
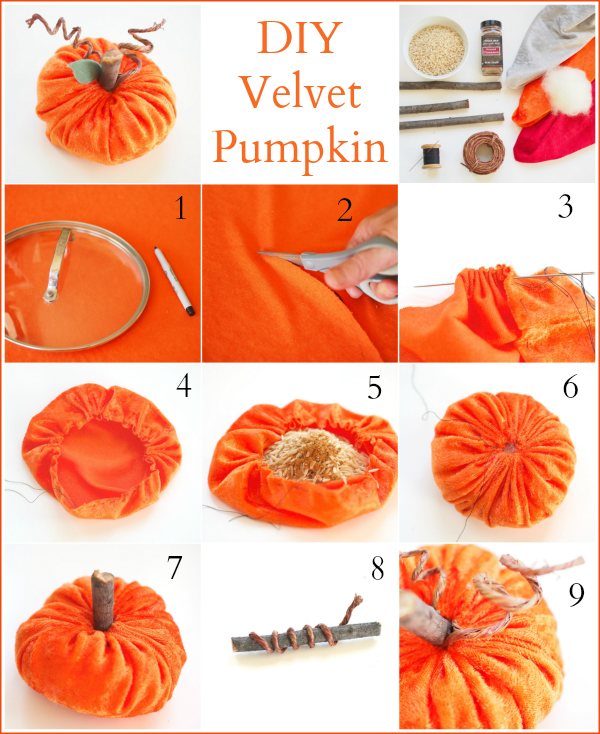
Supplies:
- Velvet material
- Rice
- Wool Fiber Filler
- 1/2 Cup of Rice
- Cinnamon
- Needle and Thread
- Brown Wire
- Green Felt Leaf
- Scissors
- Marker
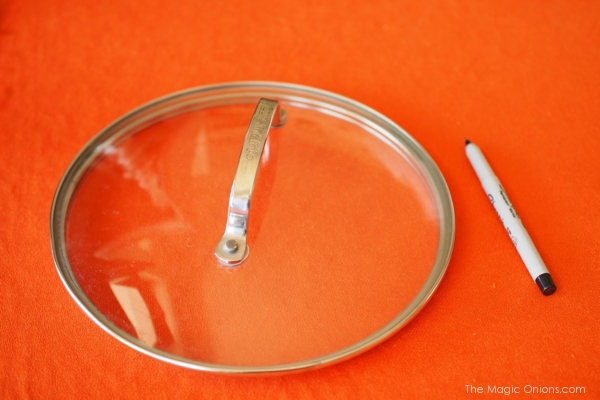
- Pot Lid
Step 1:
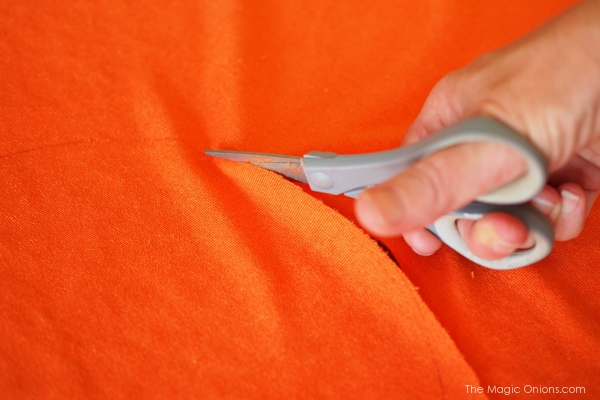
Lay the fabric (velvet side down) on a flat surface like a tabletop or the floor. Find a circular object in your home to be a stencil for your circle, such as a pot lid. Use a marker to mark the circle for easy cutting. As your fabric is velvet side down, you will not be able to see the marker on your finished pumpkin.
Step 2:
Use sharp fabric scissors to cut a circle in the velvet. The size you cut your circle will determine the size of your pumpkin. You can make your pumpkin any size you wish. Teeny tiny pumpkins are very cute but a huge big one is awesome too. And, if you are making many, pumpkins in varying sizes look wonderful.
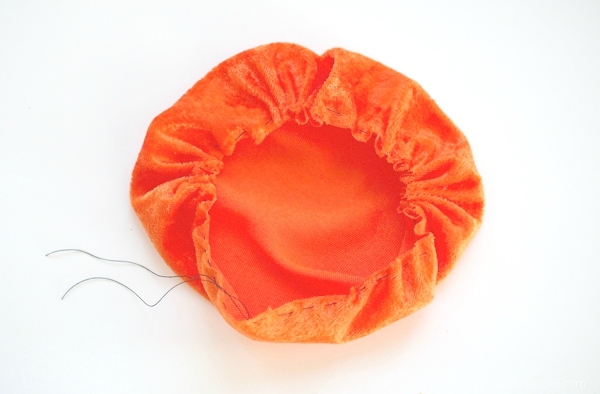
Step 3:
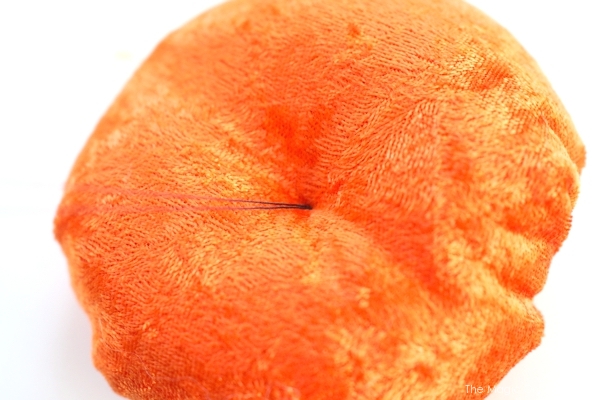
Thread the needle and sew a simple straight stitch around the outside of your fabric. Leave a long tail of thread on either side. When you gently pull the thread tails at the same time, your fabric will gather and close. Pull these threads until a small pouch has formed.
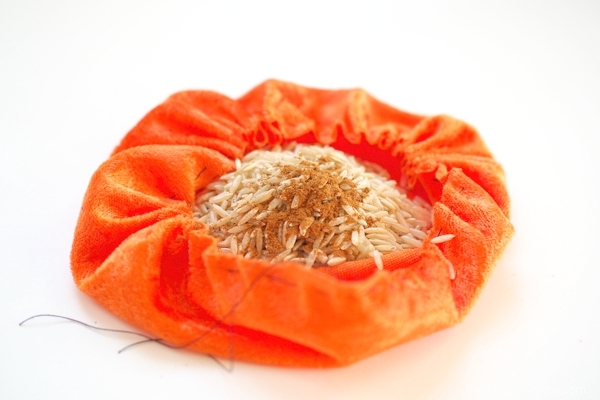
Step 4:
Fill the base of your pumpkin with rice and a little cinnamon if you wish to add the scent of fall to your pumpkin.
Step 5:
Continue to fill your pumpkin with wool filler fiber.

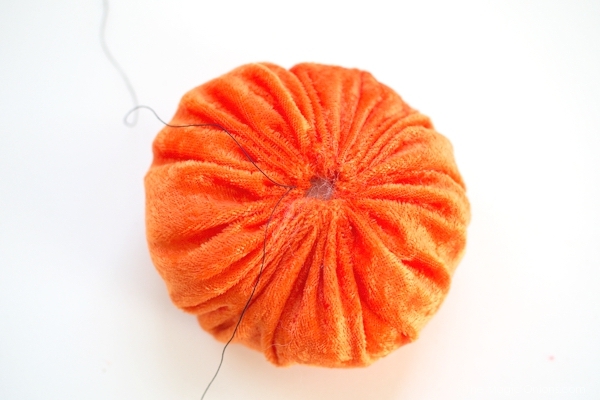
Step 6:
When your pumpkin is the desired ‘plumpness’, pull the thread tails until the mouth of your pumpkin closes completely. If you feel that your pumpkin needs a little more wool filler, you can add more at this point by loosening the mouth, stuffing your pumpkin with wool fiber and puling it closed again.
When your pumpkin is plump enough, tie these two thread tails together in a simple double knot. Trim the thread.
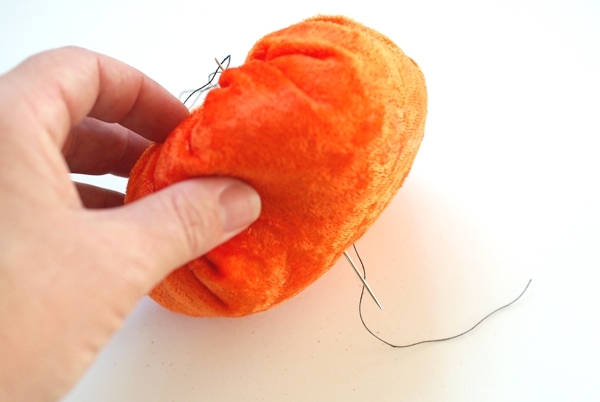
Step 7:
Firmly pull the converging threads at the base of the pumpkin tight. Make a double knot and trim.
Step 8:
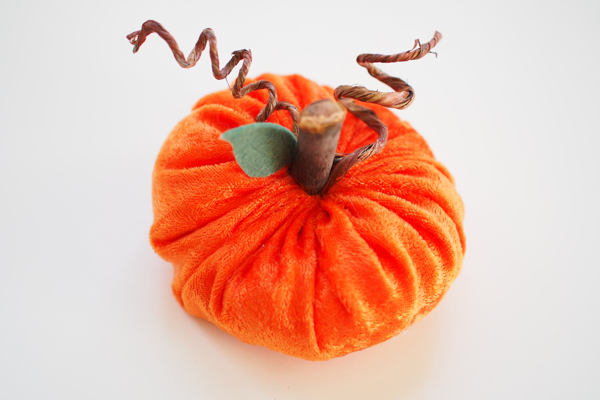
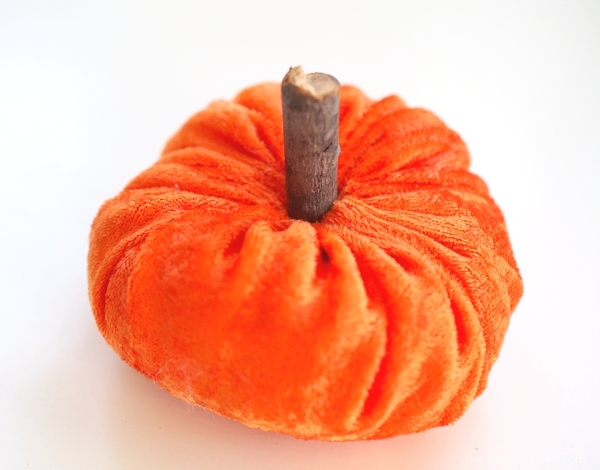
Cut the stick to the right length for the stalk and insert it into the mouth of the pumpkin.
Step 9:
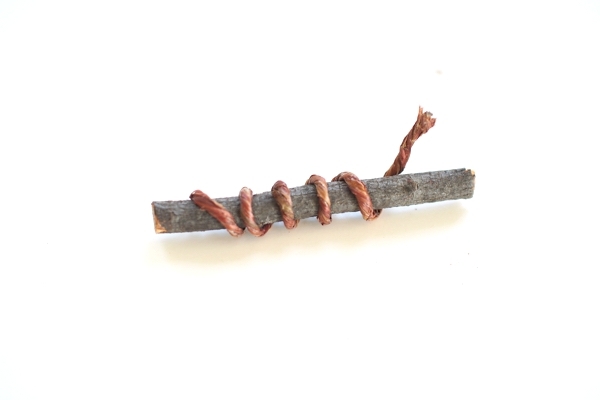
To make twirly spirals of pumpkin vine, wind brown wire around a stick. Pull the brown wire off the stick carefully so that the curls remain in the wire. Pull gently on each end of the wire to elongate the twirls a little.
Step 10:
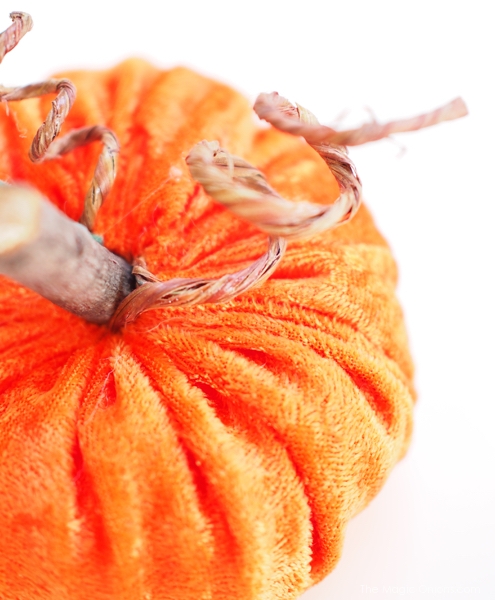
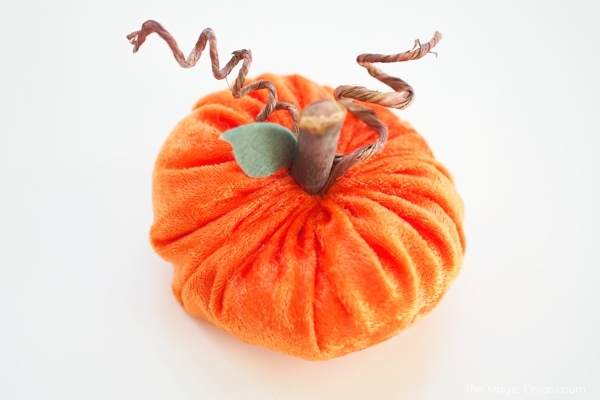
Insert the twirly vines into the mouth of the pumpkin.
Step 11:
Use a glue gun to stick a green felt leaf onto the stalk of your pumpkin. Each pumpkin should take you about 10 minutes to make so there’s plenty of time for you to make a whole barrow full!
And that’s it!
Here’s a quick cheat-sheet if you want to Pin this project for later or share it with your friends. If you enjoyed this cute velvet pumpkin autumn decoration, you may love our Fall and Halloween Ornaments collection!
Tell us how you enjoyed this Do-it-Yourself Tutorial for making a velvet pumpkin autumn decoration!
I would love to hear how useful you found our DIY blog. Would you like to see us post more neat content like this? How did you like this cute velvet pumpkin autumn decoration? Please take a moment to share this on your favorite social media site, like Facebook or Twitter. Do you have an ornament project you would like to share with me? Please send me an email with your comments, ideas, or DIY craft project to Dianne@OrnamentShop.com
This tutorial was designed and written by my friend Donni Webber from The Magic Onions Blog – www.theMagicOnions.com. Donni lives with her family in sunny Southern California. She is the mom of two sunbursts of joy, Kitty and Teddy and is also a wife, blogger, crafter, knitter, gardener, explorer and traveler.
