Showcase An Origami Swan Inside A Serene Environment
Posted June 1, 2016 in DIY (Crafts) by Dianne Weller
An Origami Swan can easily be made using the centuries old Japanese technique of artistically folding paper into sculpture, without using glue, tape or other reinforcements. The goal of origami is to take flat squares of paper and fold it into shapes that resemble animals, plants or objects. The more folds you make, the more intricate your design.
Here we demonstrate easy instructions on how to make an origami swan in 7 stages. It only requires a total of 9 folds or creases. Then, with only a few additional steps, we will demonstrate a beautiful way to preserve your origami swan in a glass ball ornament to be used as a decoration.
Anyone Can Make An Origami Swan Ornament
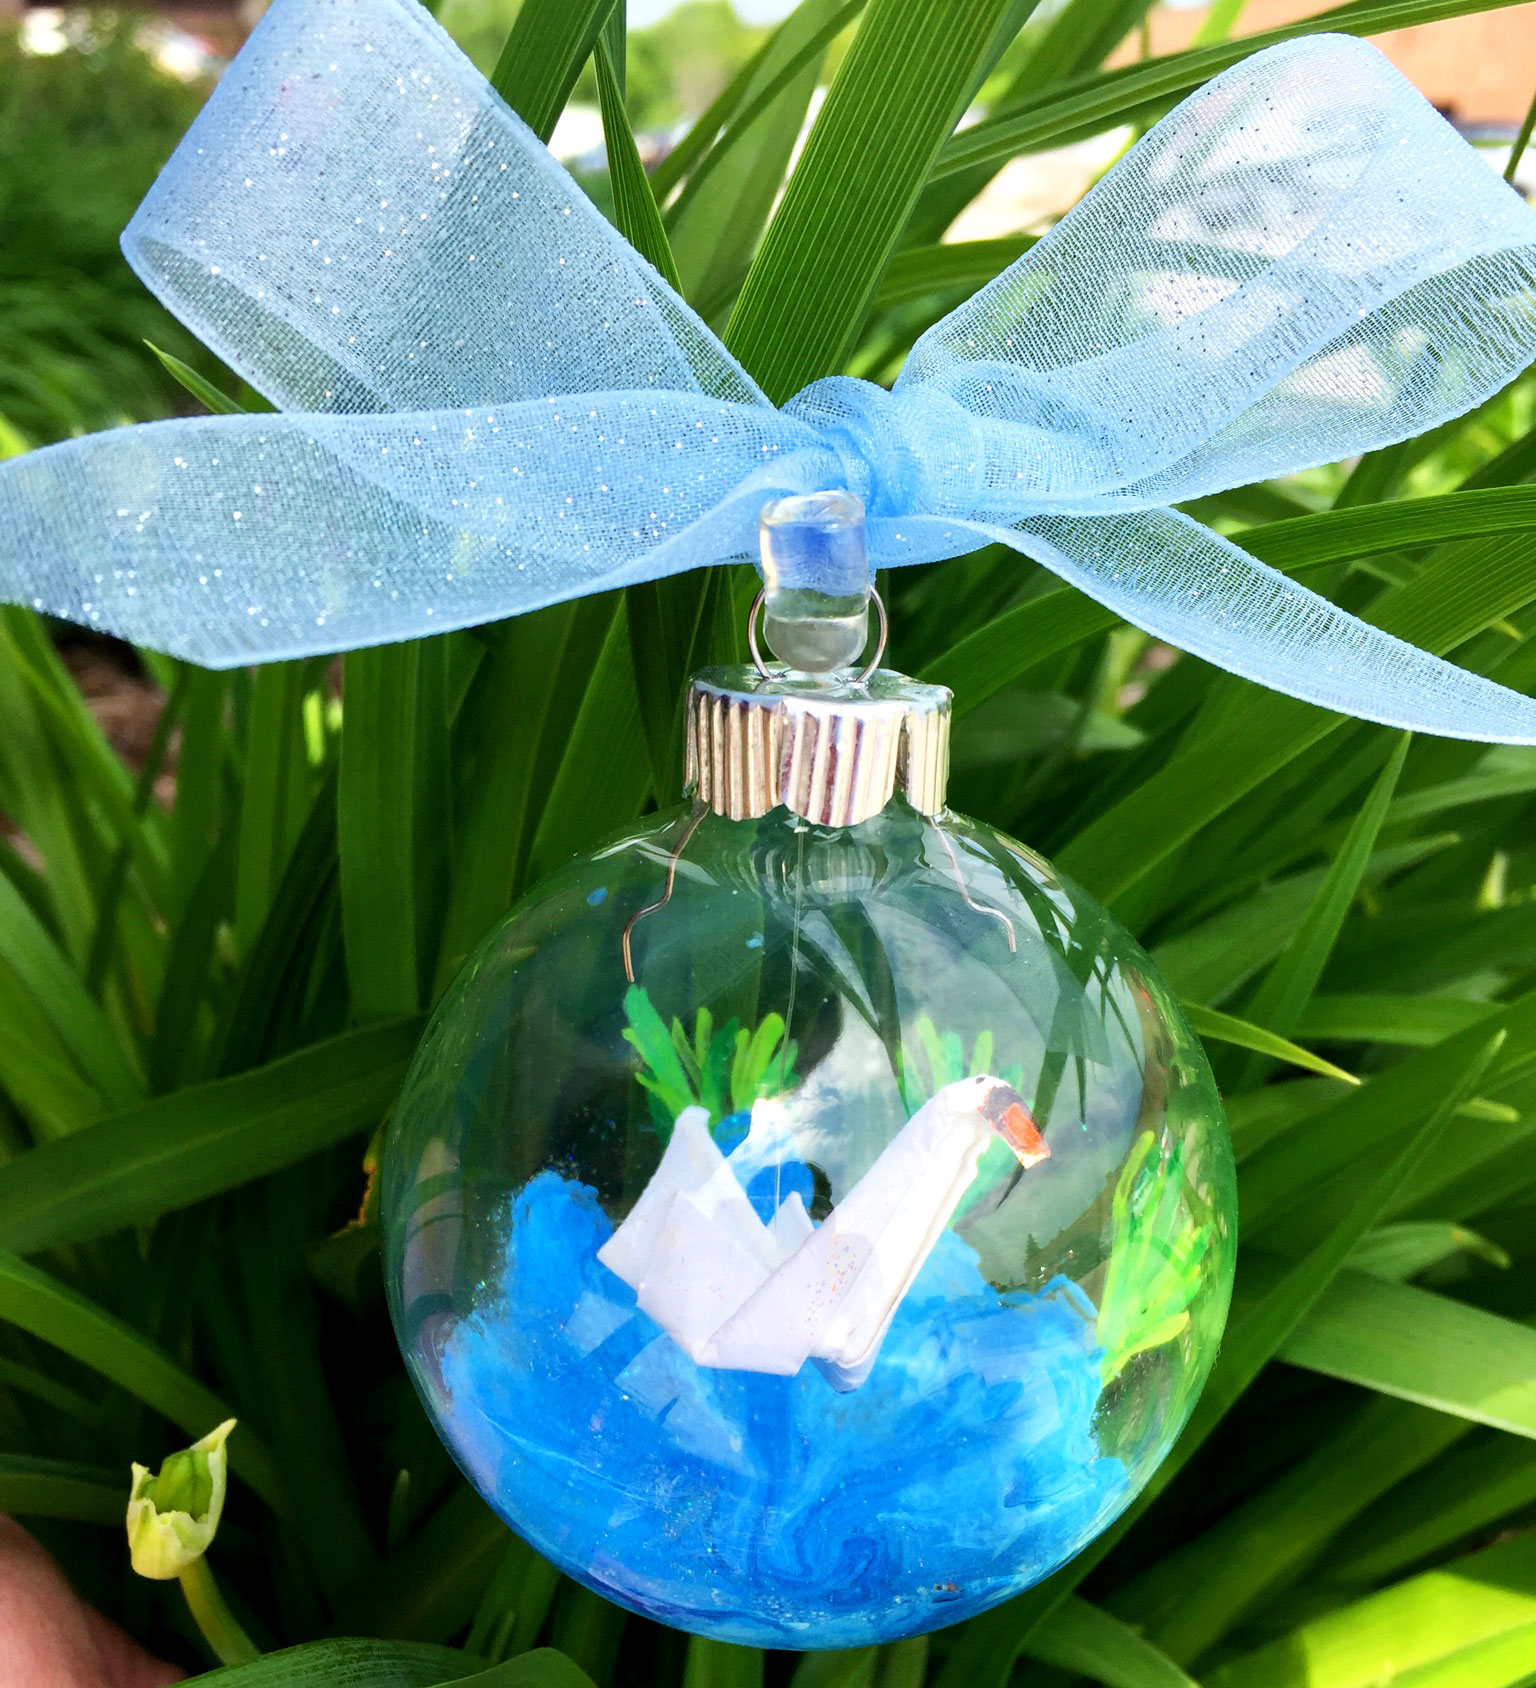
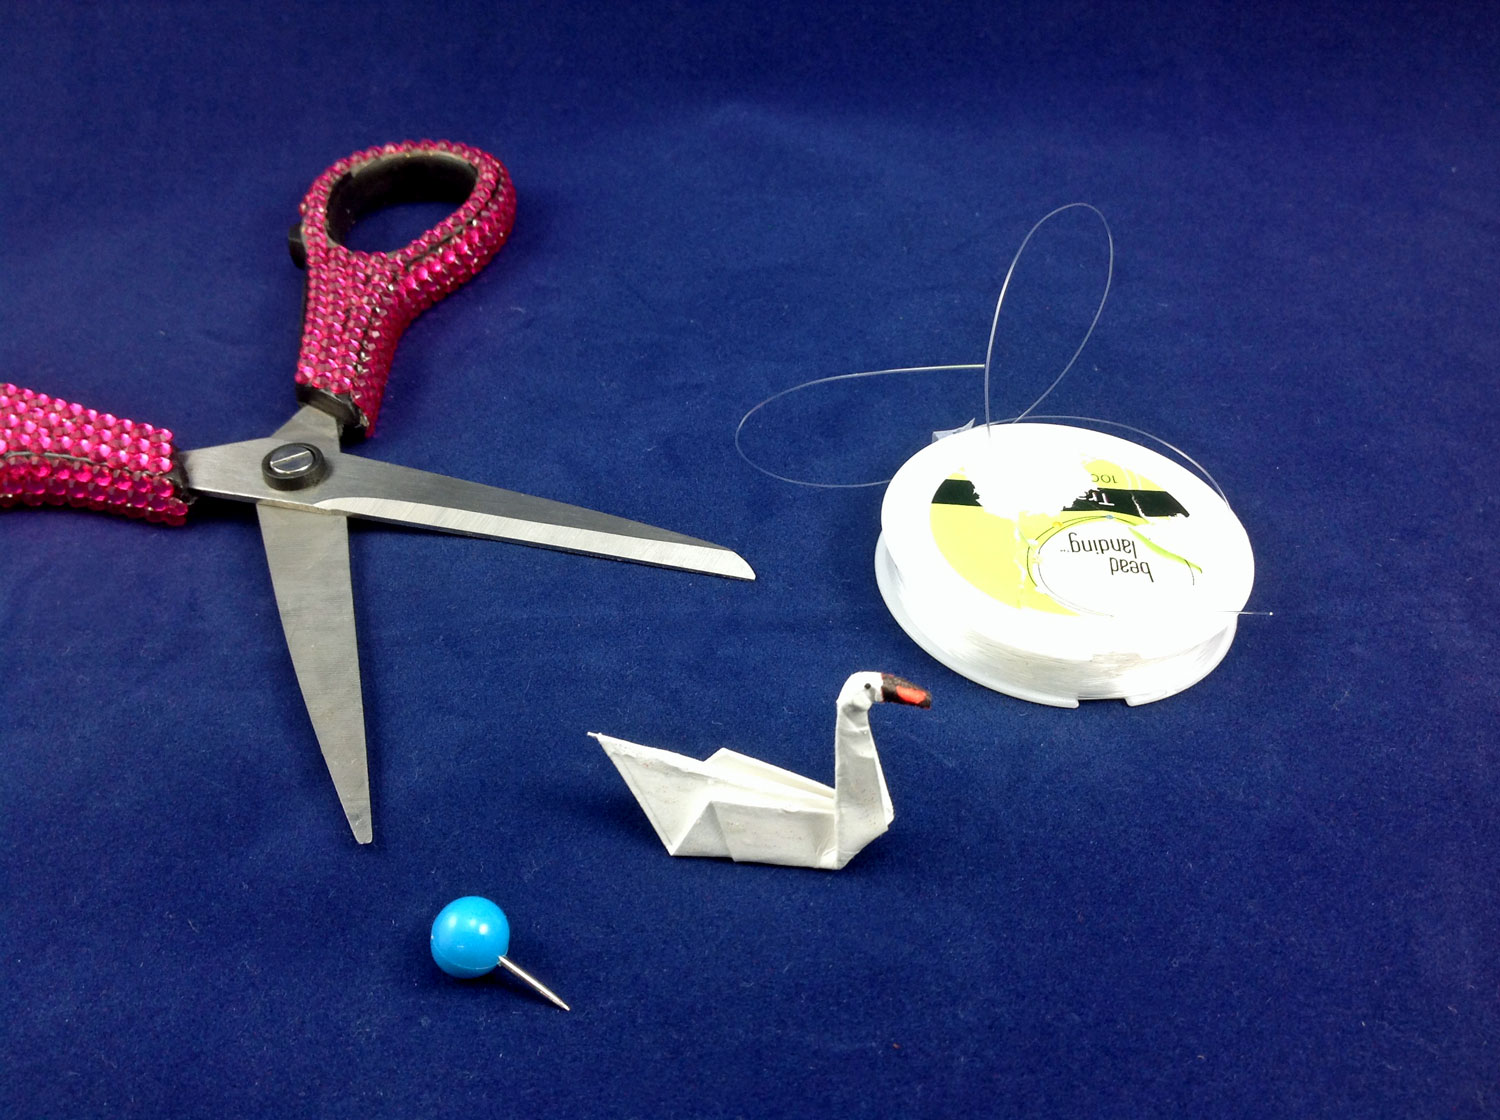
If you can fold a piece of paper, you can make an origami swan. It’s very easy! We used a 2 5/8” clear glass ball and pearl white scrapbook paper that had a sheen to it. If you use a 3 ¼” glass ball, you should use a 3” square of white paper to make your origami swan.
Supplies for Origami Swan Ornament:
- Clear glass ball ornament
- Glitter paint
- Blue paint
- Green paint
- 2” Square white paper
- Clear plastic string
- Ribbon

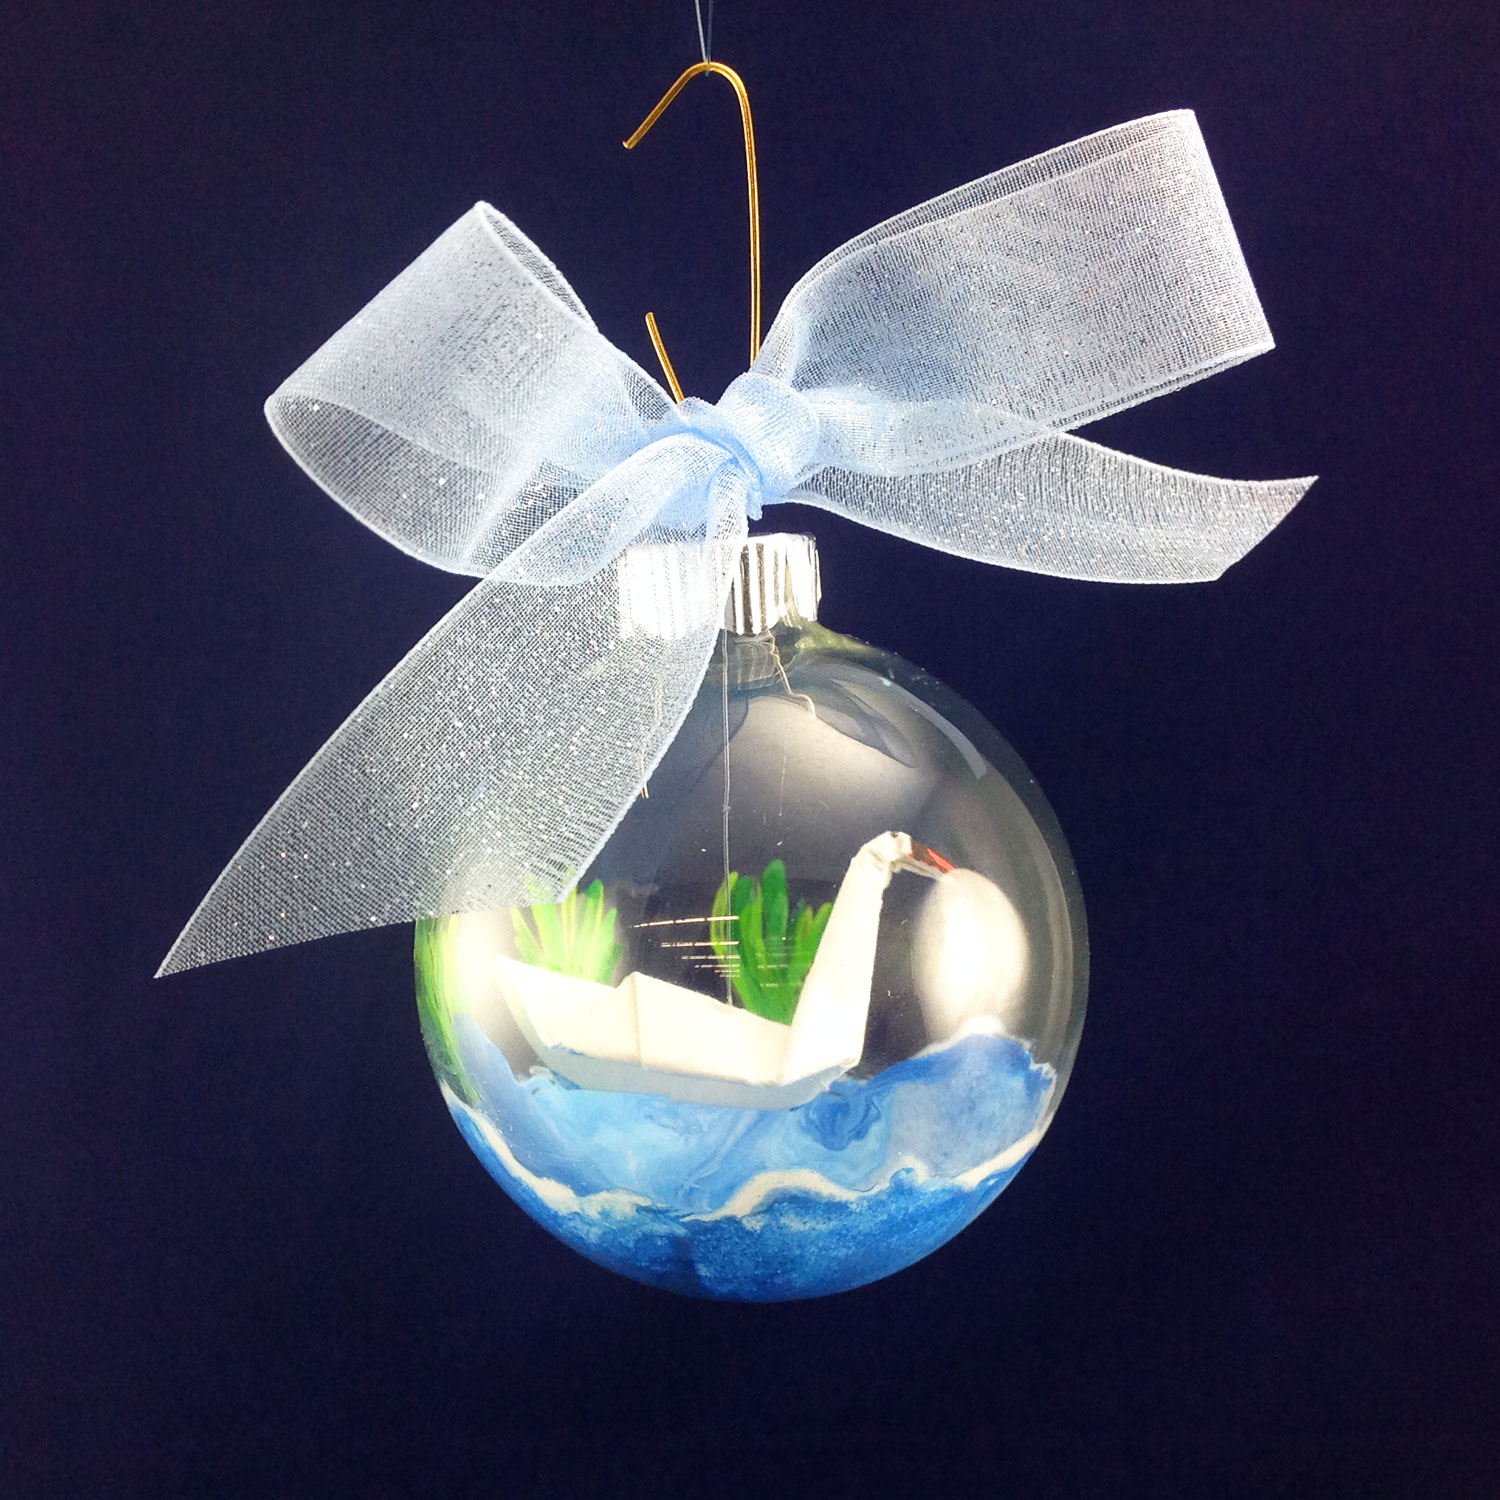
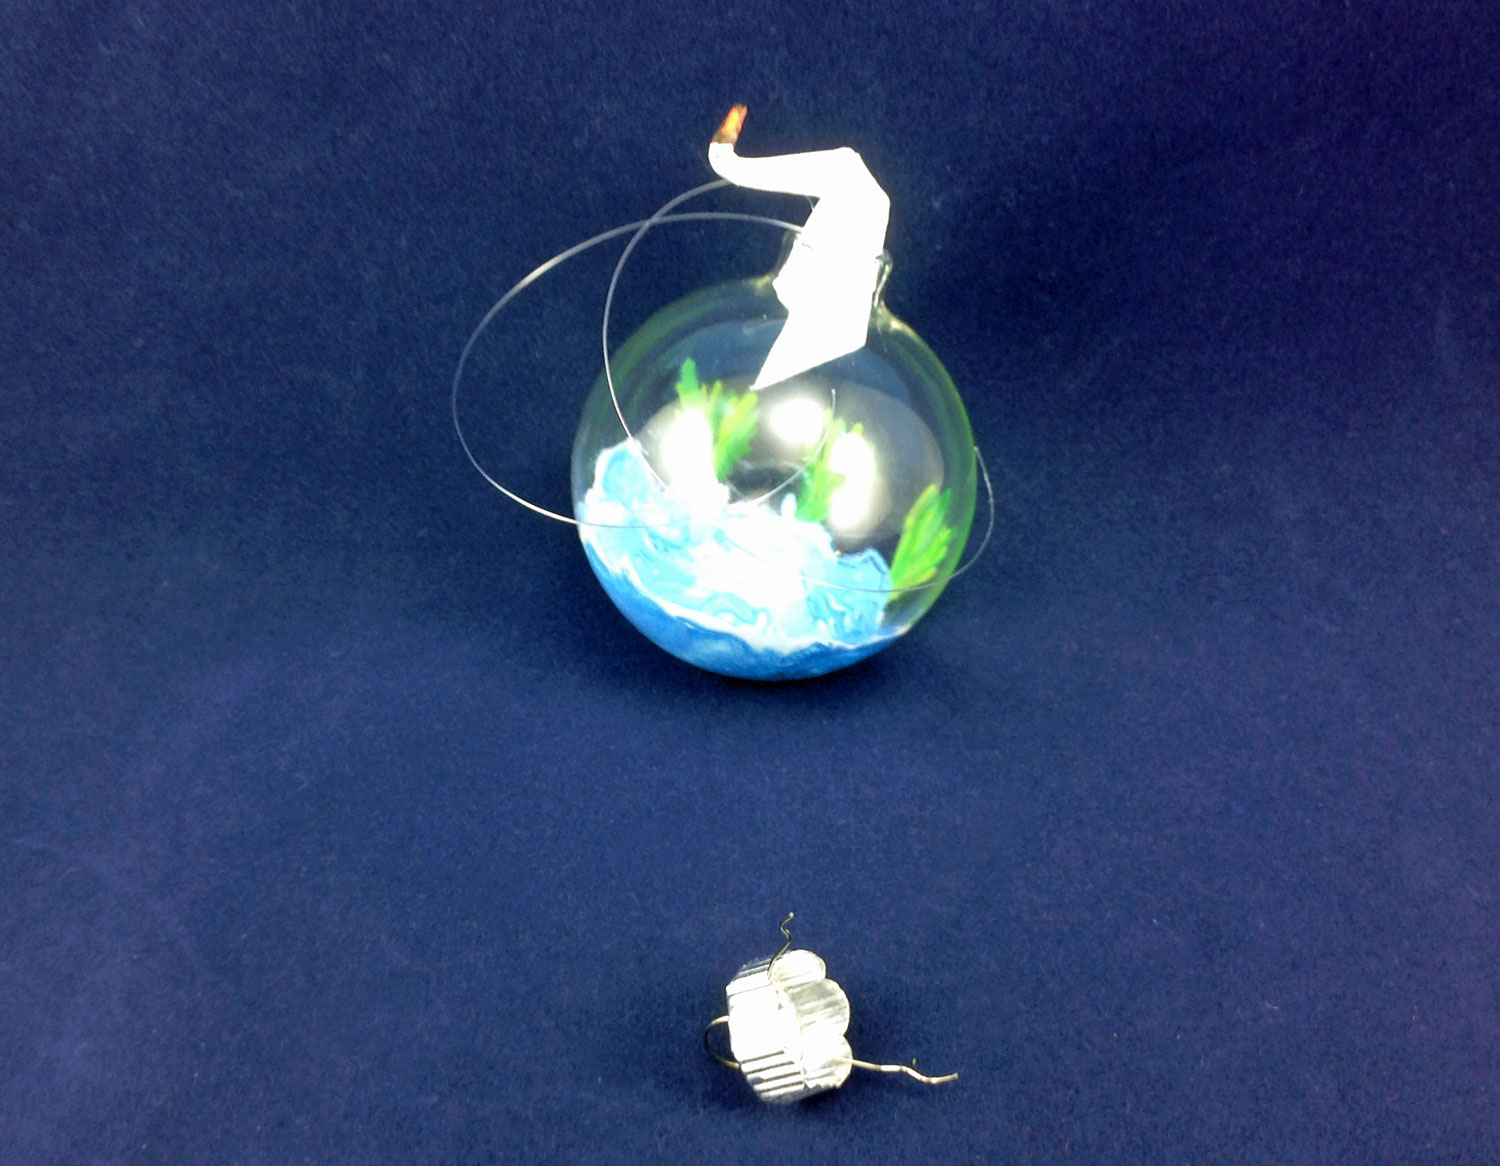
Step 1: Carefully remove the cap from the clear glass ball and paint swirly glitter waves on the inside.
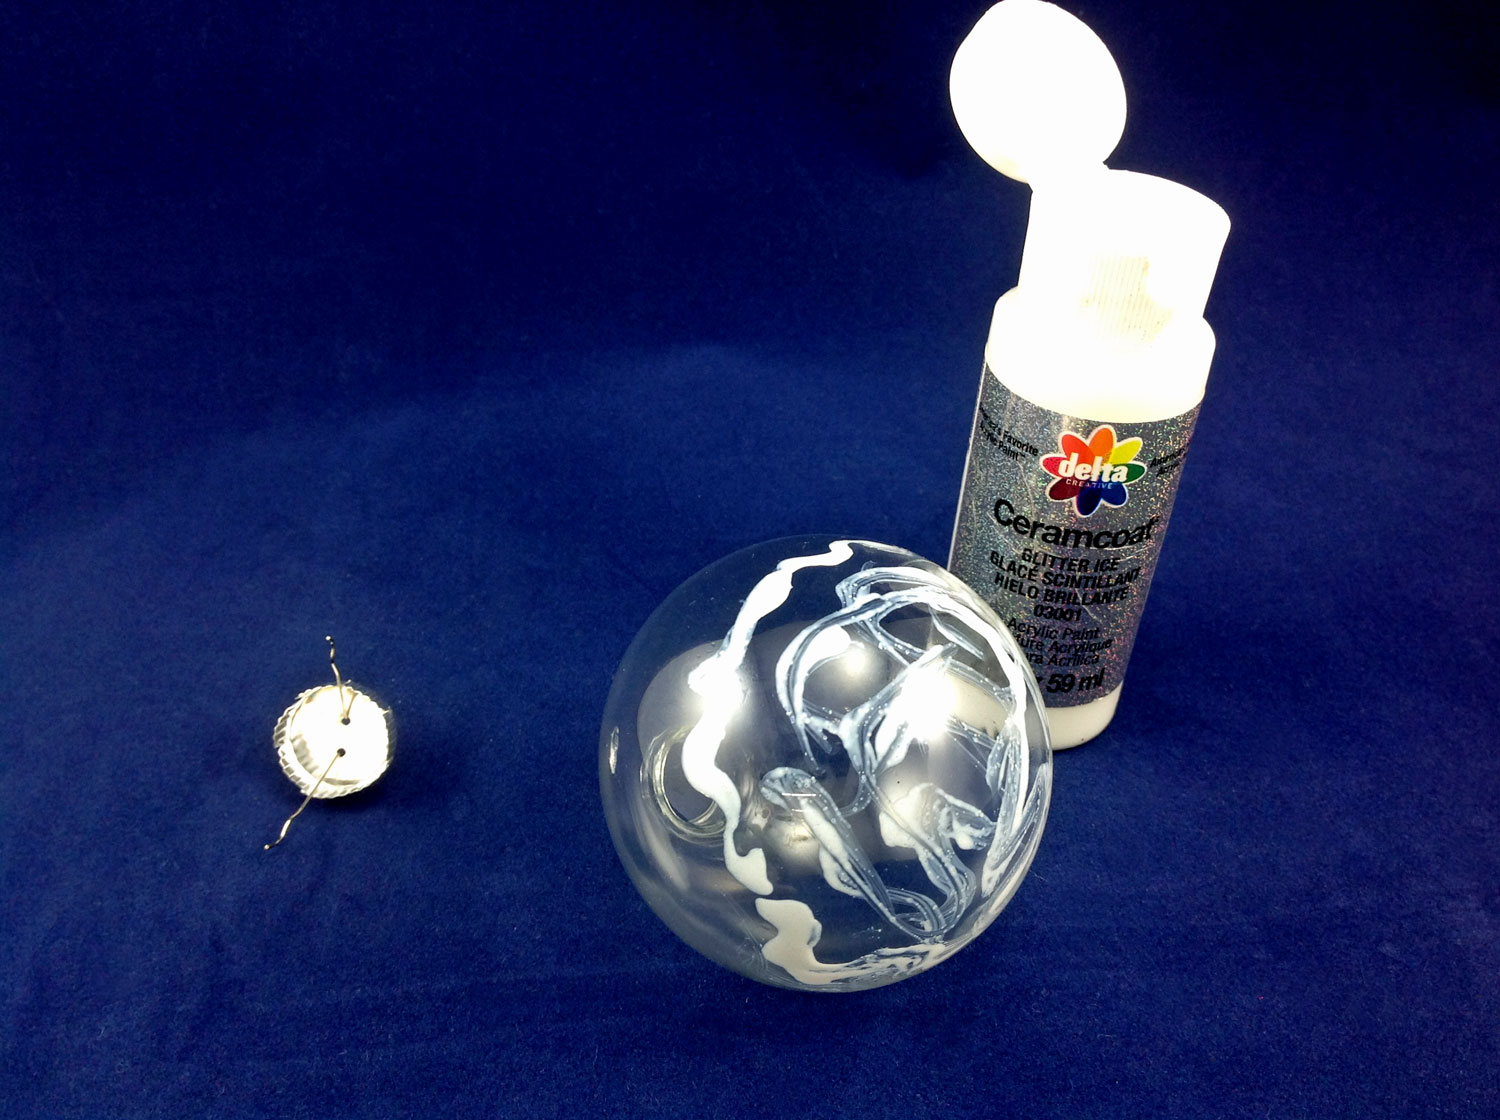
Step 2: Then VERY CAREFULLY, pour a little bit of the blue paint directly into the center of the clear glass ball and gently swirl the paint around to coat the bottom. It is OK if your blue paint is slightly uneven as it will represent water. Make sure not to let the paint run down the sides of the glass ball.
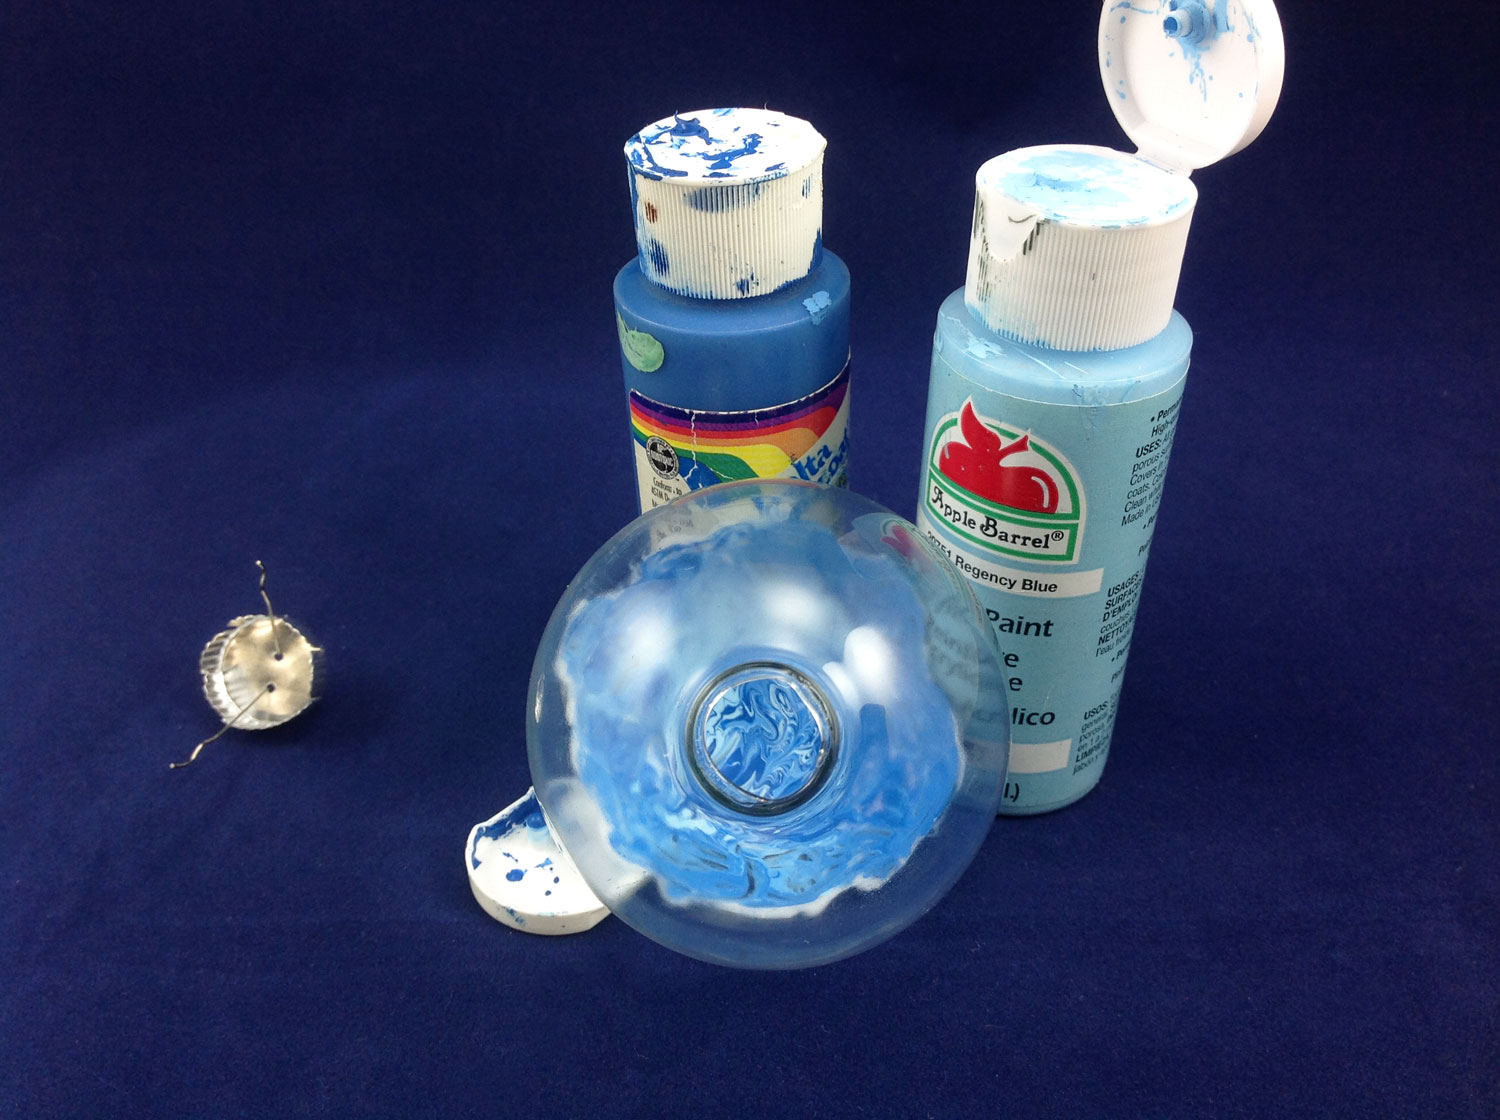
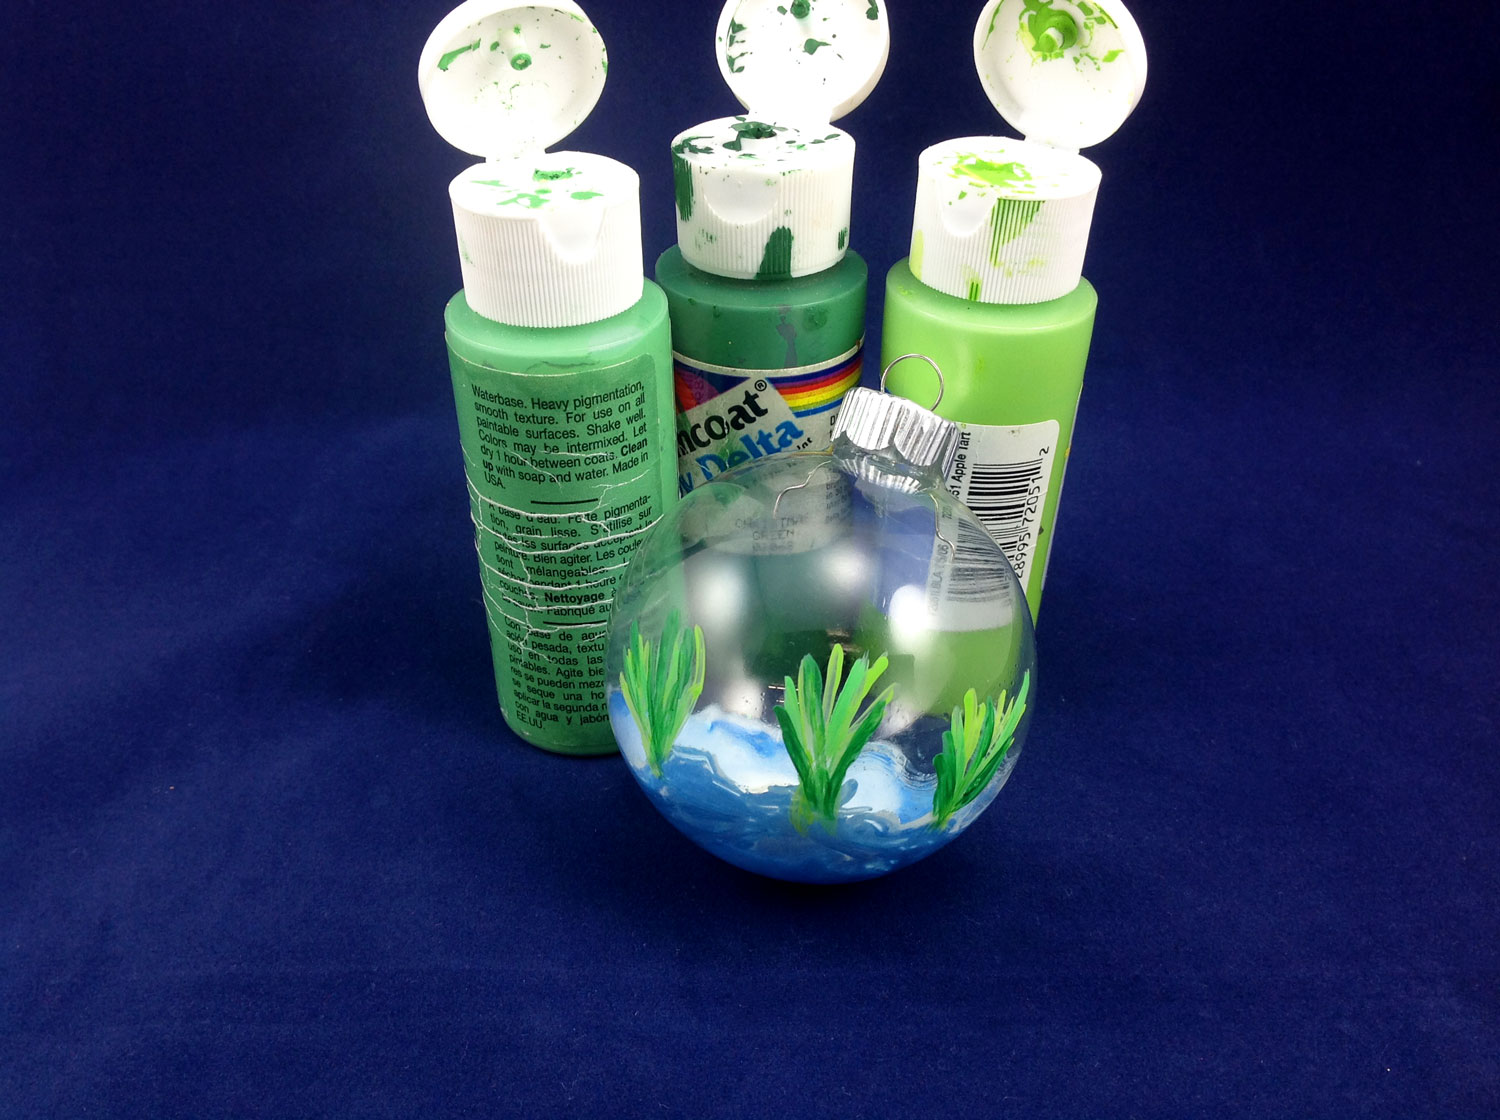
Step 3: Using the green paint, on the back outside of the glass ball, paint grass or reeds sticking out of the water. Stand your glass ball upright to dry or replace the cap and hang it. It is important that you do not allow your glass ball to tilt or else the paint might drip into an area you don’t want it in.
Step 4: While the paint on your glass ball is drying, you can make your origami swan.
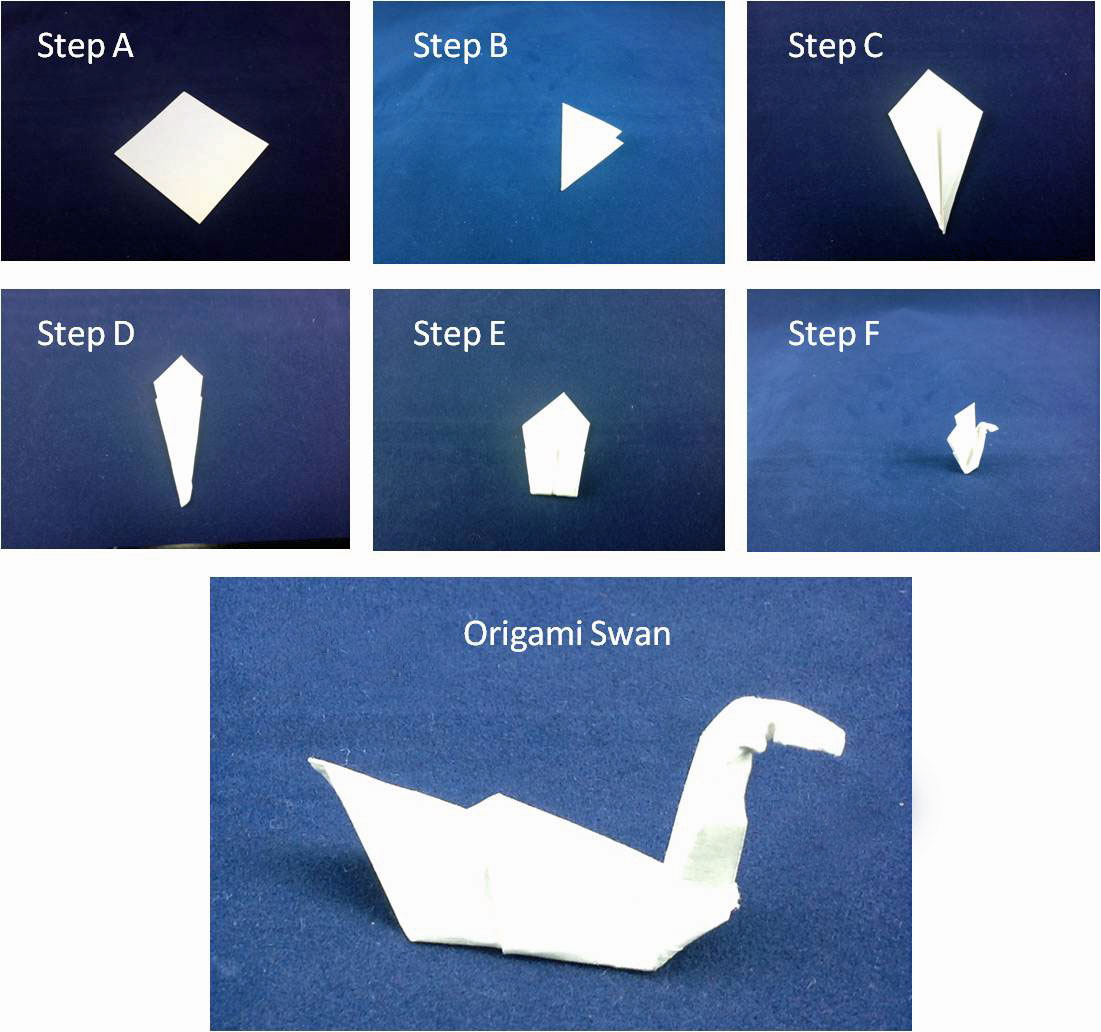
A: Hold the paper with the point at the top.
B: Fold in half.
C: Open up and fold the two sides in so that you have a kite shape.
D: Flip the paper over so that the first seam fold is on top and fold in the two kite sides.
E: Fold bottom point up to the top point. Bend skinny point down to form the beak.
F: Fold in half vertically. Then gently pull swan neck away from vertical fold.
Step 5: If you want to add color to your swan, paint the beak and eyes or define the wings with glitter.
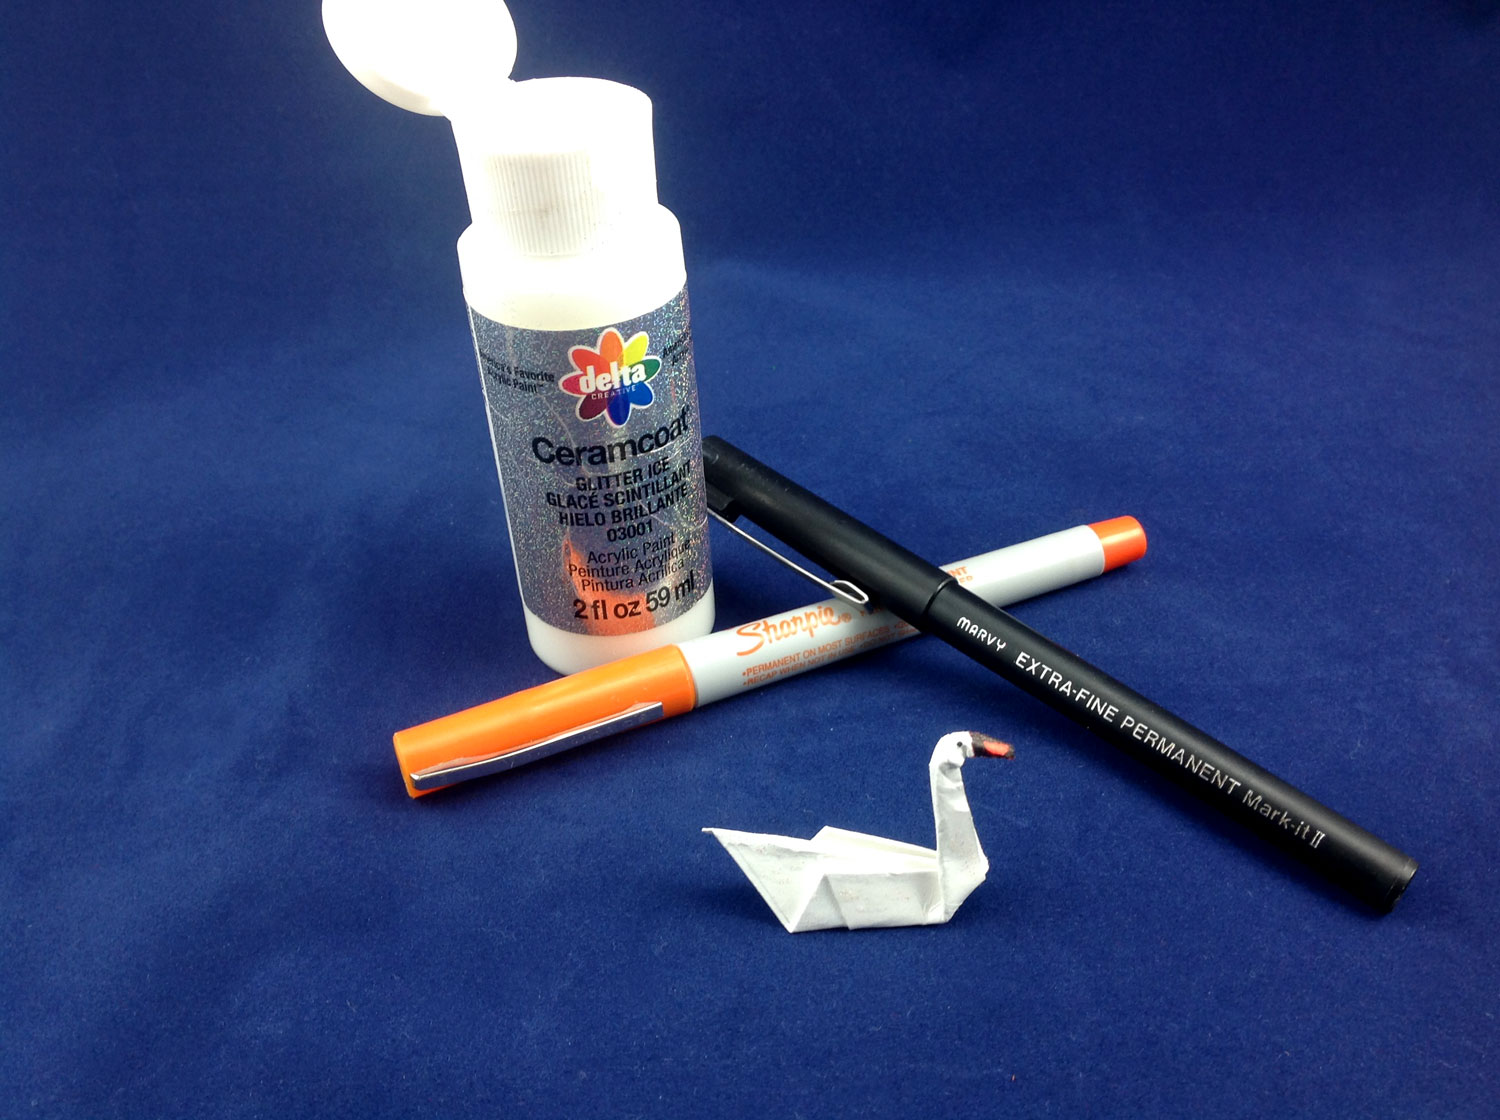
Step 6: Using a paper clip or pin, make a tiny hole in your swan and secure a clear plastic string through the top.
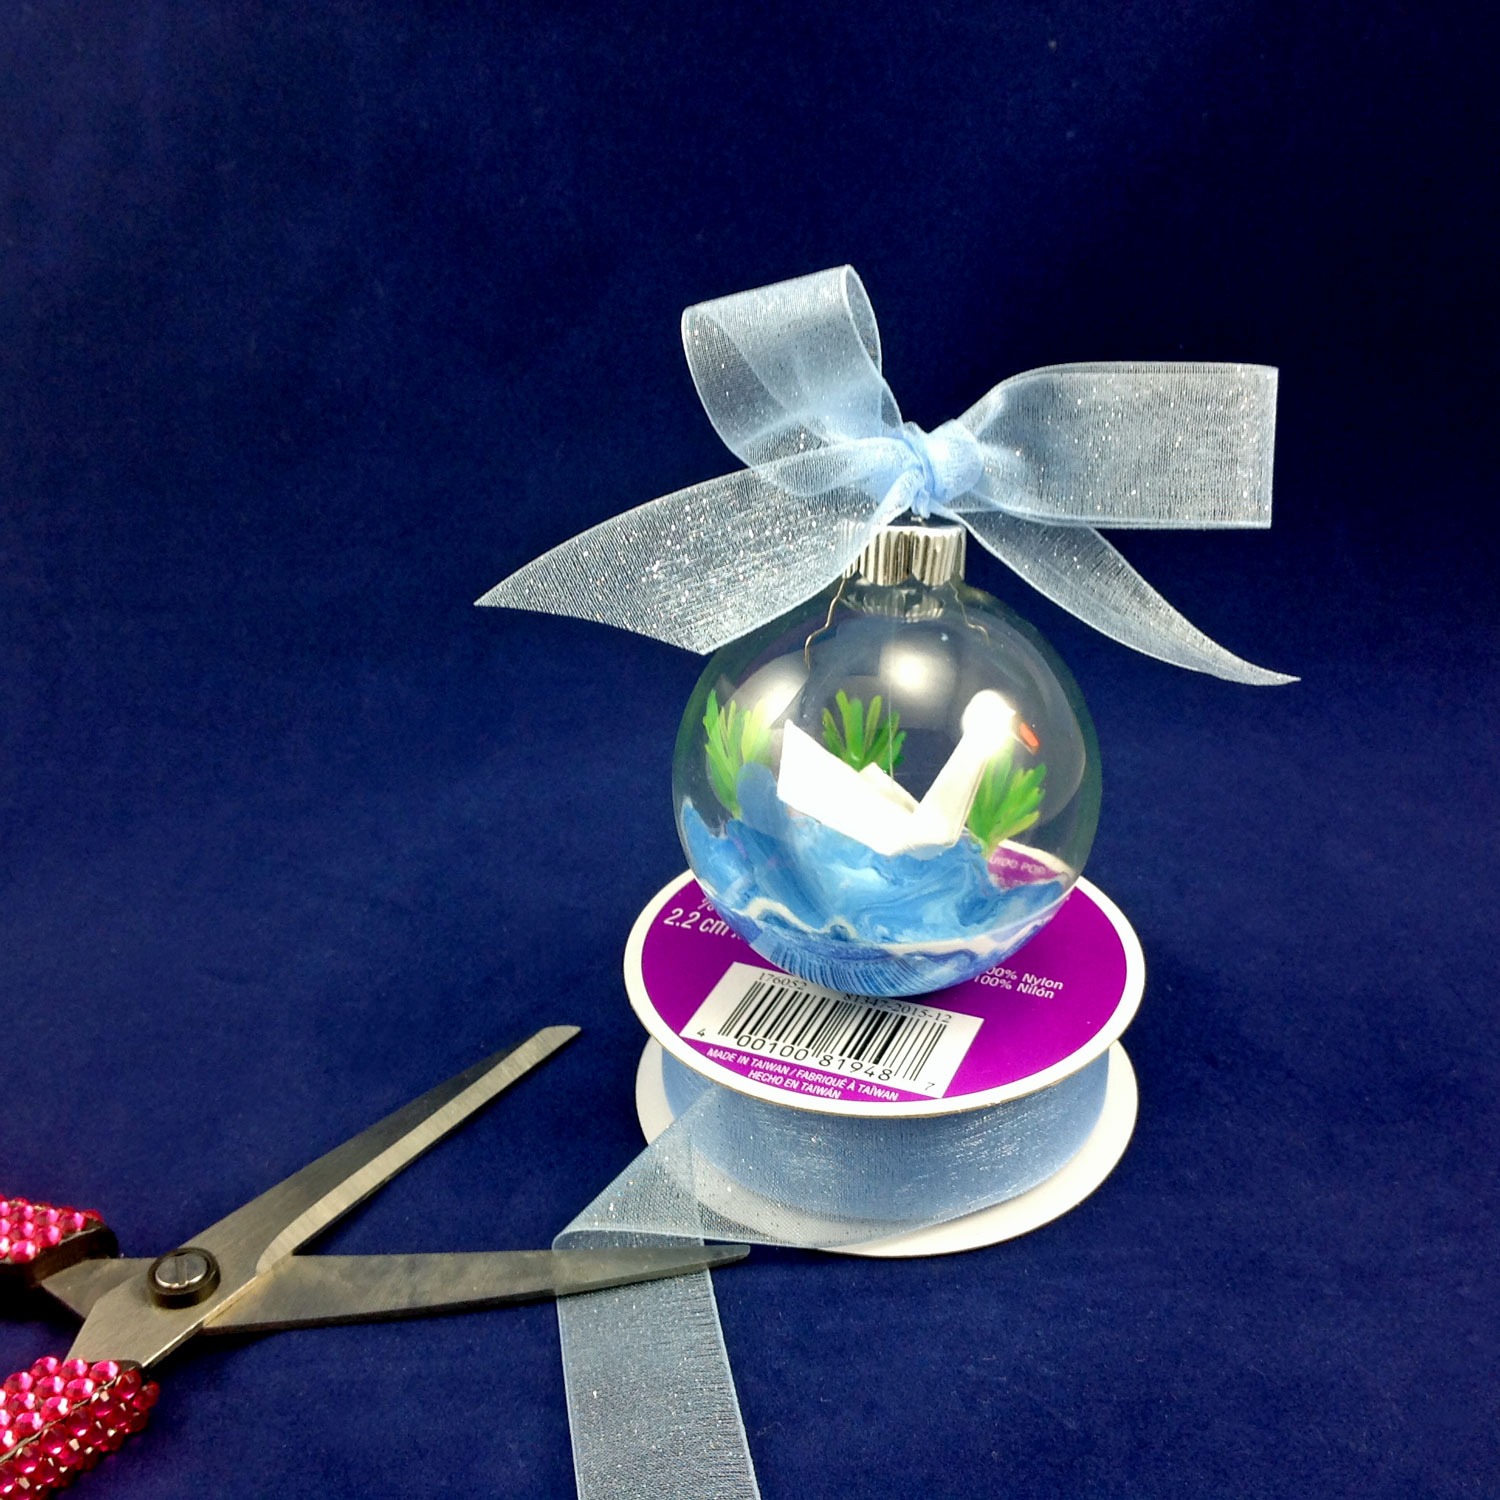
Step 7: Once you are sure that your paint is completely dry, gently press the swan through the hole of the clear glass ball ornament and knot the ends of the string through the cap so that the swan appears swimming on the lake.
That’s it! Now you have a beautiful origami swan swimming on a lake. Tie a ribbon to the top to complete your origami ornament! A clear glass ball ornament captures an origami swan or any other origami animal in an environment to enhance the beauty of your artistic folding. Paint a jungle scene for an origami monkey, an African grass plain for an origami elephant or even a marshy swamp for an origami alligator. Fun for the whole family, when everyone picks a different origami animal and designs their very own habitat in a glass ball ornament!
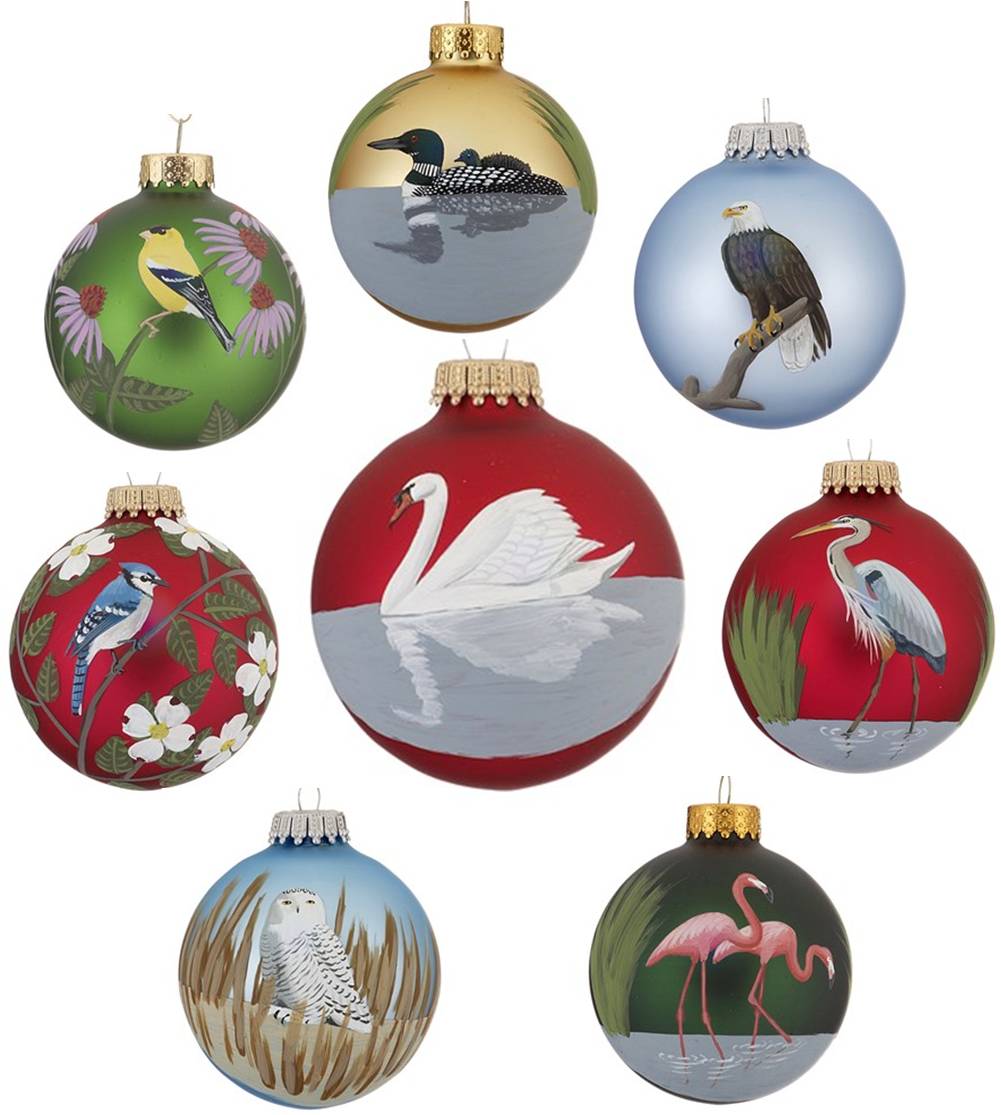
If you don’t think paper folding is for you, then check out our beautiful, personalized hand-painted bird ornaments, done by an artist with a keen eye for details. They are sure to come alive on your tree!